88 . Spectrum 100 Series User’s Guide
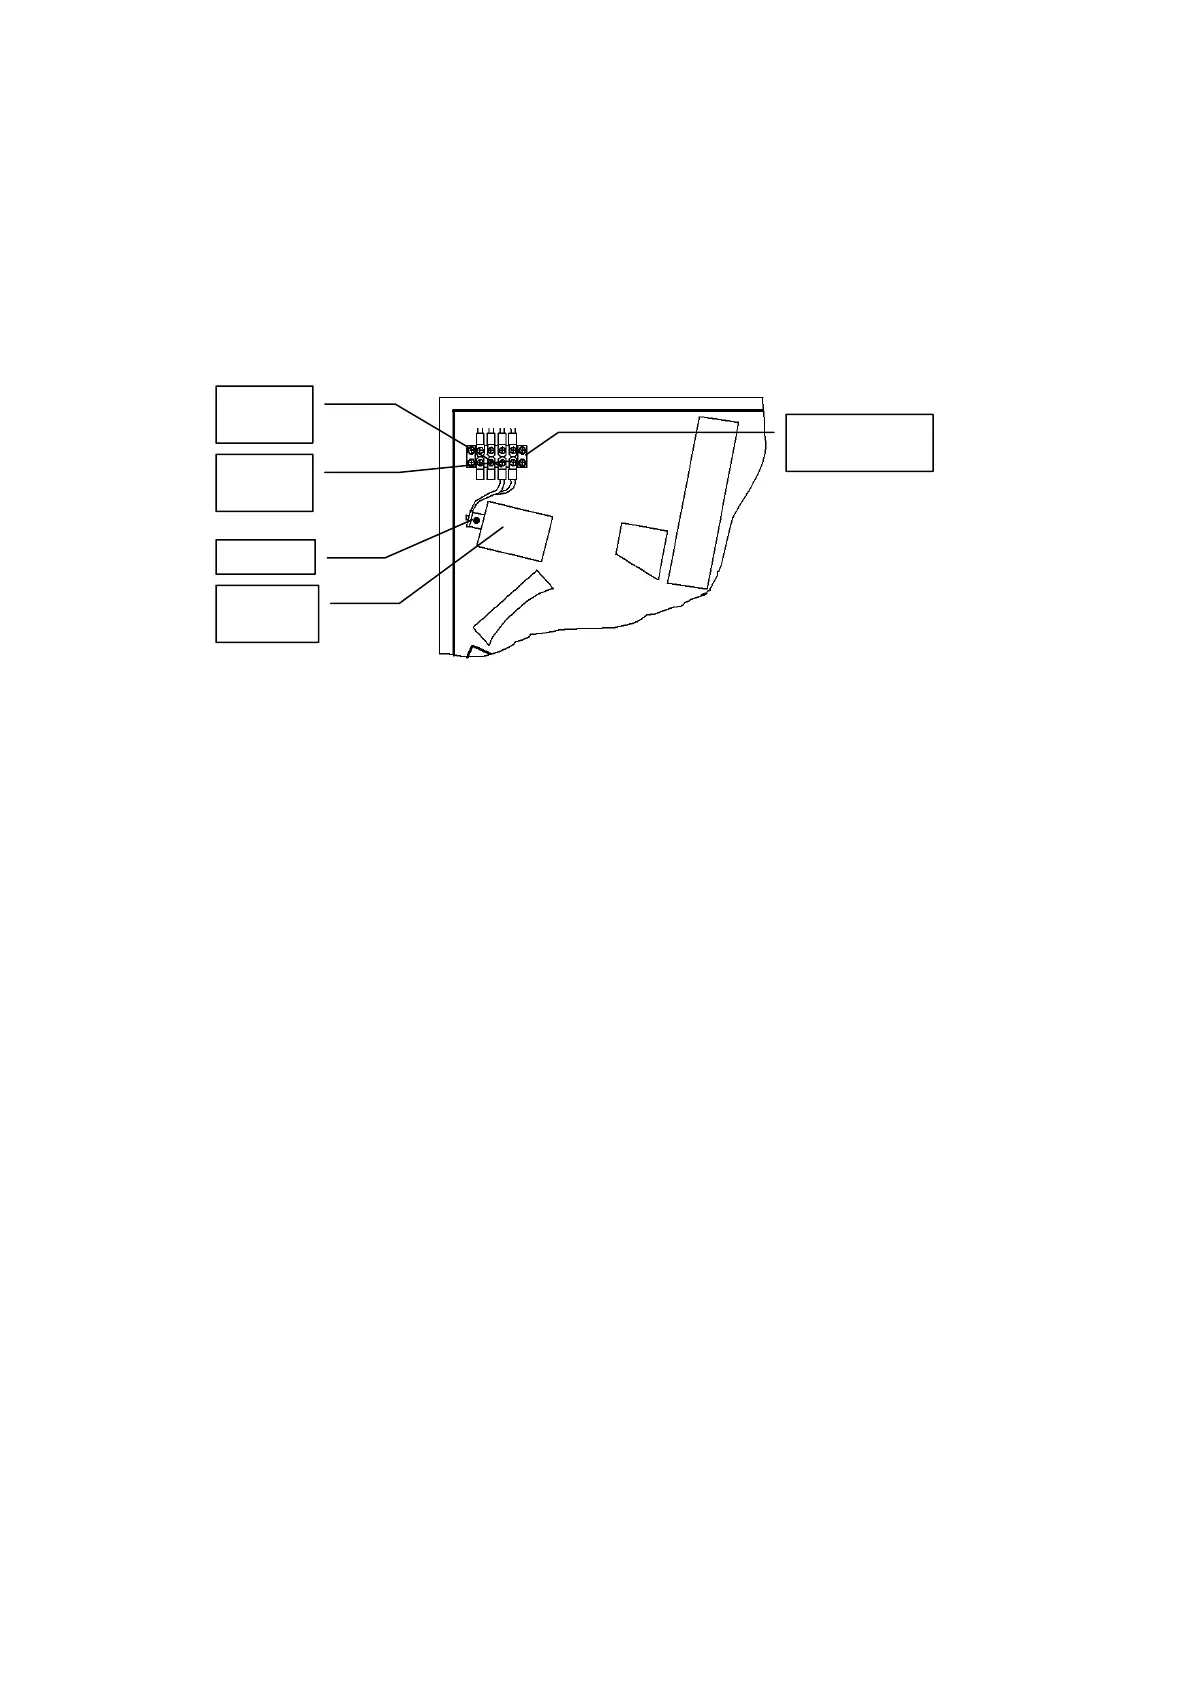
2. Slacken the two terminal screws (Figure 35) securing the wires leading to the
source. Disconnect the wires from the connectors.
3. By grasping the round metal source body NOT the wires, remove the source from its
housing by pulling, noting its installed position.
4. Install the new source in its housing, by pushing in until it clicks into place.
5. Reconnect the two wires to the terminals and secure by tightening the two terminal
screws.
Figure 35 Terminal screws
6. Close and secure the Main Cover (steps 10 to 15 on page 86).
7. Plug in and switch on the instrument.
8. Allow the source temperature to stabilize for approximately 2 hours before using the
instrument.
Source
Source
housing
Terminal
screw
Terminal
screw
Top of
connector block

 Loading...