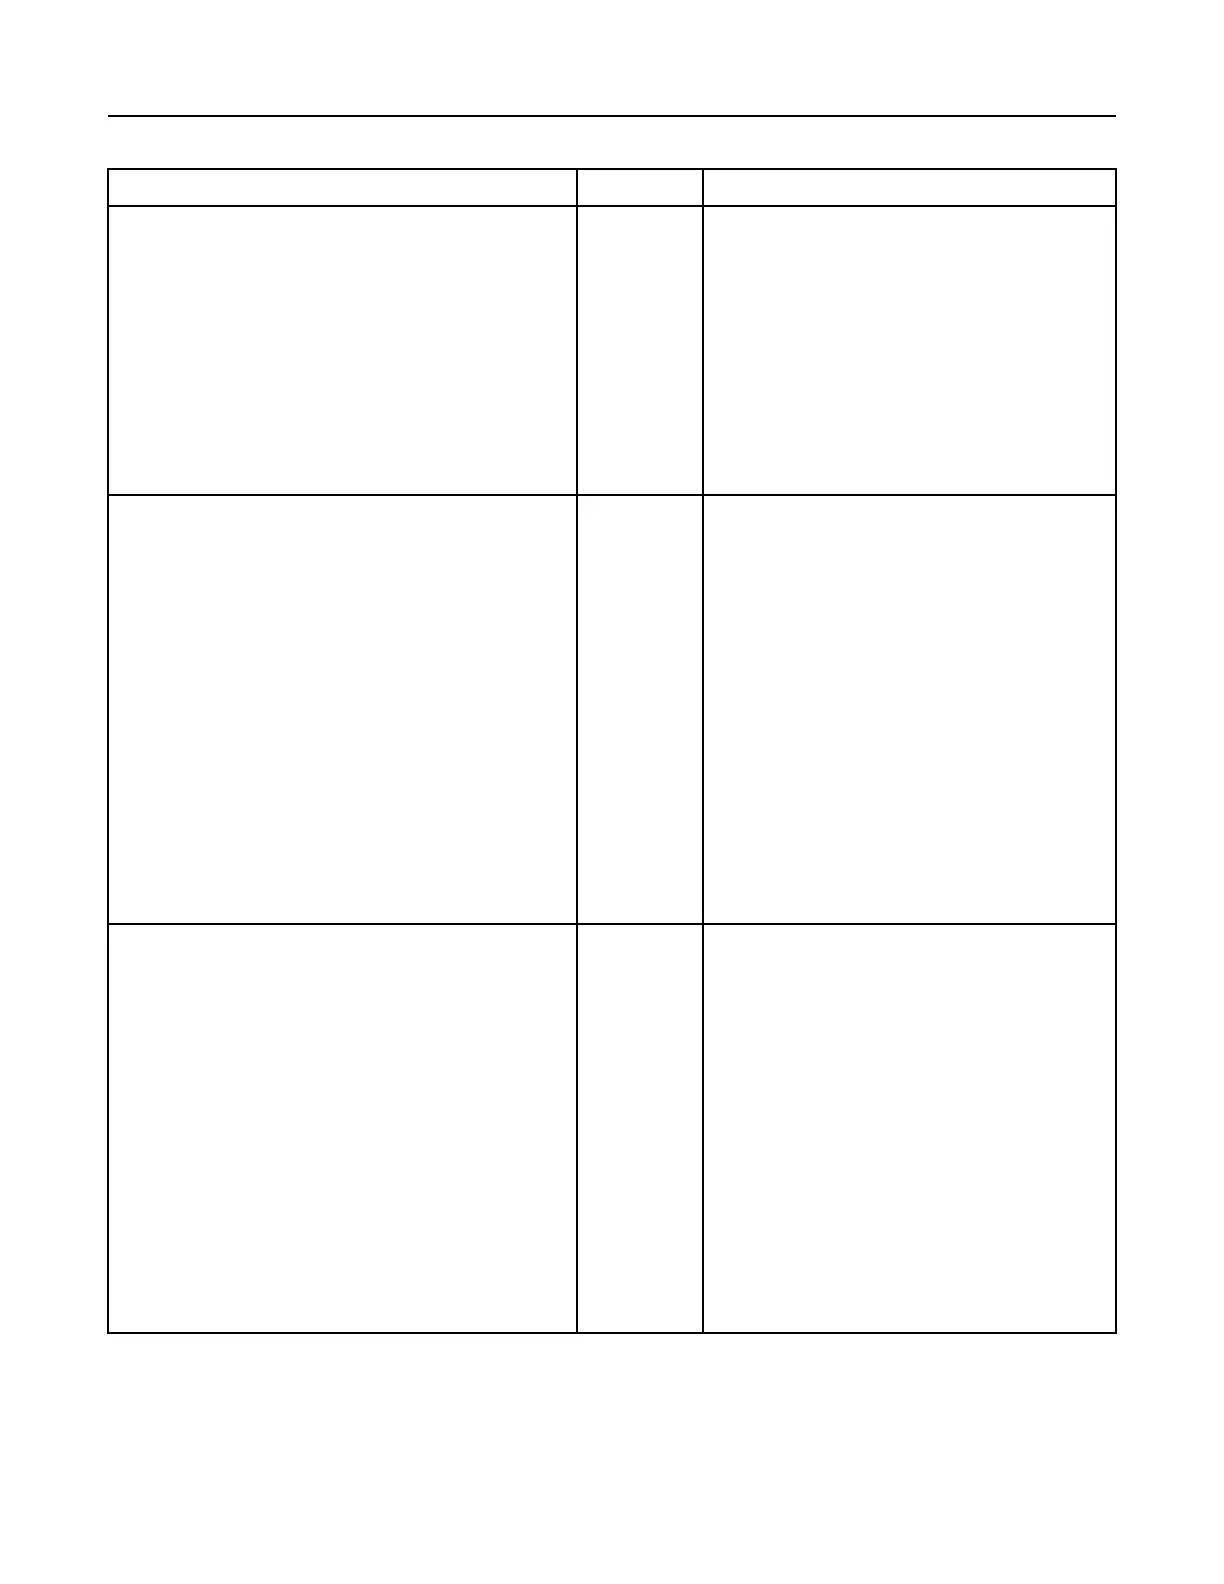
Table 210
Troubleshooting Test Steps
Values Results
1. Check the Connectors
A. Thoroughly inspect the connectors that are associated with the
data link circuits. Verify that the connectors are free of debris, free
of corrosion, and securely connected.
B. Perform a 45 N (10 lb) pull test on all the wires associated with
the data link circuits.
Connectors Result: The connectors were connected correctly and did
not have corrosion or moisture.
Proceed to Test Step 2.
Result: The connectors were not connected correctly or
the connectors have corrosion or moisture.
Repair: Repair the connectors and/or the wiring. Replace
parts, if necessary. The DCU connector is not
serviceable.
Proceed to Test Step 8.
2. Check for Active or Recently Logged Diagnostic Codes
A.Establish communication between the electronic service tool
and the engine Electronic Control Module (ECM). Refer to Trou-
bleshooting, “Electronic Service Tools”
B. Look for active or logged codes.
Diagnostic Trou-
ble Codes
Result: There is an active or recently logged 3216-11
(3002–11) or 3226-11(3609–11) diagnostic code.
Proceed to Test Step 3.
Result: There is an active or recently logged 3216-12
(3002–12) diagnostic code.
Proceed to Test Step 4.
Result: There is an active or recently logged 3226-12
(3609–12) diagnostic code.
Proceed to Test Step 5.
Result: There is an active or recently logged 4377-12
(3138–12) diagnostic code.
Proceed to Test Step 6.
3. Inspect the NOx Sensor
A. Remove the suspect NOx sensor. Refer to Disassembly and
Assembly for the correct procedure.
B. Inspect the NOx sensor for visible damage.
NOx sensor OK Result: The NOx sensor is damaged.
Repair: Ensure that the latest engine software is installed.
Refer to Troubleshooting, ECM Software - Install for the
correct procedure.
Install a replacement NOx sensor. Refer to Disassembly
and Assembly for the correct procedure.
Proceed to Test Step 8.
Result: The NOx sensor is not damaged.
Repair: Clean the NOx sensor using only a soft brush.
Note: Do not use abrasive materials or fluids to clean the
NOx sensor.
Reinstall the NOx sensor. Refer to Disassembly and As-
sembly for the correct procedure.
Proceed to Test Step 8.
(continued)
380 UENR4469-36
Circuit Tests
Copyright of Perkins Engine Company Limited. NOT FOR REPRINTING OR RESALE