Mounting and removing modules
109745_en_01 PHOENIX CONTACT 25 / 66
4.3 Mounting the modules
Please refer to Section “Safety notes for mounting and removal” on page 23
No tools are required to mount the CAPAROC system.
• First, mount the end bracket on the DIN rail.
Mounting the current rail • Then install the current rail on the DIN rail.
• Use an appropriately sized current rail for the application.
• If one current rail is not enough, you can extend it with an additional current rail.
• To connect them, insert the next current rail in the connection of the preceding one.
Current rails are available with different overall widths. Select the appropriate length
for your application from the overview in Section “CAPAROC current rails” on
page 12.
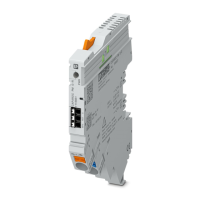
Snapping on the modules Place the power module and circuit breaker modules onto the current rail and DIN rail verti-
cally until they snap into place. Make sure that the device plugs for the current rail are posi-
tioned above the corresponding opening on the current rail. Use the guide slots on the hous-
ing sides to connect the modules together.
Figure 4-2 Snapping on the modules
 Loading...