13.2 Menu selection
When the control software is running, the touch screen on the milling unit
displays a menu selection where you can select and switch menus. There
are three menu items:
Jobs
,
Tools
and
Settings
. To select a menu item,
press on the corresponding button.
Usually only the menu icon is displayed without the menu name. To display
the menu name, press the top icon with three horizontal lines.
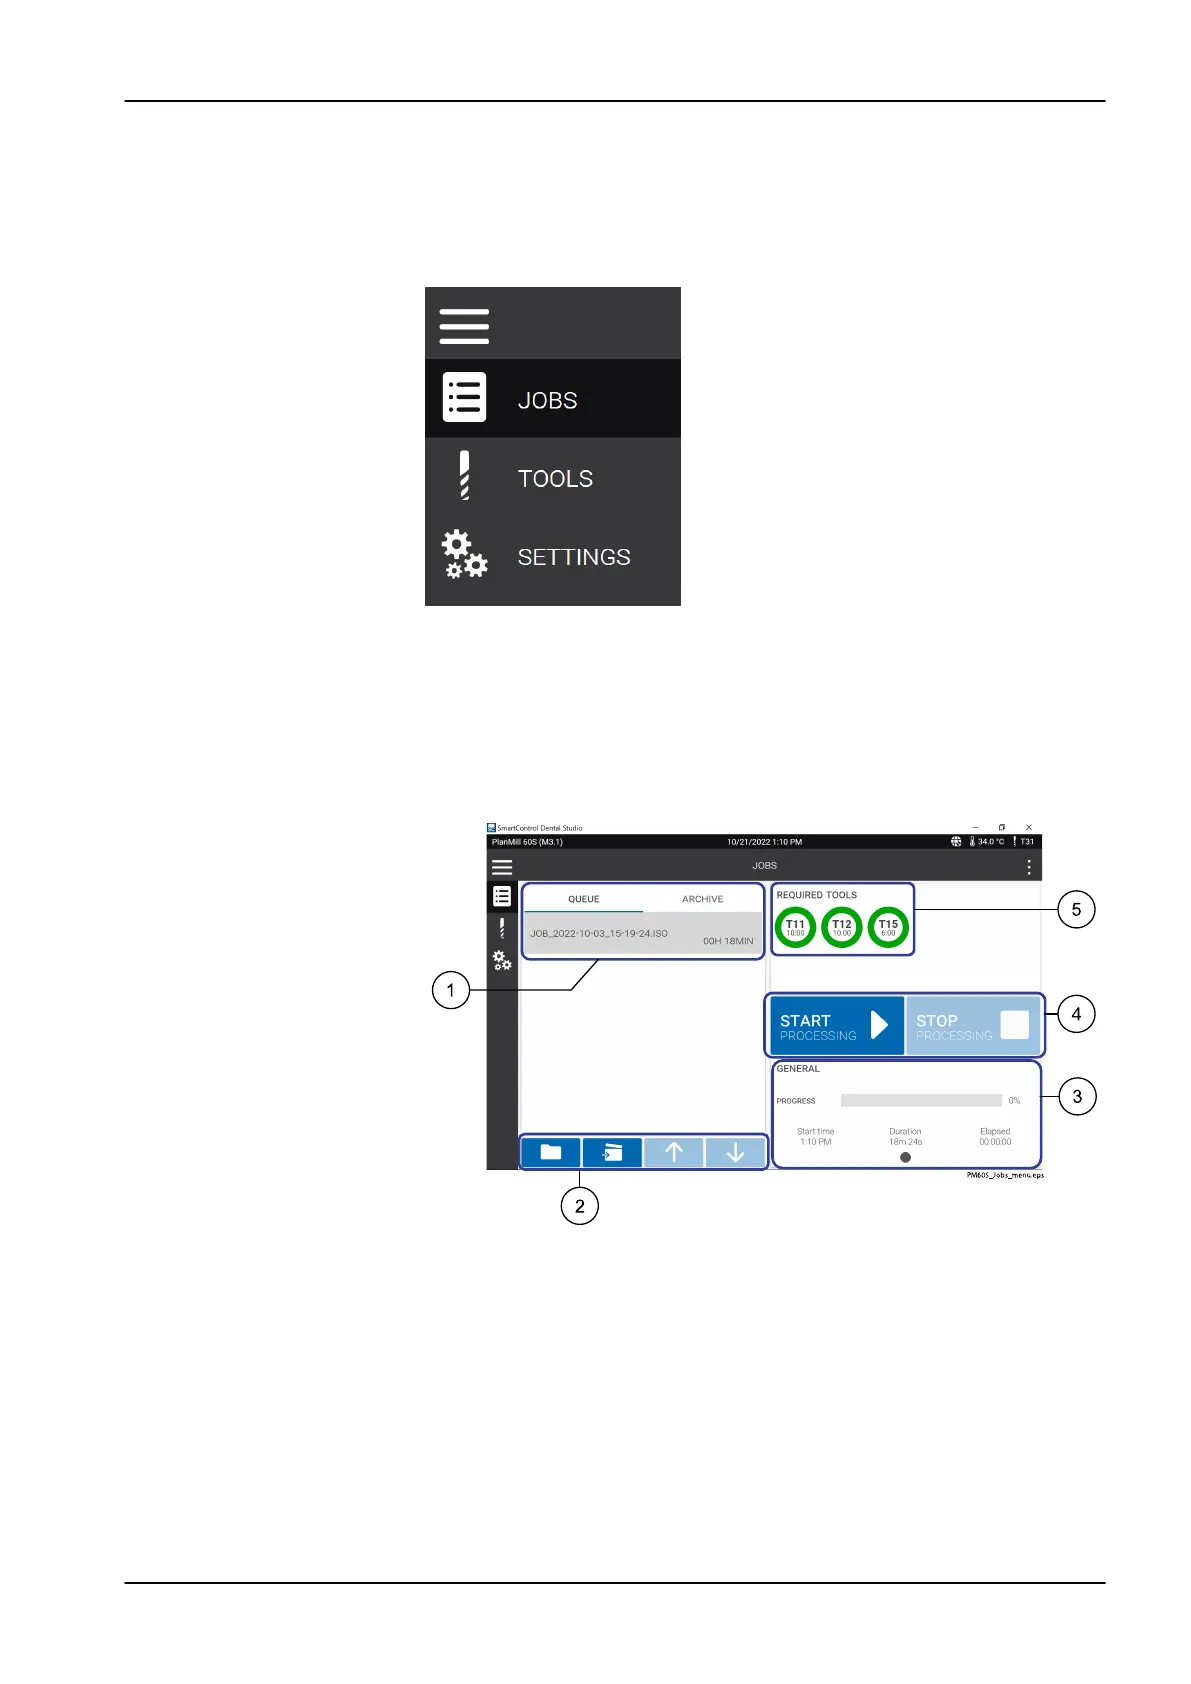
13.3 Jobs menu
After starting the Smart Control Dental Studio software, the
Jobs
menu item
will automatically open. This menu contains the functions and status displays
before and during the milling process.
1 Milling files display
2 Options for milling files
3 Processing status display
4 Machining options
5 Required tools with status display
13.3.1 Milling files display
The milling files display shows the milling files that are in the queue to be
milled next and the estimated milling process duration for each file. The
milling process of a file in the queue is started by pressing the Start button.
13 Control software
User's manual Planmeca PlanMill 60 S 39