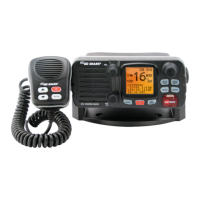
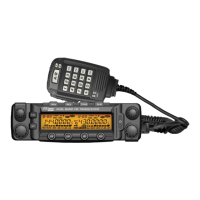
3.4 Mounting The Radio
Mount the radio on your vessel:
Find a appropriate location defined in section 3.2;
Place the mounting bracket on the location surface, use a pencil to mark the loca-
tion of four holes where the fixing screws are to go into;
Caution: Be careful tot to drill through the mounting surface.
Remove the bracket, drill four holes smaller than the screw diameter, then re-place
the mounting bracket on the surface aligning the drilled holes;
Insert the four fixing screws and secure the bracket to mounting surface using the
supplied bolts, spring washers, plain washers and nuts;
Caution: if you can not reach behind the mounting surface to attach the nut on
the bolts, use the supplied self-tapping screws to fasten the bracket.
Insert the four fixing screws and fasten them with a Philip screw-driver with atten-
tion not to screw too tightly;
Mount the base station onto the bracket with notice of the matching of the pro-
tuberances on the both inner side of the bracket and the pits on the two sides
of the base station (the selectable pits on the sides of the radio allow you adjust
the direction of the radio face to satisfy your easy-to-read-and-use, 150 for each
rotation and totally 450 tolerance);
Attach the supplied mounting knobs from the two sides of the bracket to fixing the
base station securely.
1
2
3
4
5
6
7
8
9
15
Caution:
Keep the radio and handset at least 1 meter away from any magnetic devices such as com-
pass on your vessel.
The supplied universal mounting bracket allows you to mount your base station from overhead
or on dashboard with a big scope of angle as many as 450.
To change the angle after installation:
10 Loosen the mounting knob at the sides of gimbal, first.
11 Then adjust the base station to an appropriate direction with matching of the
protuberances on the inner sides of gimbal and pits on the outer sides of base
station.
12 Tighten the knob to secure.