End User 25
Call Queue Agent
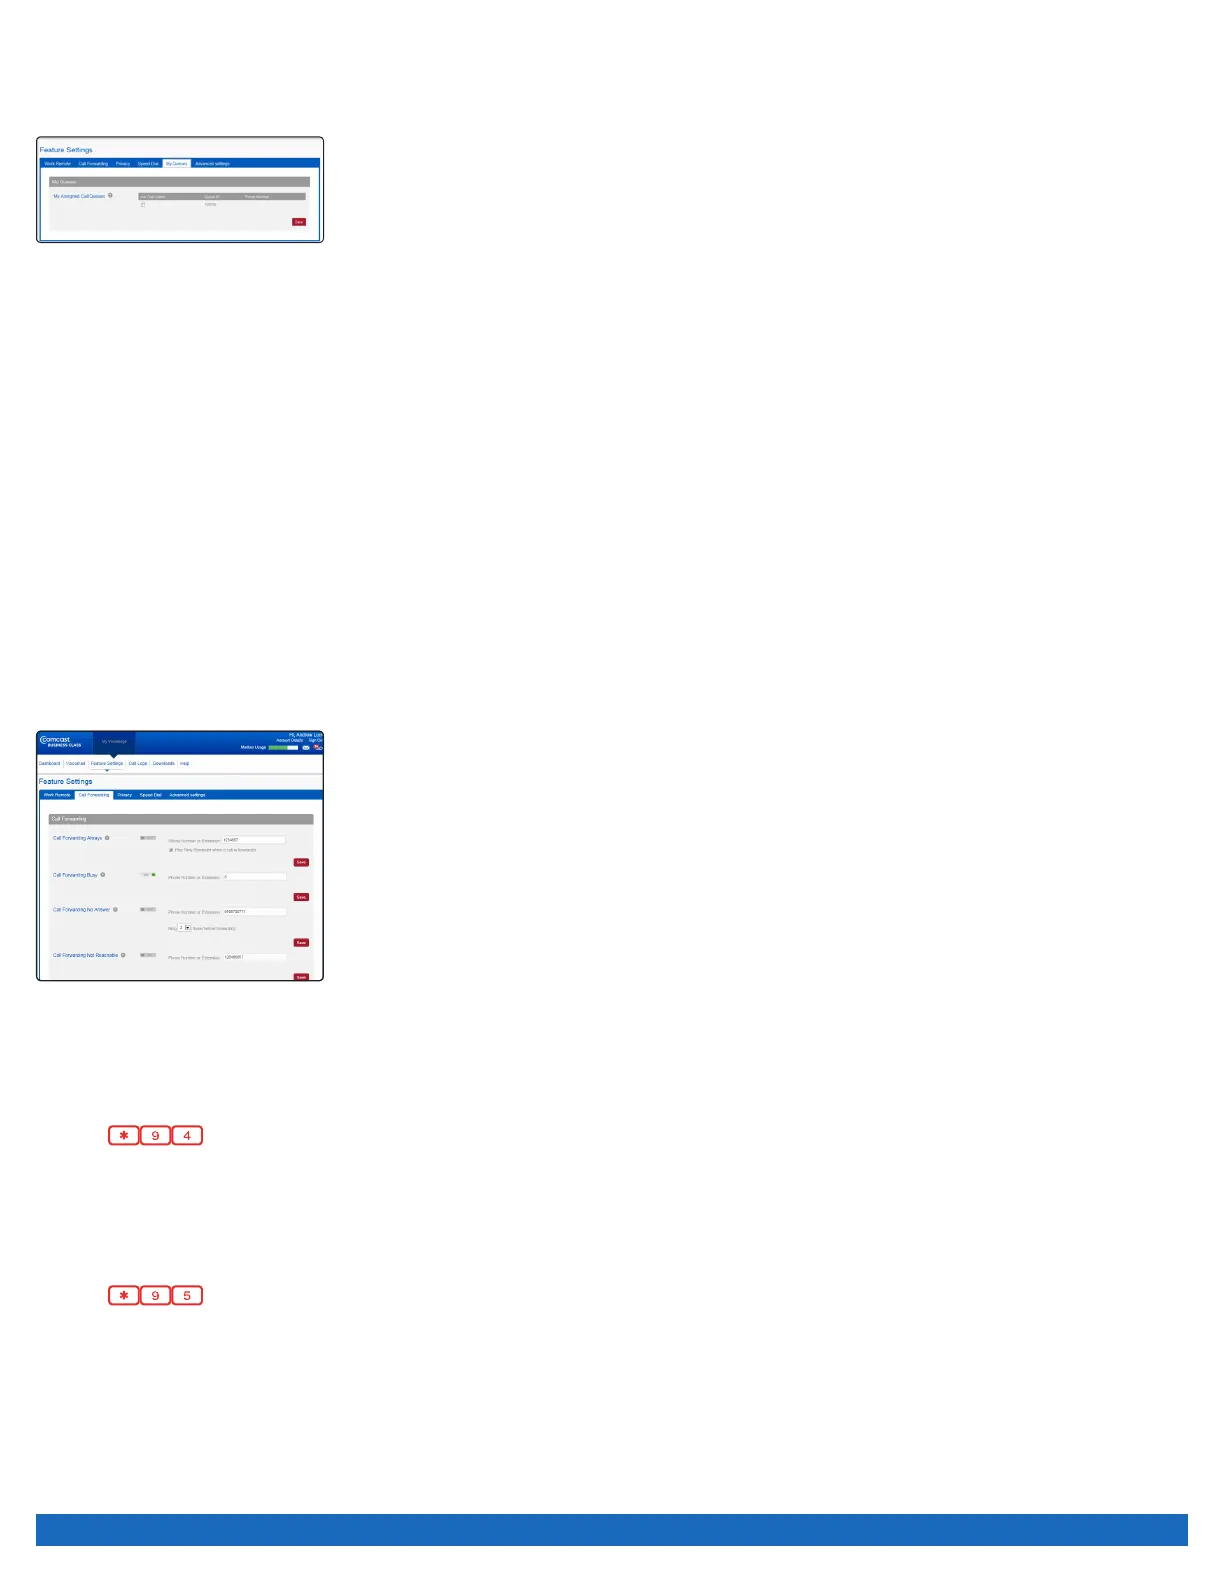
The My Queues tab enables users to join and unjoin call queues. When joined, the user will receive calls from the queue. If a user is
assigned to multiple queues, those queues will be displayed here.
To join a Call Queue:
1. Log on to business.comcast.com/bveportal.
2. From the Main Navigation Page, click “Feature Settings”.
3. Click the “My Queues” tab.
4. Select the Call Queues that you want to receive
calls from.
5. Click “Save”.
Business Voice Continuity
Business VoiceEdge has many user-level features that ensure Business Continuity. Technical Administrators may want to ensure that
users understand these features and how they may impact a broader Business Continuity plan.
Note: These are user level features that can be controlled by the individual users.
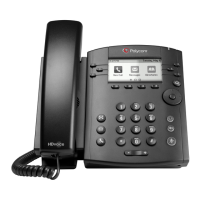
Call Forwarding Not Reachable
There are several features that ensure your business voice continuity. The most important of these features is Call Forwarding Not
Reachable. With Call Forwarding Not Reachable, your incoming phone calls are automatically routed to a pre-determined destination
in the event of power outages, broadband outages, device outages or natural disasters causing outages. No human intervention is
needed. The service is set up during the provisioning of your VoiceEdge service. However, users can change the settings at any time.
Note: The forwarding phone number must be permitted by your outgoing calling plan.
You can activate or change the phone number for this feature on the VoiceEdge portal, or by using Feature Access Codes on your
device.
To activate or change Call Forwarding Not Reachable online:
1. Log on to business.comcast.com/bveportal.
2. From the Main Navigation Page, click “Feature Settings”.
3. Select “Call Forwarding” to display the forwarding options, and scroll to Call Forwarding Not
Reachable.
4. Enter or change the telephone number that you want calls routed to in the case of your
business line not being reachable. This could be a cell phone, a home phone or an alternate
business location.
5. Click “Save”.
6. Call Forwarding Not Reachable has now been updated. All incoming calls will be routed to the number you entered if your phone
device should become unreachable.
Feature Access Code activation of Call Forwarding Not Reachable:
1. Lift the receiver and listen for the dial tone.
2. Press .
3. A menu of options will guide you in managing this feature. The prompts will enable you to activate and deactivate the feature as well
as add and delete the numbers on your list.
To deactivate Call Forwarding Not Reachable:
1. Lift the receiver and listen for the dial tone.
2. Press .
3. When prompted, press to turn the feature off.
Note: When entering the “forward to” number, remember to dial 1 and/or the area code before the number if it’s necessary to place the call. When creating your list, enter
the area code plus the 7-digit number for both local and long-distance numbers.