© Precor Incorporated, Unauthorized Reproduction and Distribution Prohibited by Law Page 110
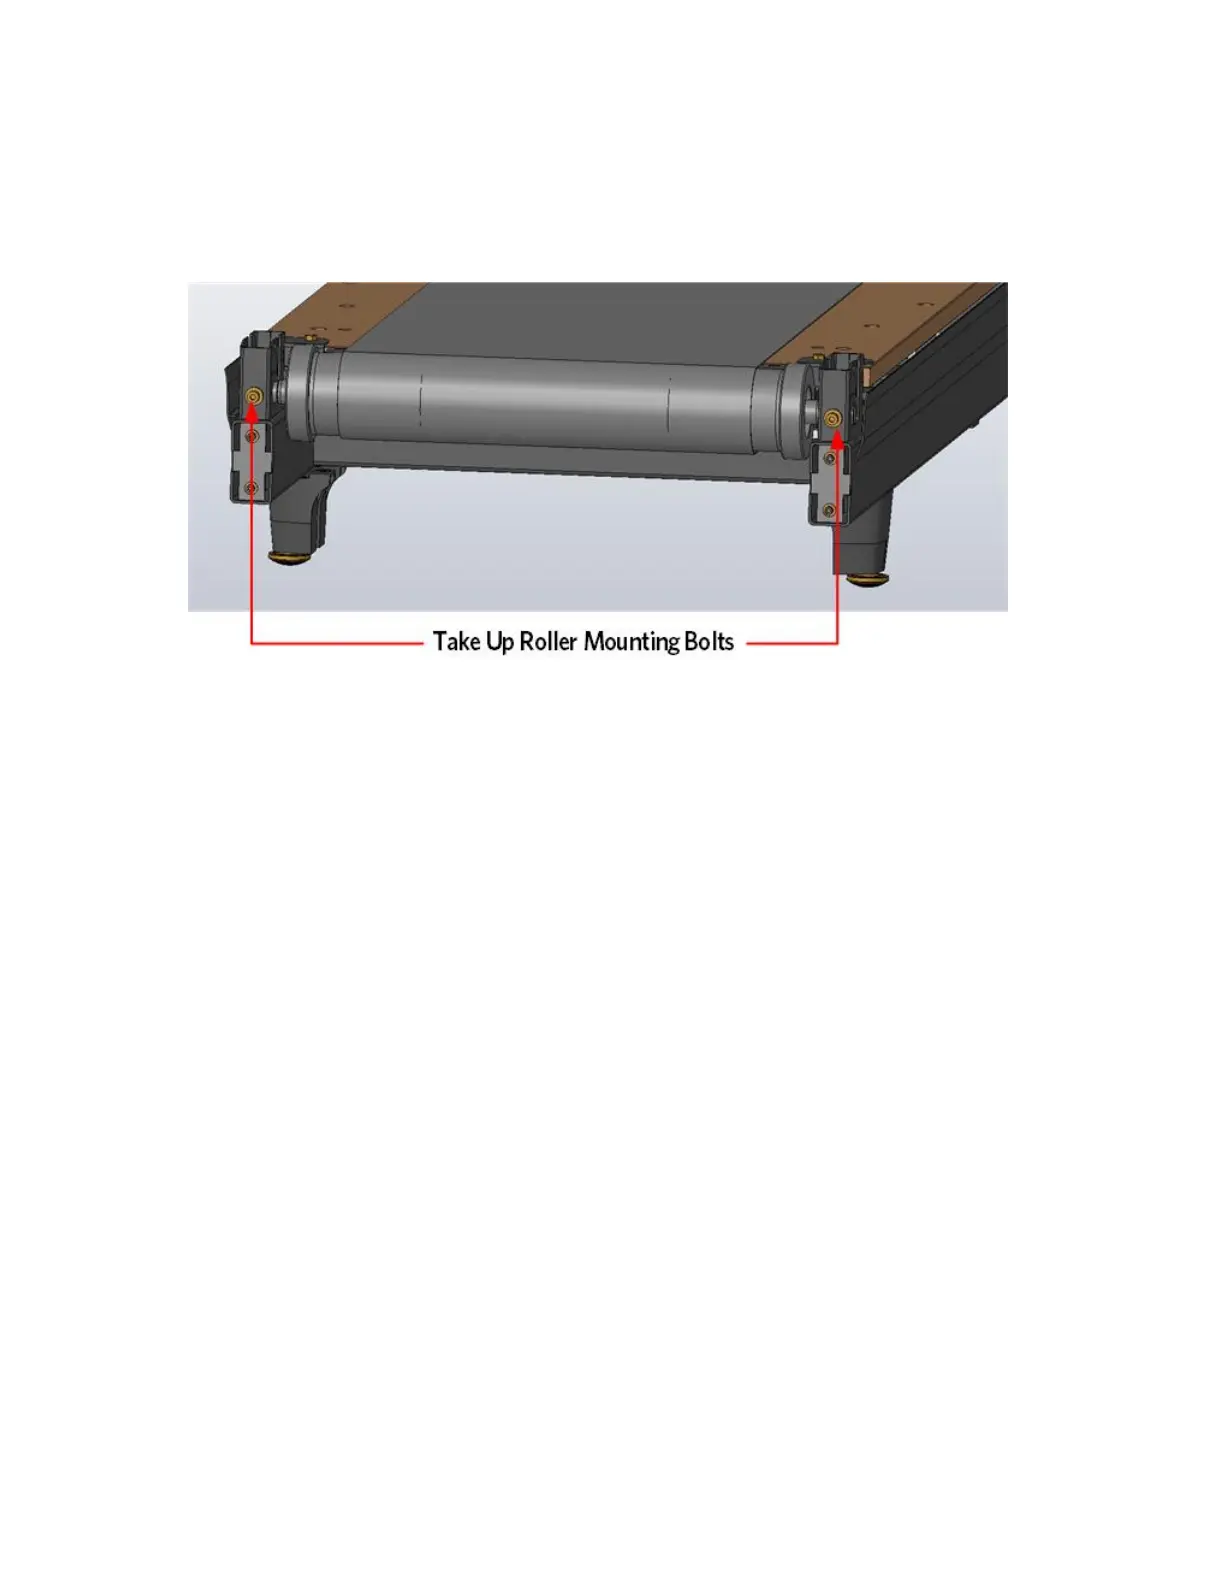
4 Remove the take up roller mounting bolts by releasing the tension
evenly on both sides. Then lift and slide the take up roller out.
Figure 46: Take Up Roller Mounting Bolt
5 Slide the new take up roller through the running belt and into place.
Hand tighten both take up roller mounting bolts a few turns only.
6 Replace the roller guard and mounting bolts.
7 Make sure the running belt is in the center of the deck, the spacing
should be the same on each side of the running belt to the edge of the
running deck.
8 Move the running belt so that the seam is underneath the treadmill.
9 Adjust the drive belt tension per the Procedure, Adjusting Drive Belt
Tension (on page 119).
10 Tensioning the Running Belt as per procedure, Tensioning the Running Belt
(on page 122) and Running Belt Tracking Adjustment as per procedure
,Running Belt Tracking Adjustment (on page 124).
11 Replace the belt guard, ensuring the belt guard tabs are firmly locked
in the frame locking tabs and snapped onto the take up roller shaft.
12 Replace the end caps and trim strips.