© Precor Incorporated, Unauthorized Reproduction and Distribution Prohibited by Law Page 90
8 Replace the plates and the running deck mounting bolts removed in step
3. Only tighten the bolts by hand at this time.
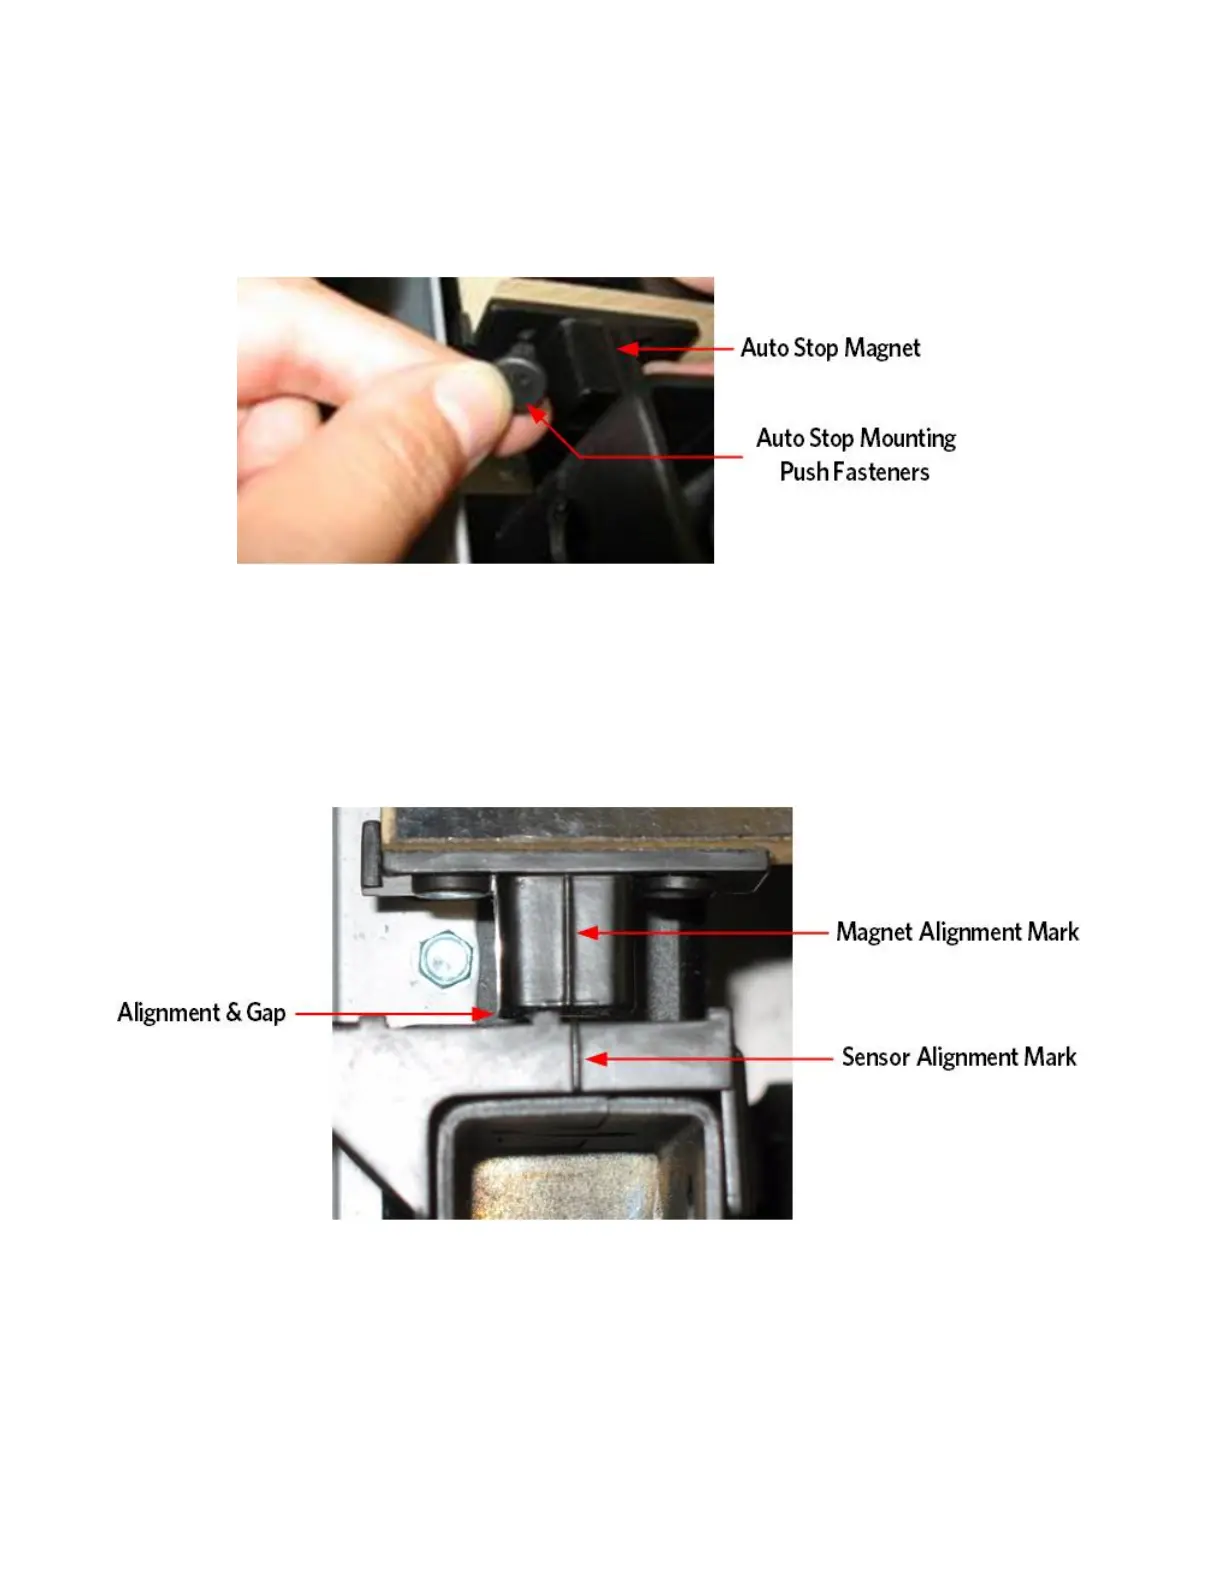
Figure 30: Auto Stop Magnet Mounting
9 Check the alignment of the magnet and the auto stop assembly. The
magnet and the auto stop assembly each have an alignment mark on the
top of their housings. The magnet mark and the auto stop mark should
align and the gap should be approximately 3/16 of an inch between the
housings. A 3/16 allen wrench can be used as a feeler gauge to set the
correct gap. If the gap or alignment are off adjust the running deck
until the magnet and auto housing are properly aligned.
Figure 31: Auto Stop Alignment
10 Securely tighten the running deck mounting bolts. Torque the bolts to
150 inch pounds.
11 Replace the left and right running deck trim strips.
12 Replace the motor hood.