1
i4s Quick Start Instructions
WARNING! Read this manual in its entirety before attempting to weld with the i4s. Before turning on the ma-
FKLQHPDNHVXUHLWLVFRQQHFWHGWRWKHSURSHUHOHFWULFLW\E\FHUWL¿HGSURIHVVLRQDOV7KHZDWHUWDQNVKRXOGEH
¿OOHGZLWKDZDWHUDQGDQWLIUHH]HVROXWLRQ%HIRUH¿OOLQJPDNHVXUHWRVHFXUHDOOZDWHUKRVHV
!
A
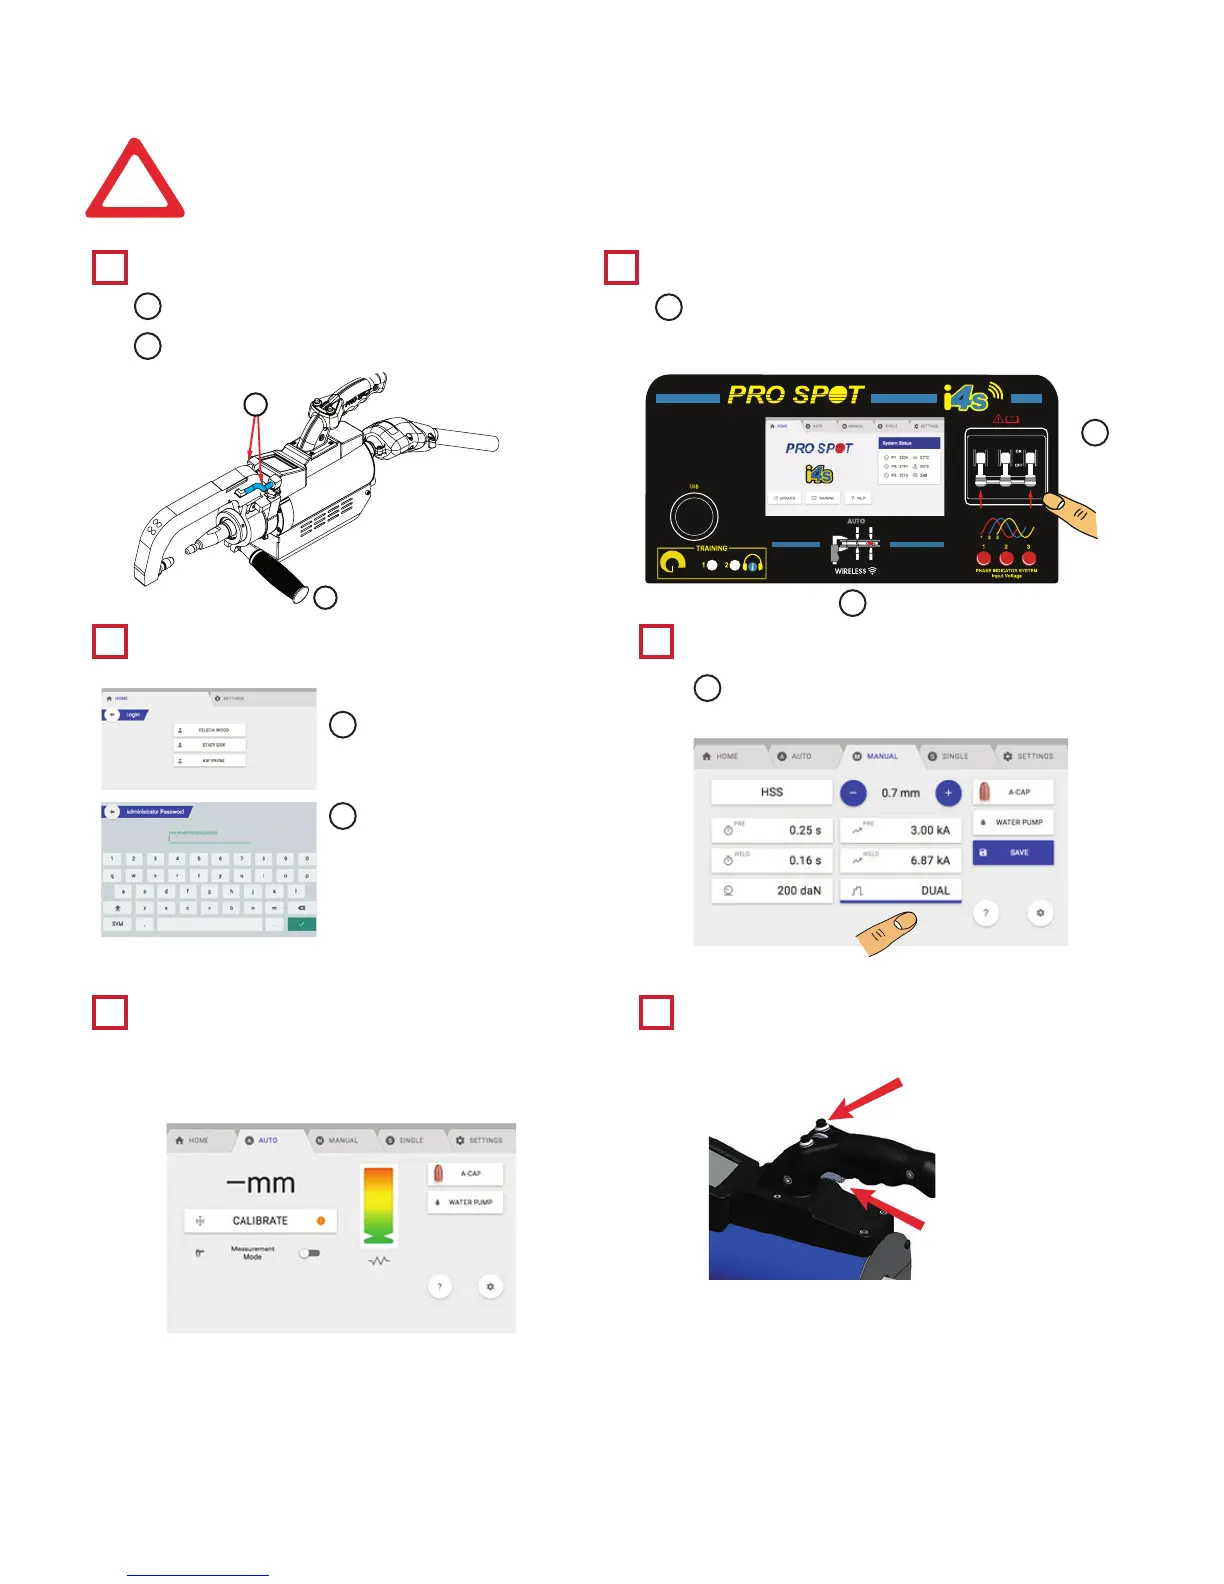
Weld Gun Check
Login Navigation
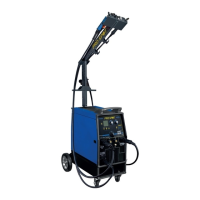
How To Calibrate The i4s Spot
Welding Gun
Start Welding
System Checks and Power On
1
3 4
5 6
2
Verify that the hoses are secure in place.
Select User Login.
The i4s touch screen is used to navigate
through menus and select options.
Enter the password and
select the green check
button.
Note: The default user
password is 1234
Verify the presence of air pressure.
Verify all 3-phase lights are illuminated.
Turn power
on.
5HFRPPHQGHGPLQLPXPLQSXWSUHVVXUHLV36,
See Section 4.2.1 for more information.
A
A
A
A
B
B
C
i4s Quick Start Instructions
*CAUTION*
DO NOT PUT MATERIAL BETWEEN ELECTRODES
DURING CALIBRATION
1. Press the calibrate button to enter calibration mode.
2. Press and hold the reverse button (top-left) on the gun.
3. Press and hold the weld trigger and the top right button
on the gun to calibrate.
1. Place the stackup between the weld caps and
EHVXUHWRXVHVKXQWFODPSVLIWKLVLVWKH¿UVW
weld.
2. Press and hold the weld trigger and top right
button on the gun to weld.
1RWH5HFDOLEUDWHHYHU\ZHOGV
• Every arm change
• Every time Auto Mode is entered.
Weld Trigger
7RS5LJKW%XWWRn
B
Verify that the arm handle is tightened.
B