64
1. Plan your home network topology
Write down your plan of the home network before starting to set up the surveillance
system. Consider the following when doing so:
i. The IP address of NAS
ii. The IP address of the cameras
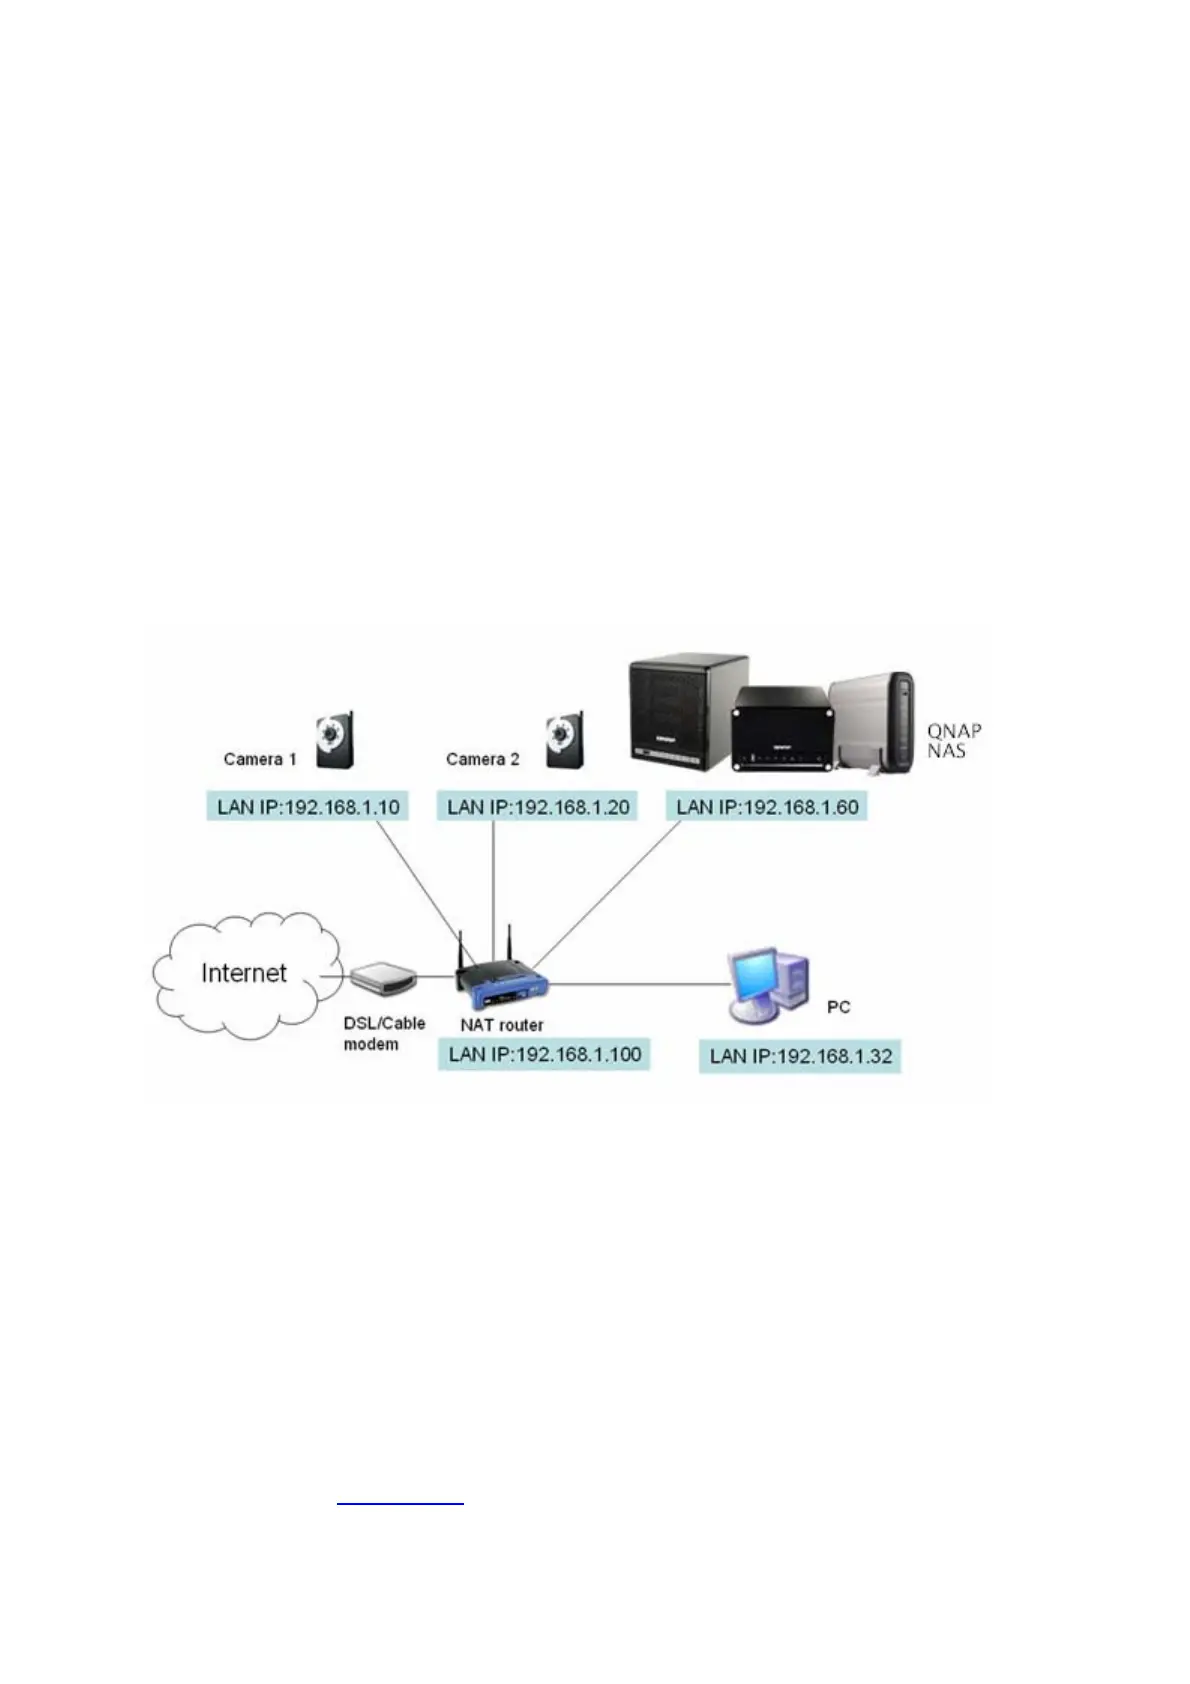
Your computer, the NAS, and the IP cameras should be installed to the same router in
LAN. Assign fixed IP addresses to the NAS and the IP cameras. For example,
y The LAN IP of the home router: 192.168.1.100
y Camera 1 IP: 192.168.1.10 (fixed IP)
y Camera 2 IP: 192.168.1.20 (fixed IP)
y NAS IP: 192.168.1.60 (fixed IP)
2. Set up the IP Cameras
In this example, two IP cameras will be installed. Connect the IP cameras to your home
network. Then set the IP address of the cameras so that they are in the same LAN as
the computer. Login the configuration page of the Camera 1 by IE browser. Enter the IP
address of the first camera as 192.168.1.10. The default gateway should be set as the
LAN IP of the router (192.168.1.100 in this example). Then configure the IP address of
the second camera as 192.168.1.20.
Some cameras provide a utility for IP configuration. You may refer to the user manual of
the cameras for further details.
* Please refer to Appendix A
for the supported network camera list.