26
26
Installation
ESP-Me Advanced User Manual
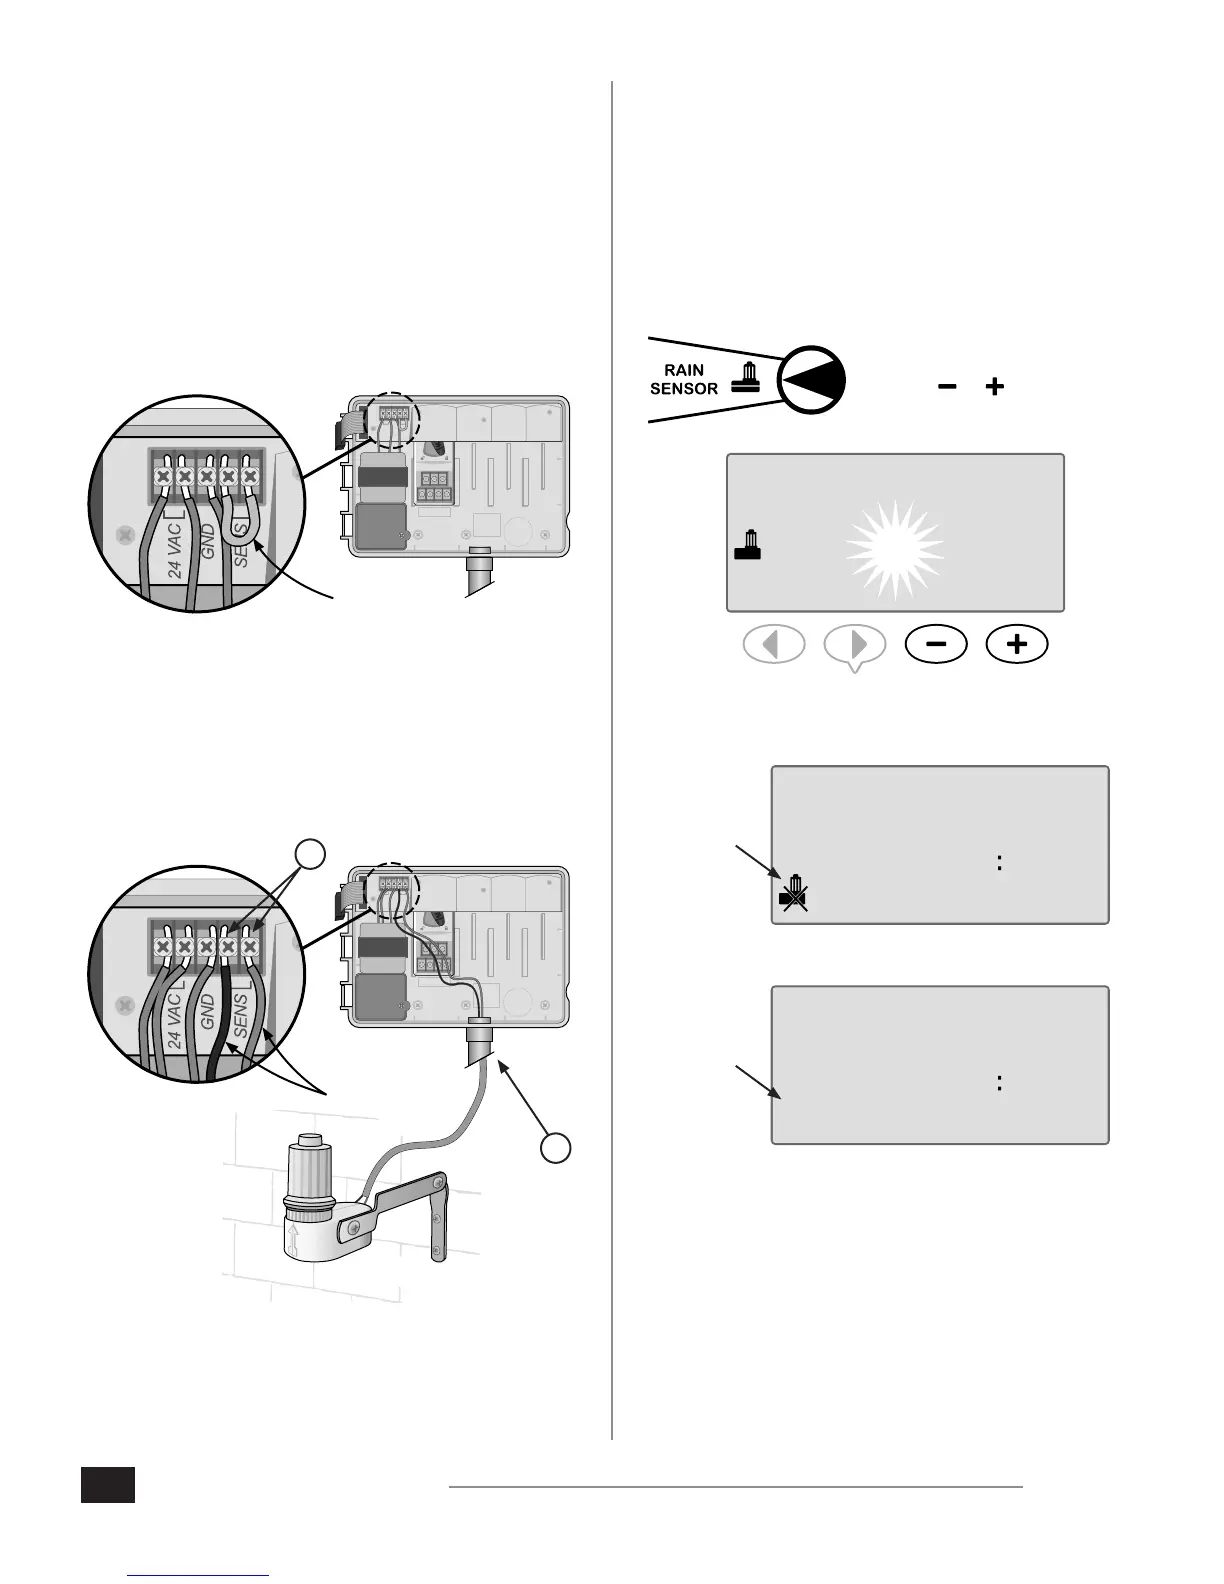
Connect Optional Rain Sensor
(Wired or Wireless)
Connect an optional rain sensor to the ESP-Me
controller.
NOTE: The ESP-Me Controller is not compatible with
with a Normally Open rain sensor. It is designed for
use with a Normally Closed rain sensor.
1. On the terminal strip, remove the yellow jumper wire
from the SENS terminals and discard.
1 2 3 4
VT = VALVE TEST
VT MV COM
24 VAC
GND
SENS
VT MV COM 5 6 7 11 12 13 17 18 19
1 2 3 4 8 9 10 14 15 16 20 21 22
CONNECT
120 VAC
REMOVE AND
DISCARD
JUMPER WIRE
2. Route the rain sensor wires through a knock-out
opening at the bottom or back of the unit.
CAUTION: Do not route the rain sensor wires
through the same opening as the power wiring.
3. Connect both Rain Sensor wires to the SENS terminals.
1 2 3 4
VT = VALVE TEST
VT MV COM
24 VAC
GND
SENS
VT MV COM 5 6 7 11 12 13 17 18 19
1 2 3 4 8 9 10 14 15 16 20 21 22
SENSOR
WIRES
WIRED RAIN
SENSOR SHOWN.
OPTIONAL
WIRELESS
RAIN SENSOR
RAIN BIRD
MODEL # WR2RC
OR WR2RFC IS
AVAILABLE
2.
3.
Set Rain Sensor to Active
(after installing a rain sensor and
removing jumper wire on backplane)
Set the controller to obey a rain sensor.
With a rain sensor is installed, automatic irrigation will
suspend if the sensor detects rainfall. When Sensor Bypass
is set to ACTIVE all programs will obey the rain sensor.
1. Turn the dial to Rain Sensor.
2. Press or to
select ACTIVE.
ACTIVE
The rain sensor symbol will show on the display in AUTO
RUN or OFF when Rain Sensor is set to BYPASS.
sun 427
PM
SYMBOL
SHOWN
When Rain Sensor is set to ACTIVE, no symbol is shown.
sun 427
PM
NO
SYMBOL
NOTE: For more details see the Rain Sensor section
in the Advanced Options section of this manual.
NOTE: The Alert light no longer illuminates when
irrigation is delayed due to rainfall.