19
19
Installation
ESP-Me Advanced User Manual
Installation
Installation Checklist
When installing the ESP-Me controller for the rst time, it
is recommended that you complete the following steps in
order.
A check-off box is provided for each step:
Check box contents (see page IV)
Gather installation tools (see below)
Select a location
Mount the controller
Connect controller power
Install station modules (optional)
Connect eld wires
Complete the installation
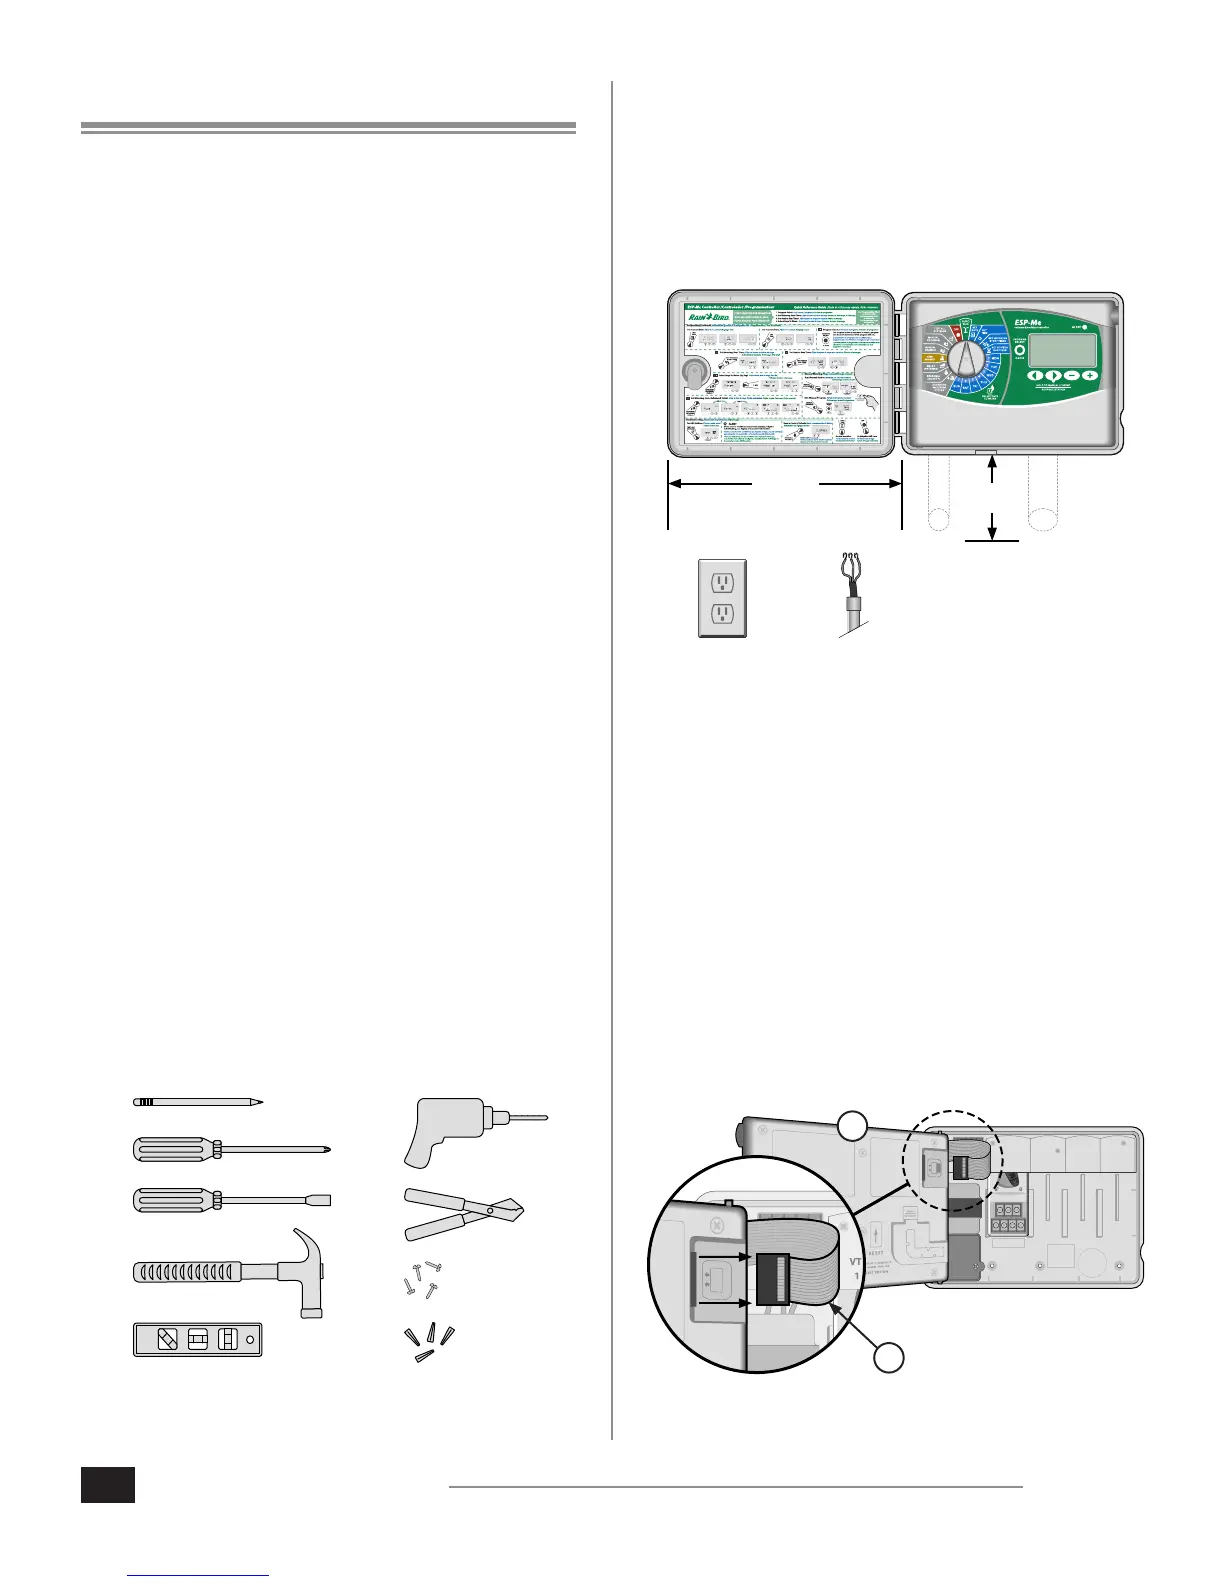
Gather Installation Tools
Before beginning installation, gather the following tools
and materials:
a. Marking pencil
b. Phillips screwdriver
(#1, #2, #3 tip)
c. Flathead screwdriver
d. Hammer
e. Level
f. Drill and drill bit
(for #8 screws)
g. Wire Stripper
h. Mounting Screws (included)
i. Wall Anchors (if needed)
a.
b.
c.
e.
f.
d.
g.
i.
h.
Mount Controller
Choose Location
1. Choose a suitable mounting location with access to an
electrical power source. Allow clearance for conduit
connections below the unit, and for the hinged door
(outdoor model only) to swing fully open to the left.
11 IN.
3 IN.
GROUNDED
ELECTRICAL
OUTLET
EXTERNAL
POWER
SOURCE
MOUNT CONTROLLER
IN PROXIMITY TO
ELECTRICAL POWER
SOURCE AS REQUIRED
OR
NOTE: The operating temperature range is 14°F to
+149°F (-10°C to +65°C).
Remove Front Panel
1. Open the door of the controller and swing it to the left.
If desired, remove it from the hinges by rst pressing
upward and then pulling outward at the bottom.
2. Pull open the front panel, swing it to the left and
disconnect the ribbon cable by gently pulling the
connector out of the socket.
CAUTION: Be careful not to bend the pins in the
sockets when detaching the ribbon cable.
1 2 3 4
VT = VALVE TEST
VT MV COM
24 VAC
GND
SENS
VT MV COM 5 6 7 11 12 13 17 18 19
1 2 3 4 8 9 10 14 15 16 20 21 22
CONNECT
120 VAC
2.
1.
NOTE: Outdoor model shown with internal
transformer *