27
27
Installation
ESP-Me Advanced User Manual
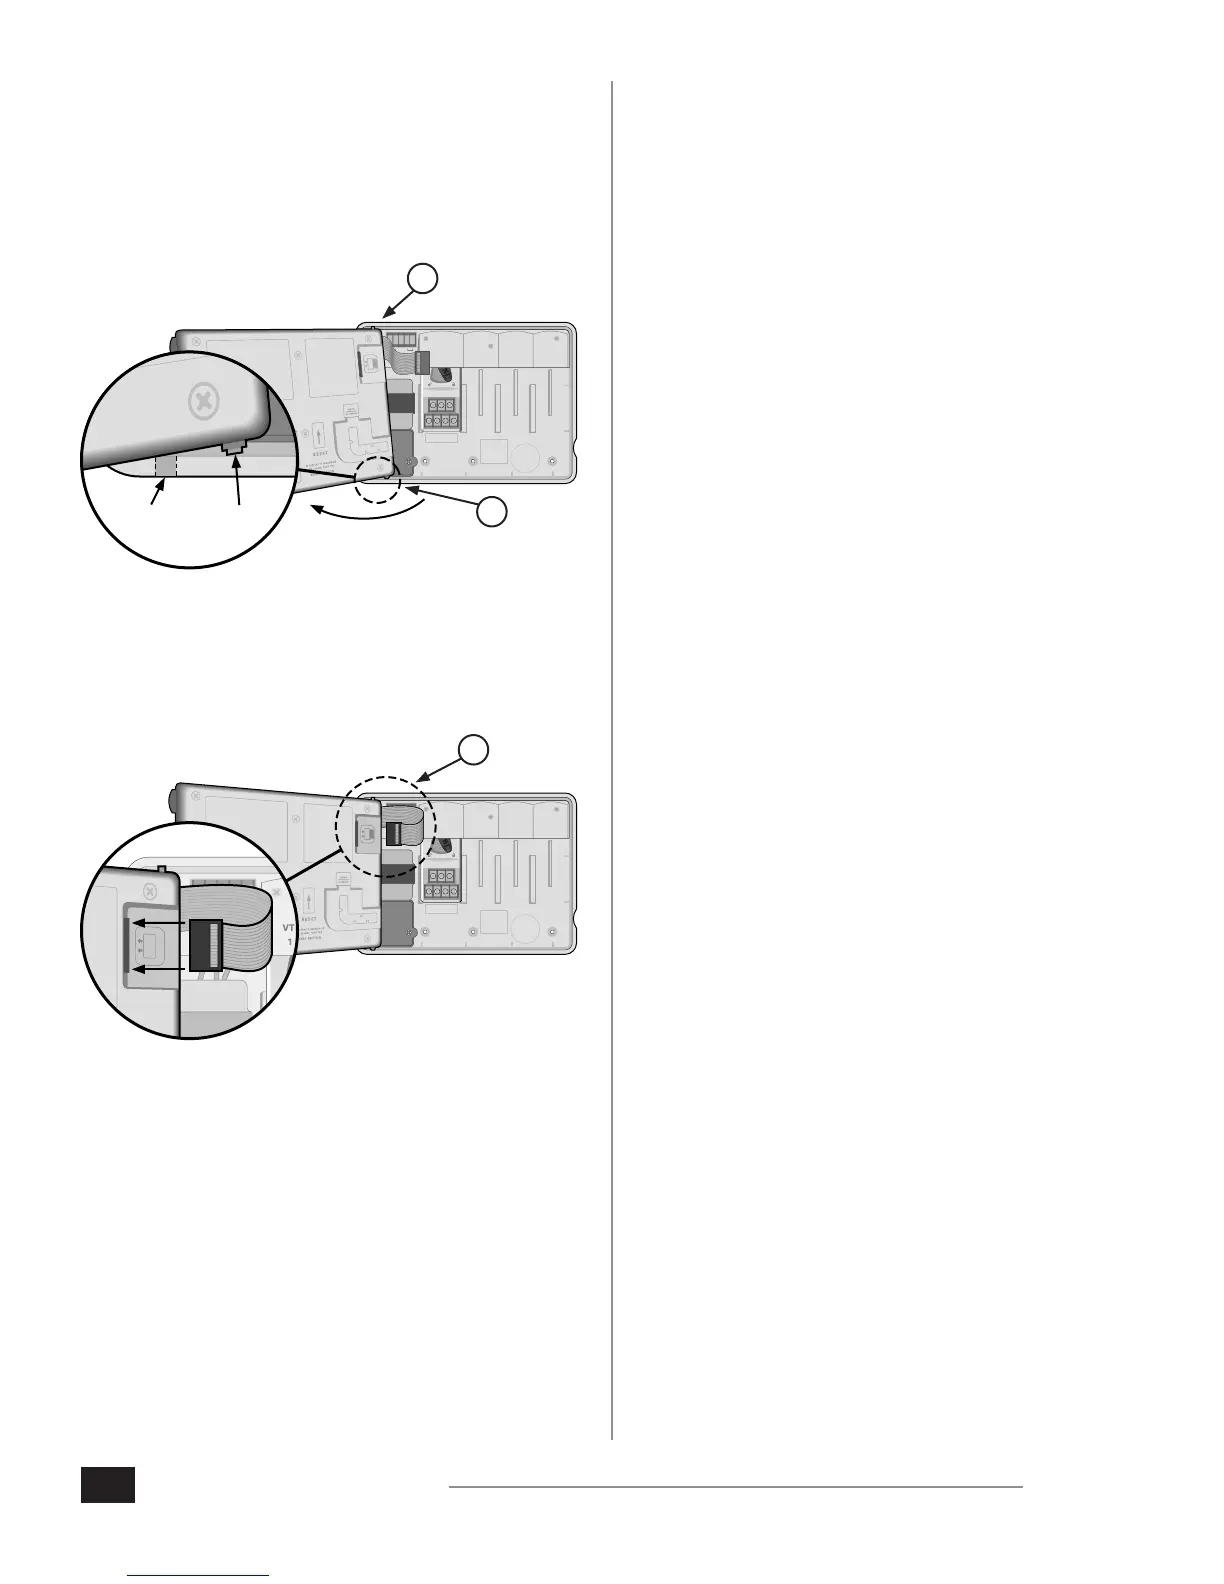
Complete Installation
1. Reinstall the front panel by rst inserting the top corner
pin into the top pin-hole.
2. Then gently pull upward and slide the bottom corner
pin into the lower pin-hole.
1 2 3 4
VT = VALVE TEST
VT MV COM
24 VAC
GND
SENS
VT MV COM 5 6 7 11 12 13 17 18 19
1 2 3 4 8 9 10 14 15 16 20 21 22
CONNECT
120 VAC
PIN-
HOLE
CORNER
PIN
2.
1.
3. Reconnect the ribbon cable to the front panel by gently
pushing the connector into the socket (Red line on
ribbon cable towards the top).
CAUTION: Be careful NOT to bend the socket pins.
1 2 3 4
VT = VALVE TEST
VT MV COM
24 VAC
GND
SENS
VT MV COM 5 6 7 11 12 13 17 18 19
1 2 3 4 8 9 10 14 15 16 20 21 22
CONNECT
120 VAC
3.
4. Reinstall the outer door if necessary.
5. Apply power to the controller and test the system.
NOTE: The electrical connections can be checked
even if water is not available. If water is available and
you would like to test some or all of your stations,
use the Test All Stations feature of the controller.