Operating instructions D30+ │ P30+ │ SheraPrint 30
Rapid Shape GmbH │ DOCR000231
NOTE!
The maximum filling capacity of the reservoir is approx.
680 ml. To avoid overflow of the printing material
during printing, the maximum filling level of approx. 11
ml must not be exceeded (see also the maximum filling
level marking in the reservoir, if applicable).
Frequent material changes are laborious. We therefore
recommend using a separate reservoir for each
material.
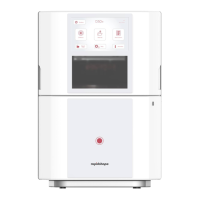
Push the material reservoir into the
machine
To insert the material reservoir into the machine, proceed as follows:
1. Open the machine. → Chapter 8.3
2. Push the filled material reservoir into the machine until the stop.
3. Once the reservoir is inserted, hold the used material bottle (if
equipped with RFID) to the RFID spot of the machine.
The material name and the expiry date of the material appear
on the display.
4. Press the 'Yes' button to assign the material to the reservoir.
5. If applicable, the 'Reservoir Check' message appears on the
display. Check the message. Then acknowledge the message by
pressing the 'Confirm' button.
6. Finally, the 'Reservoir Inserted' action buttons appear. Enter the
status of the reservoir and the material:
— 'Material Mixed': By pressing the button, you indicate
that the material has been mixed.
— 'Material Filtered': By pressing the button, you indicate
that the material has been filtered.
— 'Reservoir Checked': By pressing the button, you indicate
that the material has been checked.
The 'Reservoir-Check' message shows possible errors,
e.g. exceeding the useful life of the material.
With the 'Reservoir Inserted' action button, you can
confirm that you have performed the respective actions.
Depending on the selected actions, the 'Reservoir-
Check' messages are displayed the next time the
reservoir is inserted.
Preparation of the building platform
To prepare the building platform, please proceed as follows:
1. Check the building platform for cleanliness. → Chapter 8.4.2
Insert the building platform into the
machine
To insert the material reservoir into the machine, please proceed as
follows:
1. Orient the building platform with the mark 'Front' towards the
machine opening.