EasyManuals Logo

Rational CombiMaster Plus Original Installation Manual

Rational CombiMaster Plus
108 pages
To Next Page IconTo Next Page
To Previous Page IconTo Previous Page
Page #36 background imageLoading...
Page #36 background image
5 | Placement
36 / 108 80.06.070_iCombiPro-iCombiClassic_IM_en-GB
3. Insert the 2 screws from underneath into the rear holes and tighten them
(2).
1
1
2 2
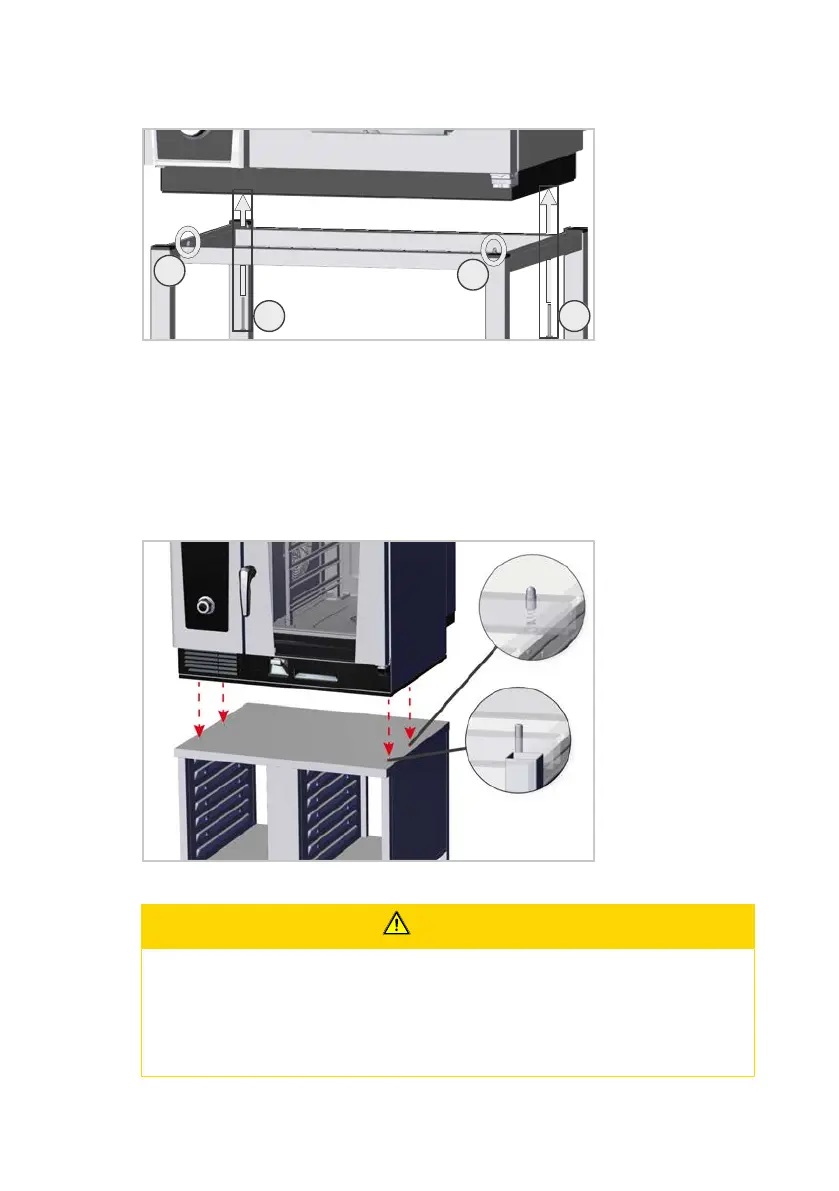
5.2.2 Unit sizes 6-1/1 up to 10-2/1 GN set up on base frame
a The installation surface is level, clean and free of grease.
1. Lift the unit onto the stand.
2. Position the unit with the spring pins.
3. Screw the unit to the stand with 2 screws. The diagram indicates the posi-
tion of the screws in the stand. The screws are attached with the nuts wel-
ded in the unit.
5.2.3 Align the base frame horizontally and fasten
CAUTION
Shifting the unit to the installation position.
Risk of crushing if the unit is shifted.
Gas units can damage gas lines.
n
Secure the unit with the fixing kit.

Table of Contents

Other manuals for Rational CombiMaster Plus

Questions and Answers:

Question and Answer IconNeed help?

Do you have a question about the Rational CombiMaster Plus and is the answer not in the manual?

Rational CombiMaster Plus Specifications

General IconGeneral
ModelCombiMaster Plus
ManufacturerRational
CategoryOven
Cooking modesSteam, Convection, Combination
Temperature range30°C to 300°C
Cleaning systemManual cleaning
Power ConsumptionVaries by model
Steam Generator OutputVaries by model
WeightVaries by model
DimensionsVaries by model
Control typeManual
Capacity10-20 levels (depending on model)

Related product manuals