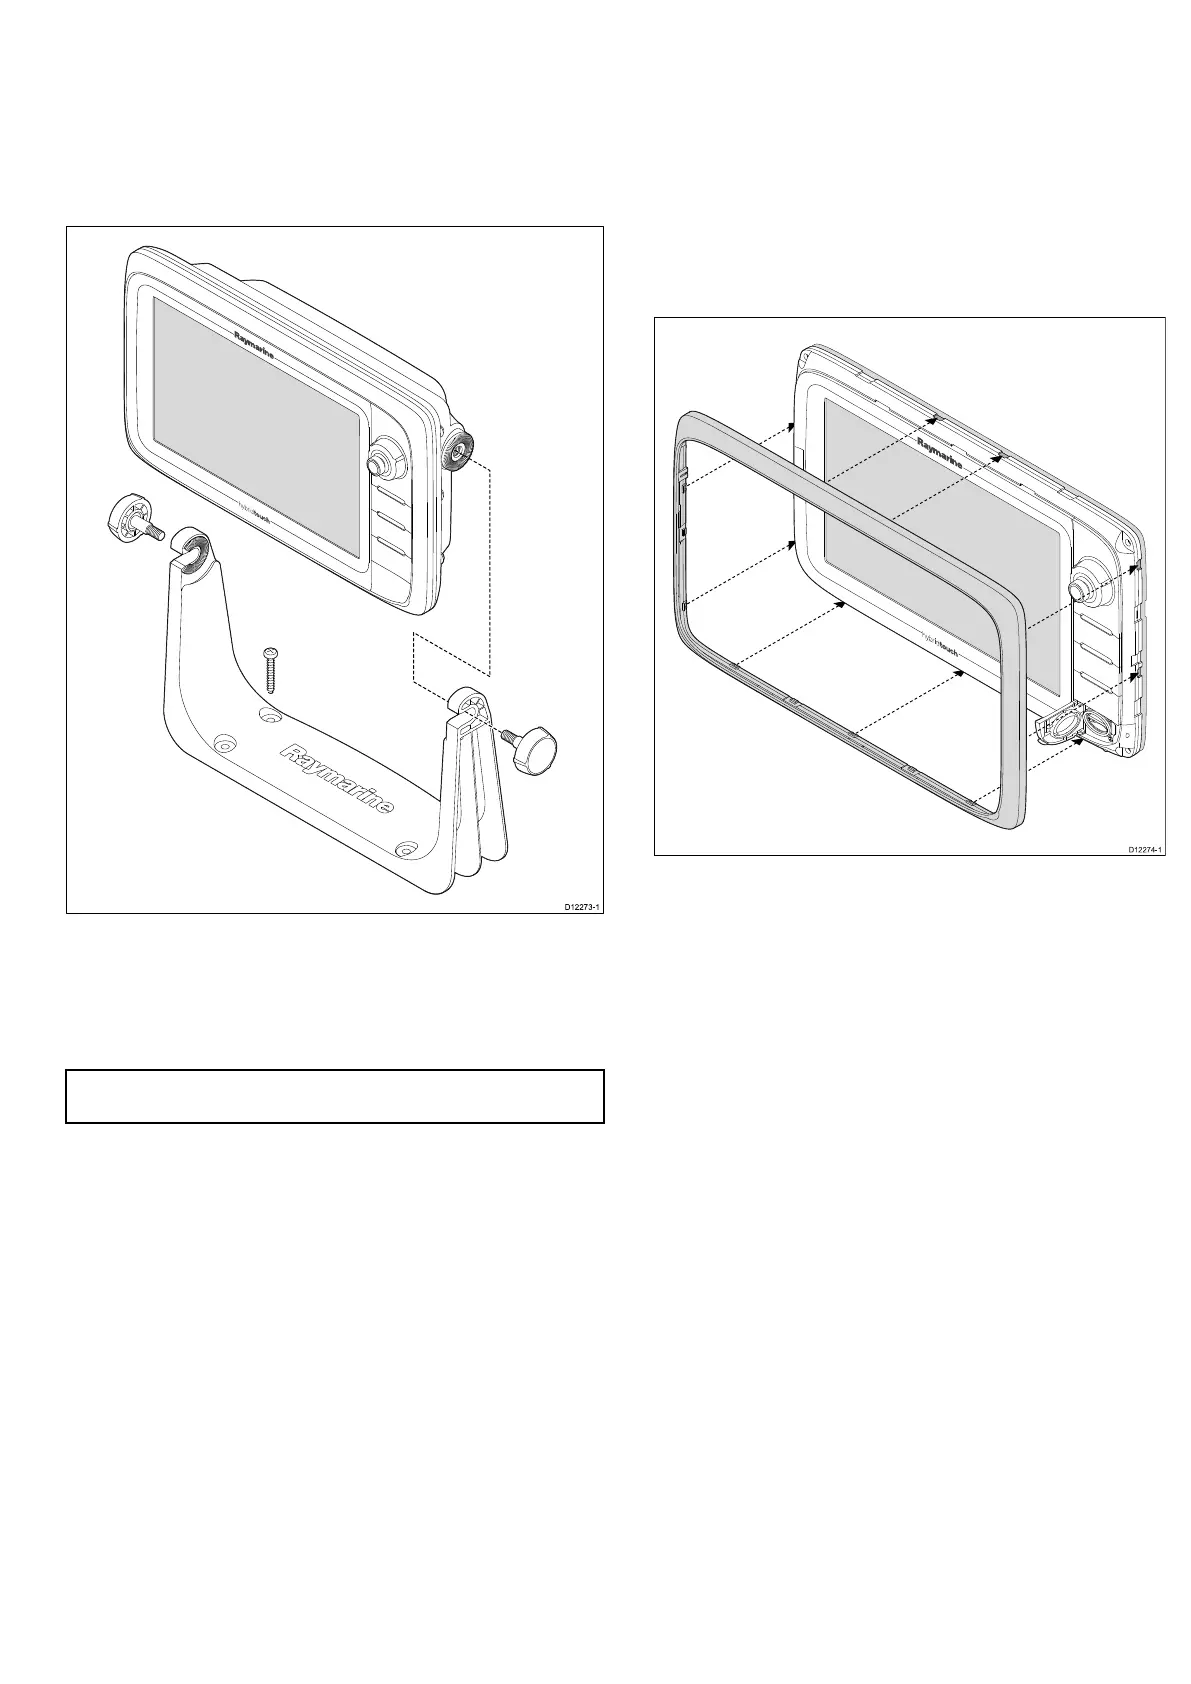
5.5Bracket(trunnion)mounting
Thedisplaycanbemountedonthesuppliedbracket.
Beforemountingtheunitensurethatyouhave:
•Selectedasuitablelocation.
•Identiedthecableconnectionsandroutethatthecableswilltake.
•Attachthefrontbezel.
1.Markthelocationofthemountingbracketscrewholesonthe
chosenmountingsurface.
2.Drillholesforthescrewsusingasuitabledrill,ensuringthereis
nothingbehindthesurfacethatmaybedamaged.
3.Usethesuppliedscrewstoattachthemountingbracketsecurely.
4.Attachthedisplayunittothemountingbracket.
Note:Theappropriatetorquetousewhendrillingdependsonthe
thicknessofthemountingsurfaceandthetypeofmaterial.
5.6Frontbezel
Attachingthefrontbezel
Thefollowingprocedureassumesthattheunithasalreadybeen
mountedinposition.
1.Carefullyliftoneedgeofthescreenprotectionlm,sothatitis
accessibleforremovingwhenunitinstallationiscomplete.
2.Ensurethememorycardslotdoorisintheopenposition.
3.Orientatethebottom-rightsideofthebezelunderthelipofthe
chartcarddoorandplacethebezeloverthefrontofthedisplay,
ensuringthattheclipsalongthebottomedgeofthebezellatch
intoposition.
4.Ensurethebezeliscorrectlyalignedwiththedisplay,asshown.
5.Applyrmbutevenpressuretothebezelalongthe:
i.Outeredges-workfromthesidesupwardsandthenalong
thetopedge,toensurethatitclipssecurelyintoposition.
ii.Inneredges-particularlyalongthechartcarddooredge,to
ensurethatthebezelsitsat.
6.Checkthatallcontrolbuttonsarefreetooperate.
Removingthefrontbezel
Beforeproceedingensurethememorycardslotdoorisopen.
Locationandmounting
55
 Loading...