Chapter 3: Getting Started 21
Chapter 3: Getting Started
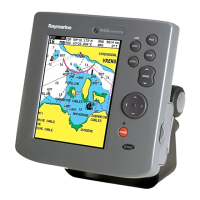
3.1 Introduction
This chapter provides information and instructions to allow you to start
using your RC400 GPS Chartplotter. It is intended to help you familiarize
yourself with the controls before you start using the chartplotter for
routine navigation.
Note: There is often more than one method of performing a particular
task. Normal operating procedures are detailed in Chapter 5. When you
are familiar with the system you can adapt these procedures to suit your
method of operation.
Battery Voltage Indicator
When the RC400 is being used in portable mode, an icon
displays the status of the AA batteries. The icon is located in
the upper right corner of the screen, below the status bar.
When the batteries are completely discharged, the battery
icon appears empty. When fully charged, the battery icon
appears full. The figure to the left indicates the six status
levels the battery level icon can display.
When battery charging is complete, the message BATTERY CHARGE
COMPLETED appears on the screen.
When the unit is in need of charging, the message BATTERY LOW appears
on the screen.
Simulator
The Chartplotter includes a Simulator mode, which allows you to
practice operating your chartplotter without live GPS data. Section 3.3,
Simulator Mode describes how you can switch to this mode. Simulator
mode can be used in the following situations:
• Before the chartplotter has been installed on your vessel. Connect the
Chartplotter unit to a 12V DC power supply, fused at 1A, connecting
the red core from the power lead to positive (+) and the black core to
negative (-); see Chapter 2 for full details.
• Once the chartplotter has been installed on your vessel and while in a
marina or otherwise at anchor.
NEEDS CHARGING
FULLY CHARGED
 Loading...