Connecting and Routing the Cables
4-16 SmartEdge 100 Router Hardware Guide
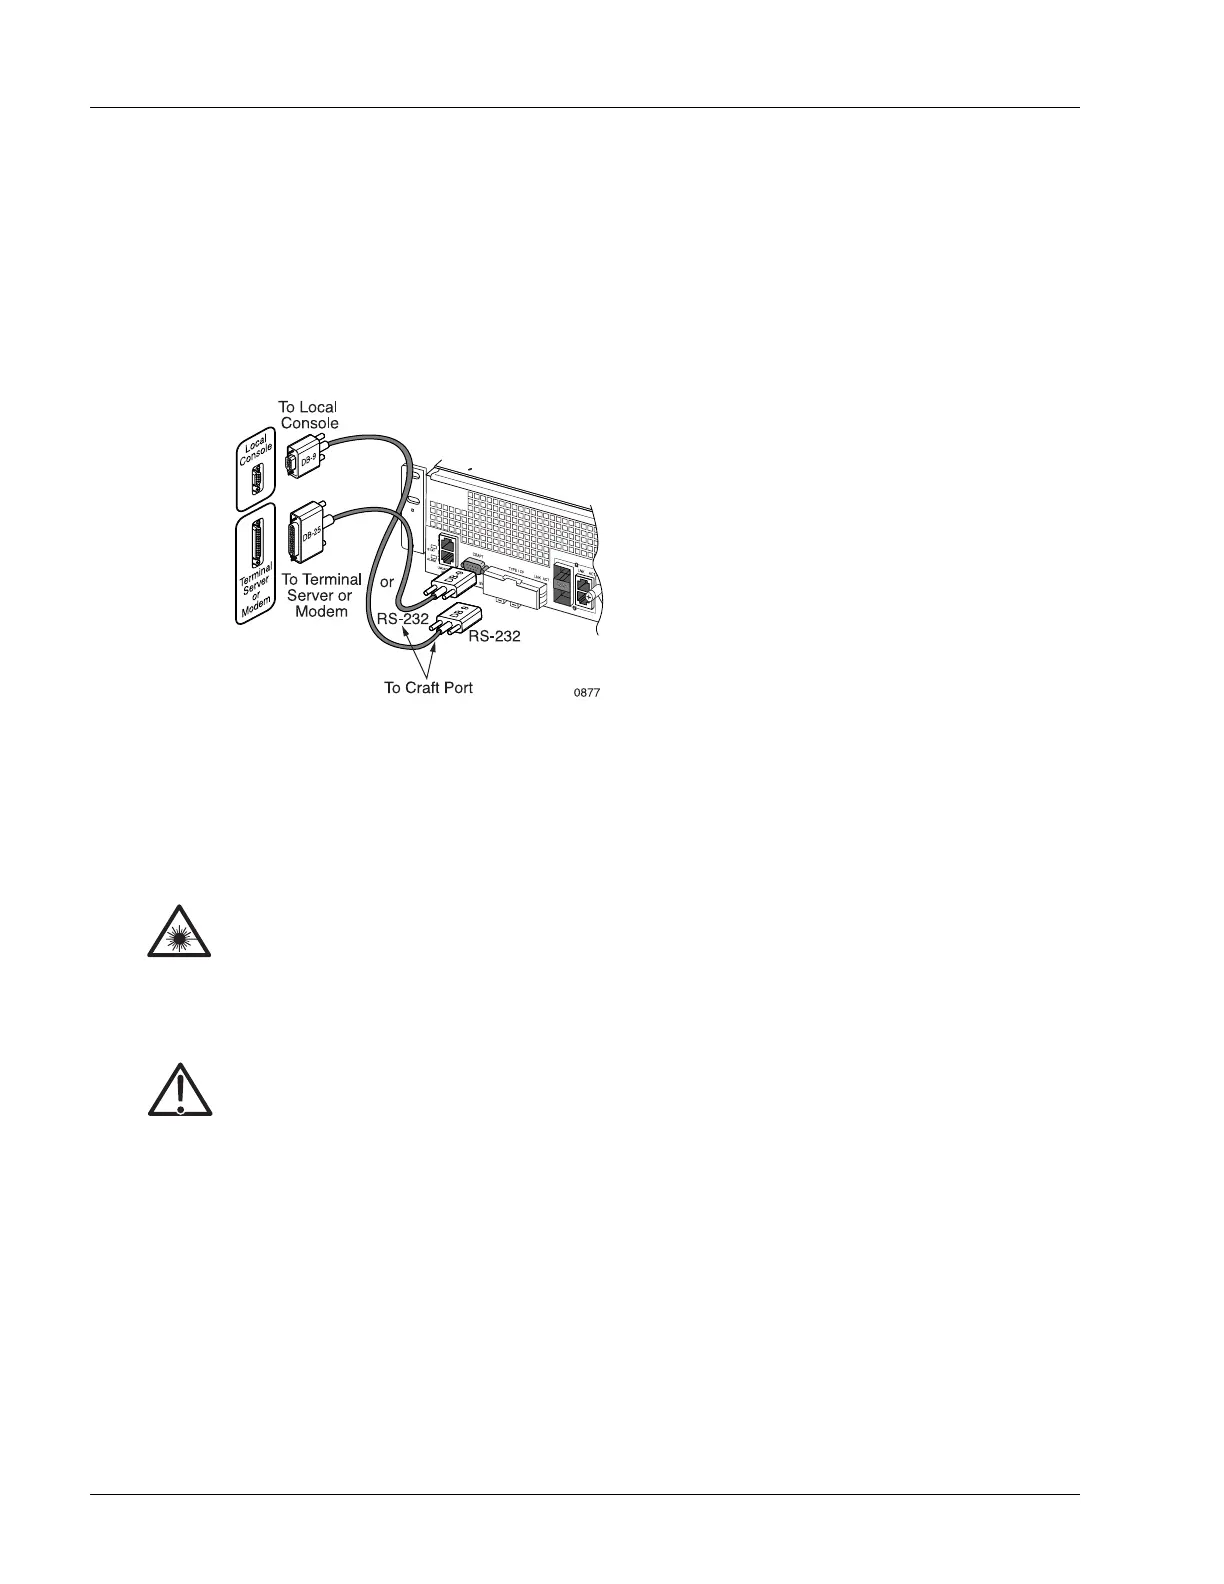
Local or Remote Console Terminal
A local or remote console terminal is connected to the SmartEdge 100 router using the Craft port on the
front panel. This type of connection provides access to the SmartEdge OS CLI, either directly or through a
terminal server. This port is always available; all system messages are directed to this port during a reload
operation. Figure 4-11 shows the connection to the Craft port.
Figure 4-11 Connections for a Local or Remote Console
Connect and Route the Cables at the Front of the Chassis
All MIC cables are connected to the front panels of the MICs. For cable specifications and pin assignments,
see the “FE and GE MIC and Native Port Cables” section in Appendix A, “Cables and Pin Assignments.”
To connect and route the cables at the front of the chassis, perform the following steps:
1. Put on an antistatic wrist strap (one is shipped with the system), and attach it to an appropriate grounded
surface.
Note The Craft port does not support a modem connection.
Laser Risk of severe damage to your eyes. All versions of the optical SFPs are Class 1 devices, which
use lasers to convert electrical signals to optical signals that can damage your eyes. To reduce the
risk when working with optical SFPs, keep the connectors covered until you are ready to connect
the fiber-optic cables. When you remove a cover, do not stare into or directly view the laser beam
emerging from the connector.
Caution Risk of damage to fiber-optic cables. Fiber-optic cables are fragile and are easily damaged when
bent. To reduce the risk, never step on a cable; never twist it when connecting it to or
disconnecting it from an traffic card.
Note Do not attach the wrist strap to a painted surface; there is an ESD convenience jack located in
the lower right corner of the air intake panel on the front of the chassis.
 Loading...