Inserting and Extracting a Transceiver
Servicing the Hardware 6-5
Insert a Transceiver
To insert a transceiver of any type, perform the following step:
1. Put on an antistatic wrist strap (one is shipped with the system), and attach it to an appropriate grounded
surface.
2. Ensure that the latching mechanism is closed.
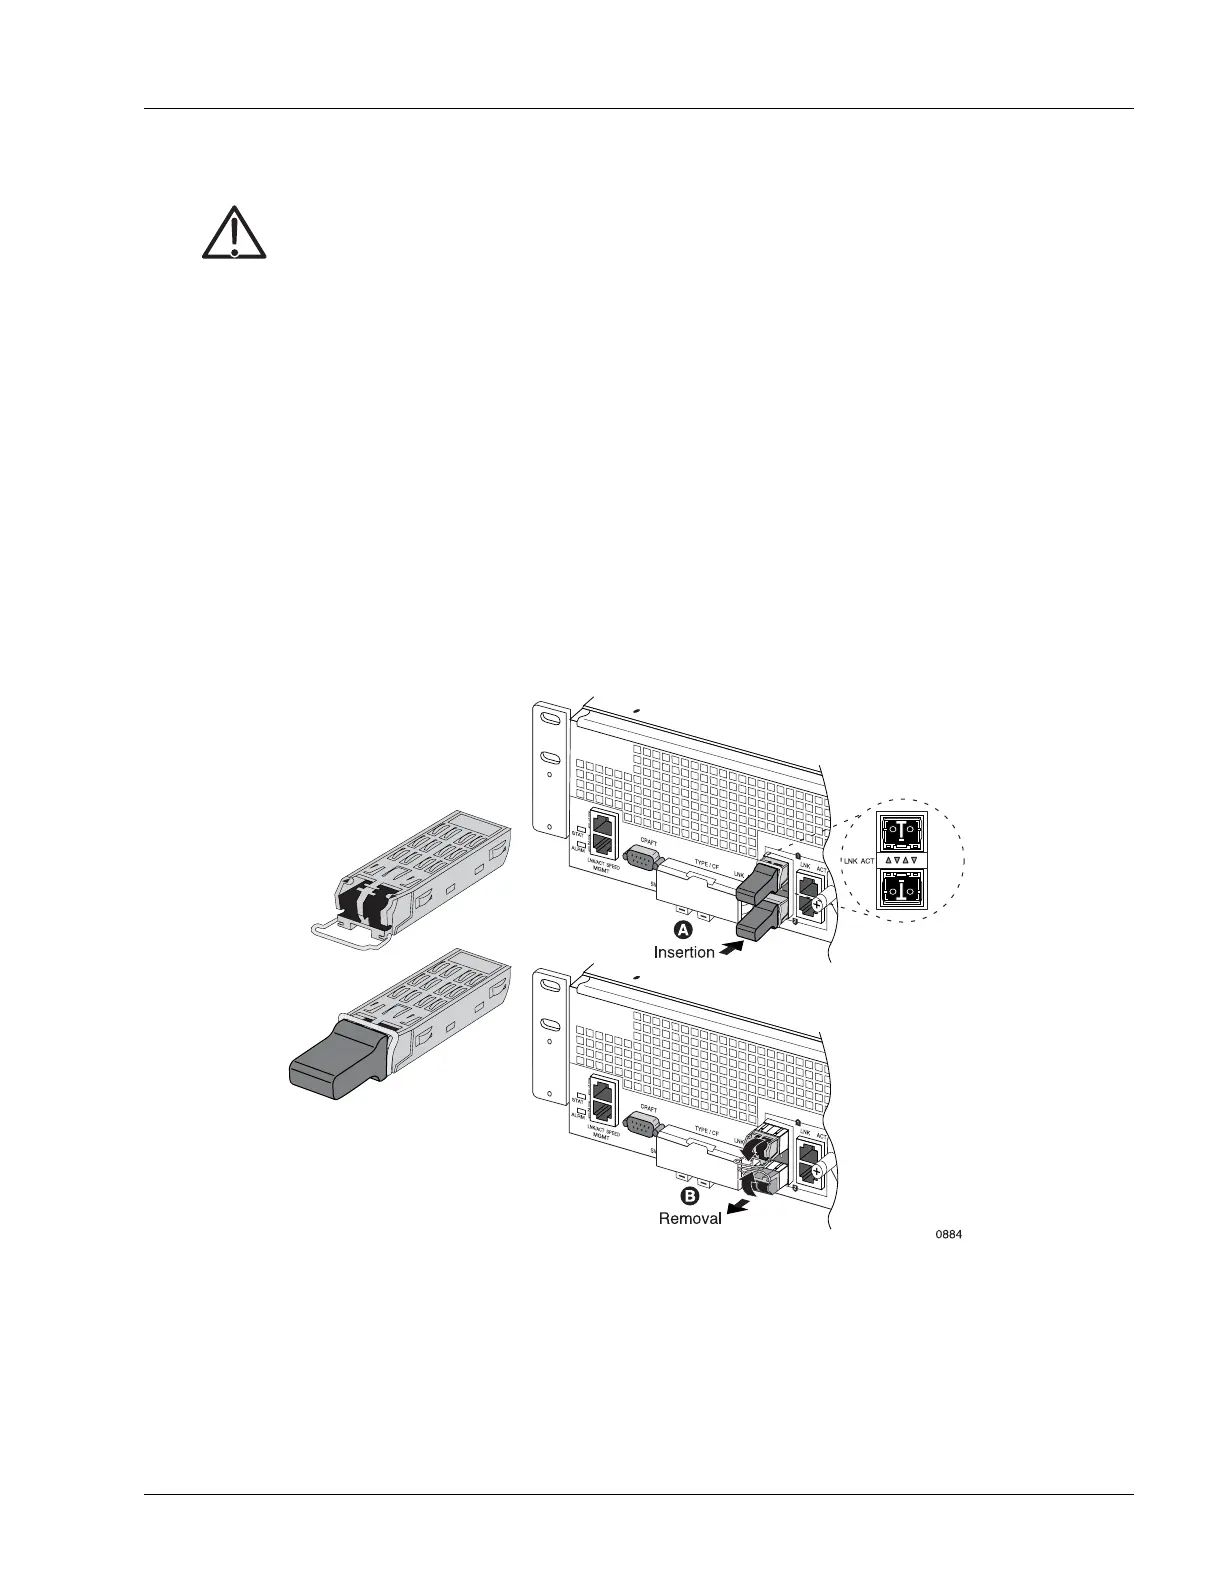
3. With the transceiver connectors as shown in Figure 6-3, slide the transceiver into the opening for the
port until the rear connector is seated and the locking mechanism snaps into place.
4. Remove the dust cover if you are installing an optical transceiver.
Figure 6-3 Inserting and Extracting an SFP Transceiver
Caution Risk of data loss. You can corrupt the system if you attempt to install SFP transceivers that are
not purchased from Redback
®
, because these items have not been tested with the SmartEdge
router. To reduce the risk, install only the transceivers purchased from Redback.
Note Do not attach the wrist strap to a painted surface; there is an ESD convenience jack located on
the front of the chassis.
 Loading...