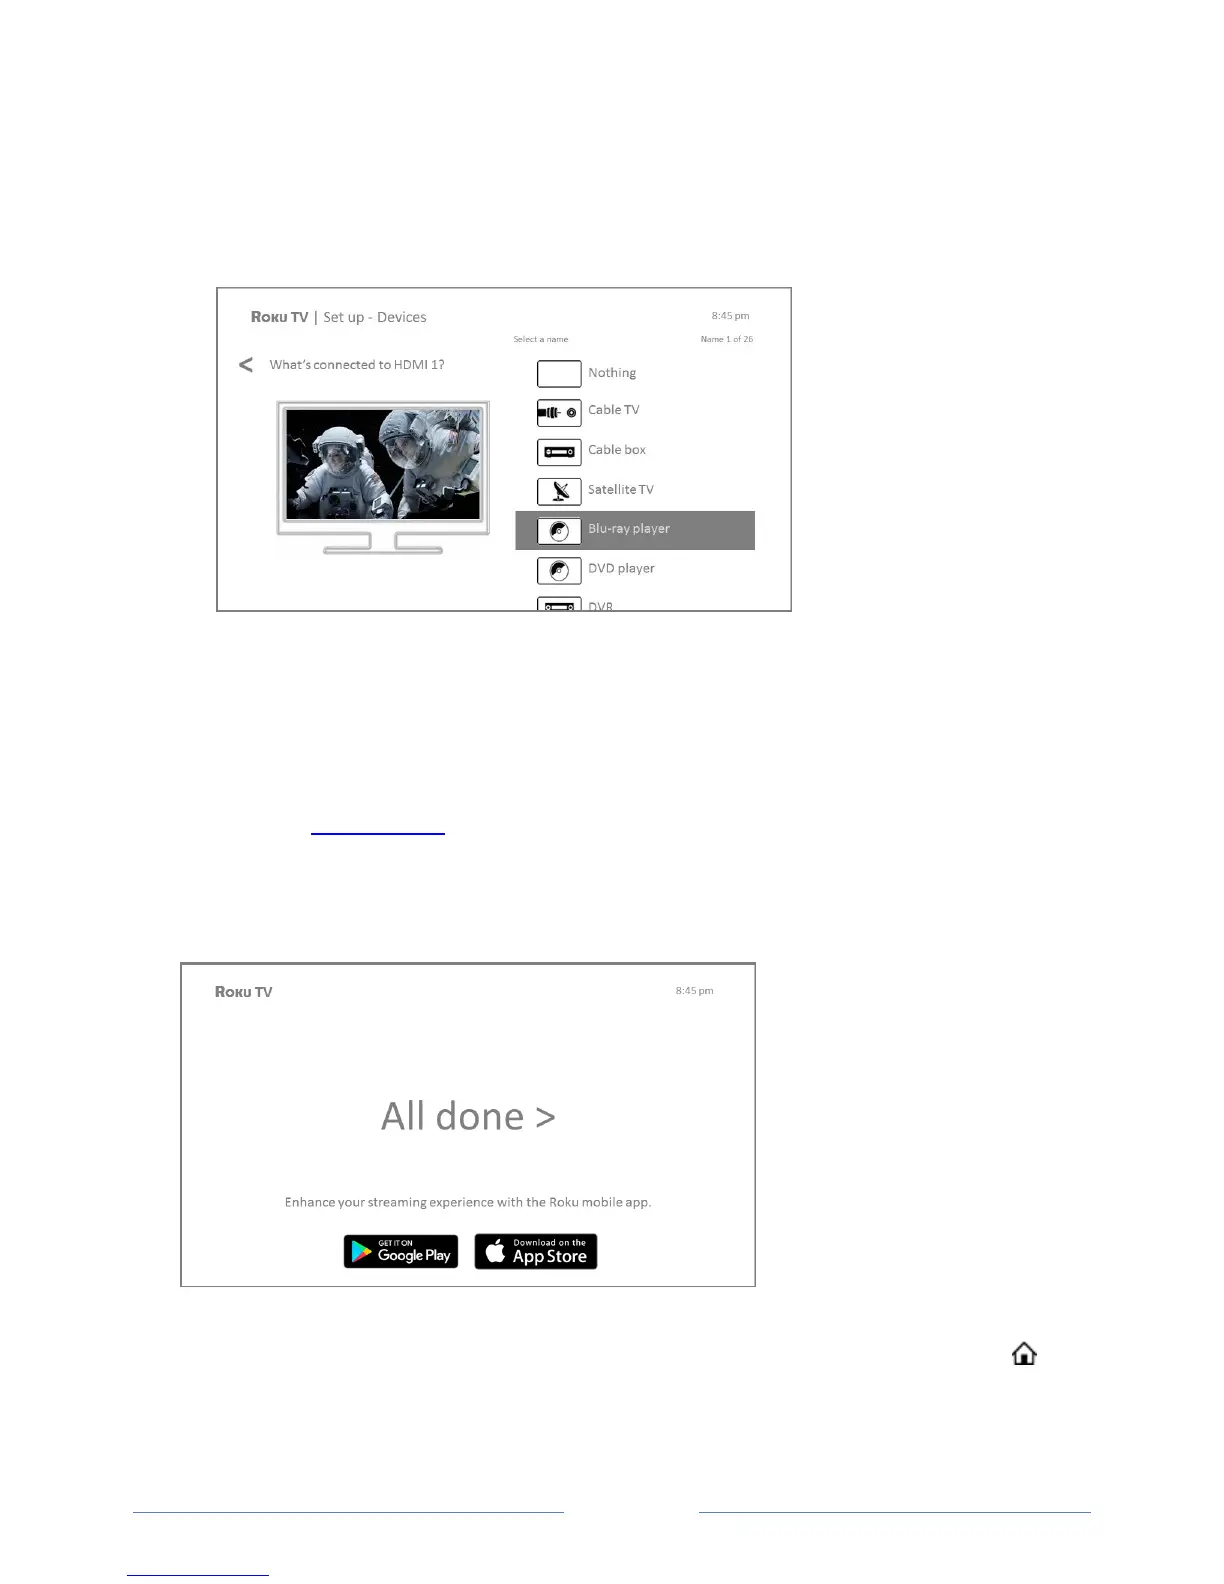
12. Connect all the devices you plan to use with your TV, turn them all on, and then select
Everything is plugged in and turned on. The TV now takes you step by step through each of its
inputs and asks what kind of device you have connected. On each input that has a connected
and active device, you can see its picture and hear its sound.
13. Press the UP or DOWN arrows to highlight the label you want to associate with the input. If you
are not using the input, select Nothing, and the input won’t appear on the Home screen.
14. While setting up your devices, rather than using the predefined names and icons, you can set a
custom name and icon. To do so, scroll up or down to highlight Set custom name & icon, and
then press OK. Follow the instructions on the screen to enter a name and select an icon for the
input. See Rename inputs for more information.
15. Repeat the previous step for each input.
You’re done with Guided Setup.
Note: Some Roku TVs, depending on where you live and other factors, show you an introductory
video filled with some great hints and tips. If you’re not interested in viewing this video, press on
the remote control to exit to the Roku TV Home screen.