•
,
II
3.
System
Data
Settings
MIDI Receive Channel
MIDI Transmll Channel
OMNI
Conlrol
Number
MIDI
Mapping
MIDI Filler
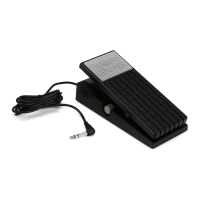
Conlrol Pedal
Oulpul Selecl
LCD Contrast
4.
Data
Initializing
Channel
"1
,.
Channel "1"
ON
T ransmll
011
Relerlo
"1.
Palch/Program
Change Number Corre-
spondence Chari"
Receplion
enabled
(RECEIVE)
Muled (MUTE)
Seleclion possible
(ENABLE)
50
You
can
gel
back each laclory sellings
01
Ihe Palch
or
Ihe
Syslem
by
Ihe lollowlng procedures.
[Step
1J
Turn the power swilch "OW.
(Wilh the amp's volume "OW thai
is
con-
nected
to
the
GP-16)
[Step
2J
Press Ihe number burtons
l.§j,
Wand
[§J.
While holding them. lurn Ihe power swileh
on.
When
powering up, Ihe display will show as lollows
When
Ihe
display
shows Ihe lollowing, data initializing
IS
available.
~
:;:,
c t
;:1
r'-
'=<
F'
r'
Eo
:.:;.
e
i.
i=lne
F·=.;T..,::h
Lo.tid
a.
Initializing
one
patch
This procedure replaces Ihe selling
alone
palch wilh
any
01
laclory
sellings
[Step
3-aJ
Using IFUNCTIONI call
up
the parameler
(have il appear
In
Ihe display) shown
below.
58
1.
r
,2CT".(lr··'~
F'r-·e:.=.et
CI
(:
e
F':3
+..
c h L
c,
.~
d
[Step
4-aJ
Press IWRITE,
A
Drase1
patch
IS
: F
,=:
T
F'
('
e.=.
~
t
....
h - I - 1 - shown
-+
R - 1 - 1 - A desuna!lon
palm
IS
shown
[Step
5-aJ
Using i a-Dial, seleci a palch from Ihe Fac-
lory
presets. Nexl, select a Deslination
paleh by
I GROUP
NB
I.
Bank bullons
[11-
f8]
and Number bullons:..:u -
i81
.
~
For information on how to select a palch, see
'\41
Patch
Selection.
(IlSP.12)~
(Example, When storing Ihe Faclory selling "A-1-S"
in
"A-S-8".)
[Step
7-aJ
Press
[WRITE
to
store in memory.
II
you
decide to cancel, press
IESCAPE!, and
you
will relurn to where you were in
[Step
5-8J.
, -
,uno::-
r-;"~-=~7_
, L
':;
,~d
C
(0
i'l
F' 1 e t
..
e
When storing compleled. and the display
Shows
Ihe
message above,
you
will return
to
where
you
were
in
[Step
3-aJ
If
needed, repeat
[Step
4-8)
to
[Step
7-a) to
make the settings as
~9u
wis_~...:.
When you wish to finish
this procedure, press IES_CA£il once to return in the
ordinary use (the Play rnode)
Once new settings have been stored, all settings
previously stored
lor
that palch will be erased.

 Loading...