26
Basic Operation
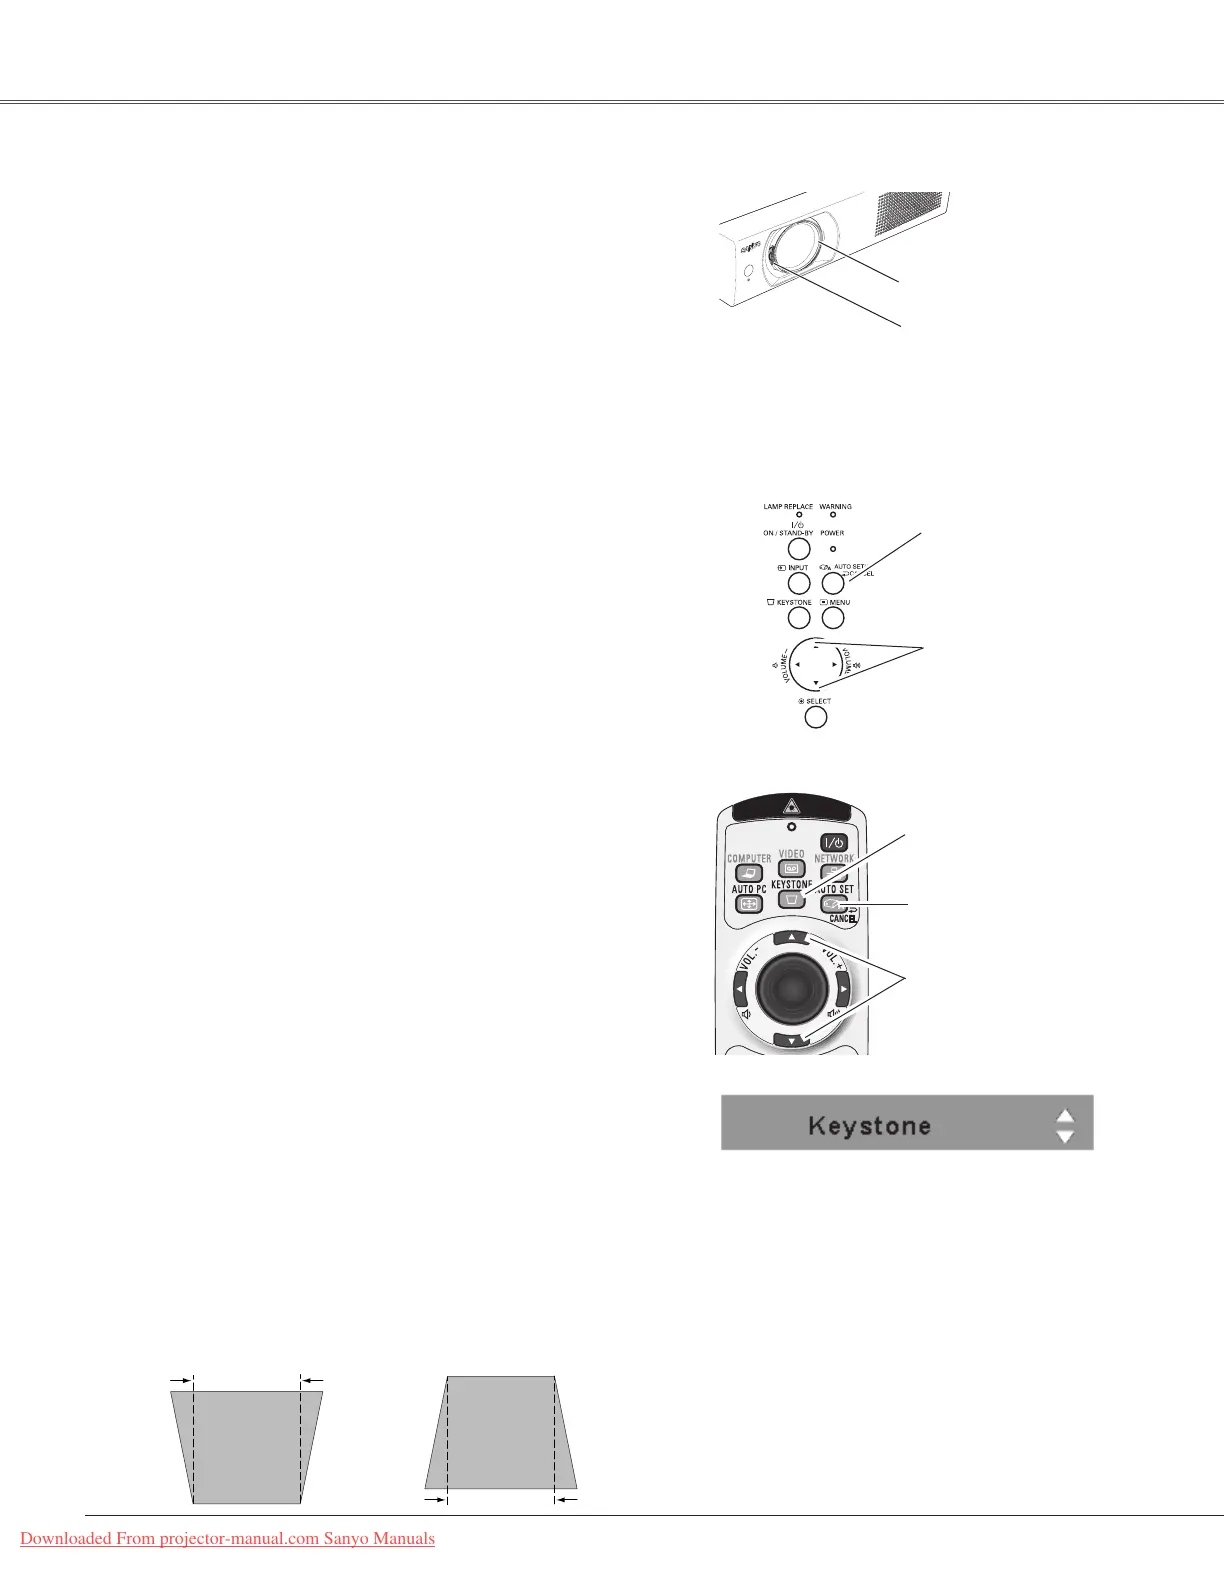
RotatetheZoomLevertozoominandout.
RotatetheFocusRingtoadjustthefocusoftheimage.
Zoom and Focus Adjustment
ZoomLever
FocusRing
If a projected picture still has keystone distortion after
pressingtheAUTOSETUP/CANCELbuttononthetopcontrol
or theAUTO SET/CANCEL button on the remote control,
correcttheimagemanuallyasfollows:
Press the KEYSTONE button on the remote control. The
Keystone dialog box appears. Usethe Point ▲▼ buttons to
correctkeystonedistortion.Thekeystoneadjustmentcanbe
stored(p.48).
Reducetheupperwidth
withthePoint
▲button.
Reducethelowerwidth
withthePoint
▼button.
•Thewhitearrowsindicatethatthereisnocorrection.
•Aredarrowindicatesthedirectionofcorrection.
•Anarrowdisappearsatthemaximumcorrection.
•If you press the KEYSTONE button on the remote
control once more while the keystone dialog box is
being displayed, the keystone adjustment will be
canceled.
•The adjustable range is limited depending on the
inputsignal.
Keystone Correction
Top Control
AUTO SETUP/CANCEL
button
POINT▲▼buttons
Remote Control
Auto setup function is provided to automatically correct
Keystonedistortionaccordingtotheprojector’stiltandadjust
thecomputerdisplayparameters(Finesync,Total dots, and
Pictureposition)byjustpressingtheAUTOSETUP/CANCEL
button on the top controlor theAUTO SET/CANCELbutton
on the remote control. The operational setup for the Auto
setupcanbechangedintheSettingmenu.Refertopage47
forthesettingoftheAutosetupfunction.
Notes:
•AutoKeystonecorrectsverticaldistortiononly;itdoesnot
correcthorizontaldistortion.
•AutoKeystonecannotworkwhenCeilingfeatureissetto
“On”intheSettingmenu(p.51).
•Perfect correction of the image distortion cannot be
ensured with the Auto setup function. If the distortion
cannot be corrected properly by pressing the AUTO
SETUP/CANCEL orAUTO SET/CANCEL button, adjust
manuallyby pressingthe KEYSTONEbuttonon
the top
control or on theremotecontrolorselectingKeystonein
theSettingmenu(p.48).
•Fine sync,Total dots, Horizontal and Vertical position of
some computers cannot be fully adjusted with theAuto
PCAdjustmentfunction.Whentheimageisnotprovided
properly with this operation, manual adjustments are
required(pp.34–35).
AUTO SET/CANCEL
button
Auto Setup Function
POINT▲▼buttons
KEYSTONE button
Downloaded From projector-manual.com Sanyo Manuals
 Loading...