SECTION 5
:
PRESET, TABLE DATA
SATO HT200e Page 5-13
DELETION FOR TABLE DATA
[FNC1]
[
→
]
[
→
]
[
→
]
[ENTR]
[ENTR]
[ENTR]
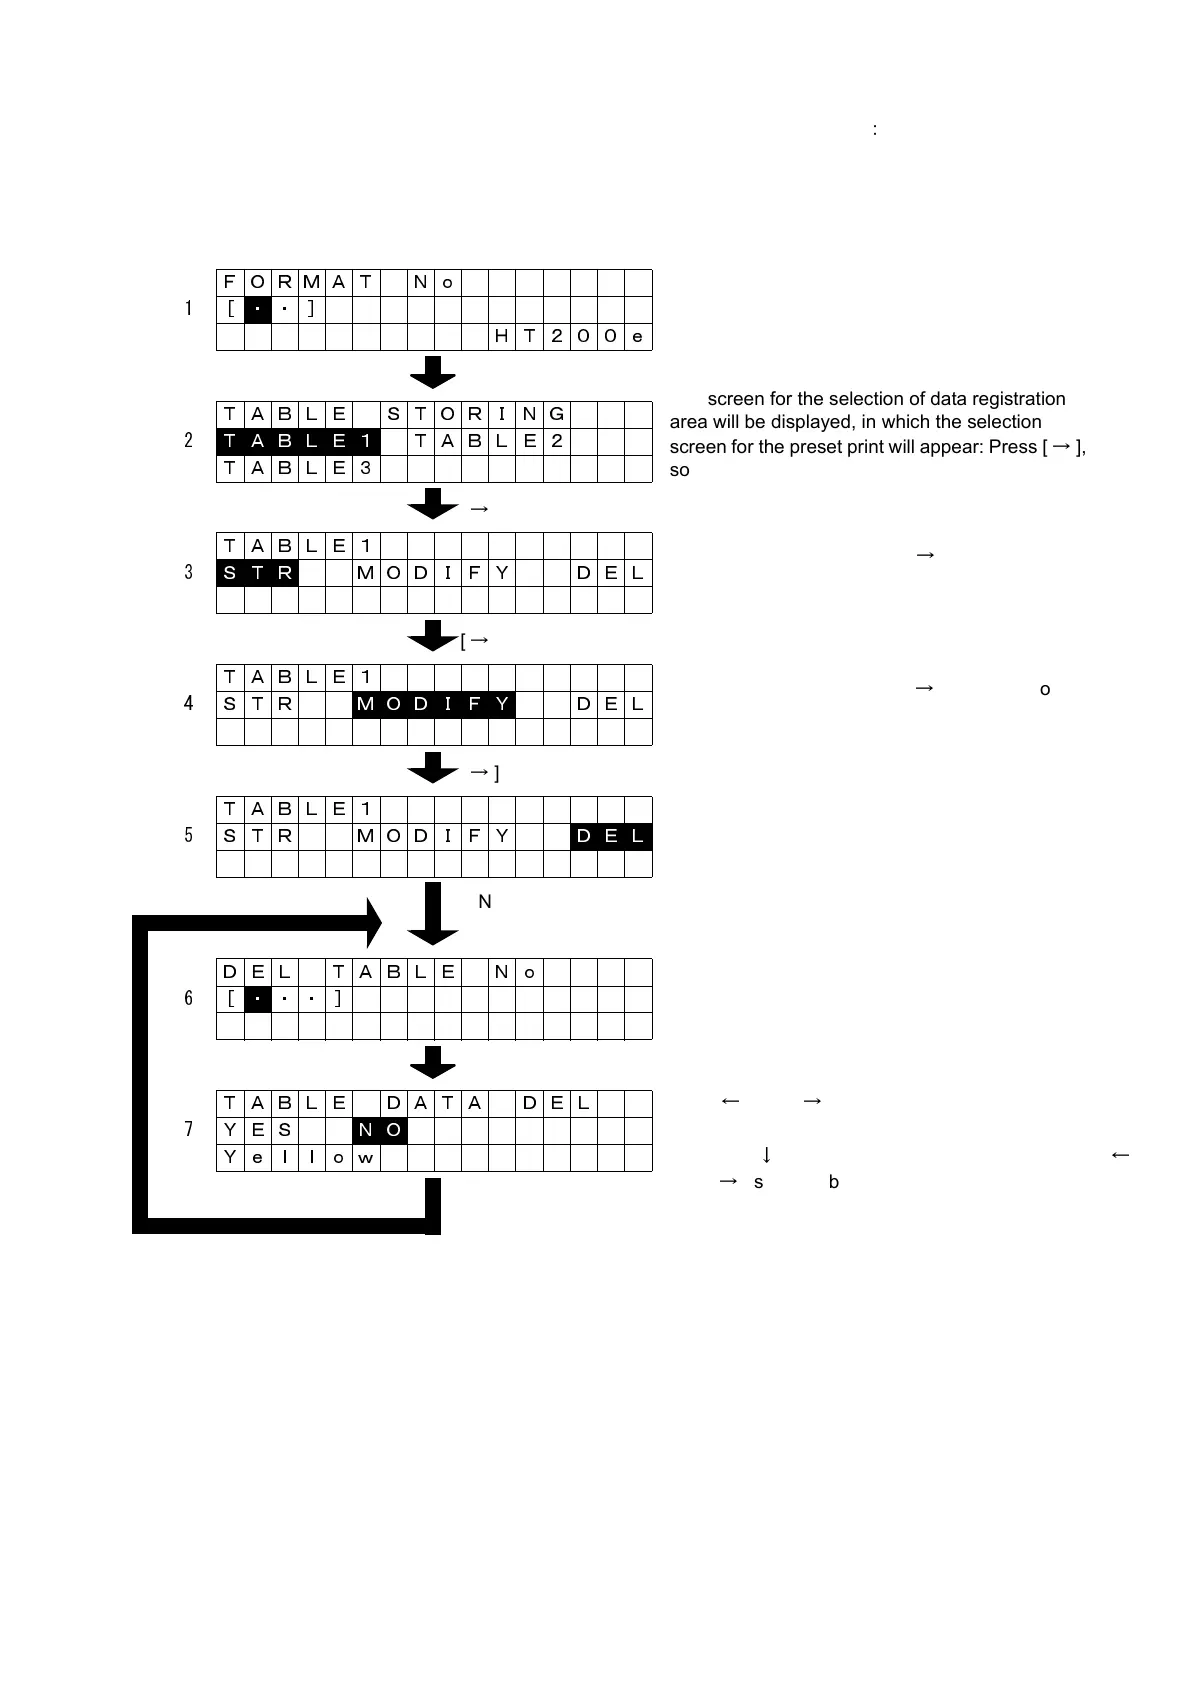
FORMAT No
1[
・ ・]
HT200e
TABLE STORING
2
T A B L E 1 TABLE2
TABLE3
TABLE1
3
S T R MODIFY DEL
TABLE1
4 STR
M O D I F Y DEL
TABLE1
5 STR MODIFY
D E L
DEL TABLE No
6[
・ ・・ ]
TABLE DATA DEL
7 YES
N O
Yellow
The screen for the selection of data registration
area will be displayed, in which the selection
screen for the preset print will appear: Press [
→
],
so that it goes to the screen for the process No. 3.
Press [FNC1], so that it goes from the modes of the
print of format to the table data.
The screen for the selection of table data registra-
tion will be displayed: Press [
→
], so that it goes to
the screen for the process No. 4.
The screen for the selection of table data modifica-
tion will be displayed: Press [
→
], so that it goes to
the screen for the process No. 5.
The screen for the selection of table data deletion
willbe displayed: Press [ENTR], so that it goes to
the screen for the process No. 6.
Table No. can be entered: Press [ENTR], so that it
goes to the confirmation of table data deletion.
Use [
←
] and [
→
] to select for confirmation. Press
[ENTR], so that it deletes the table data specified:
Pressing [
↓
]displays table data. Whereas pressing [
←
]
and [
→
] shows table data for scrolling.