SECTION 2: INSTALLATION AND SETUP
Page 2-24 SATO HT200e
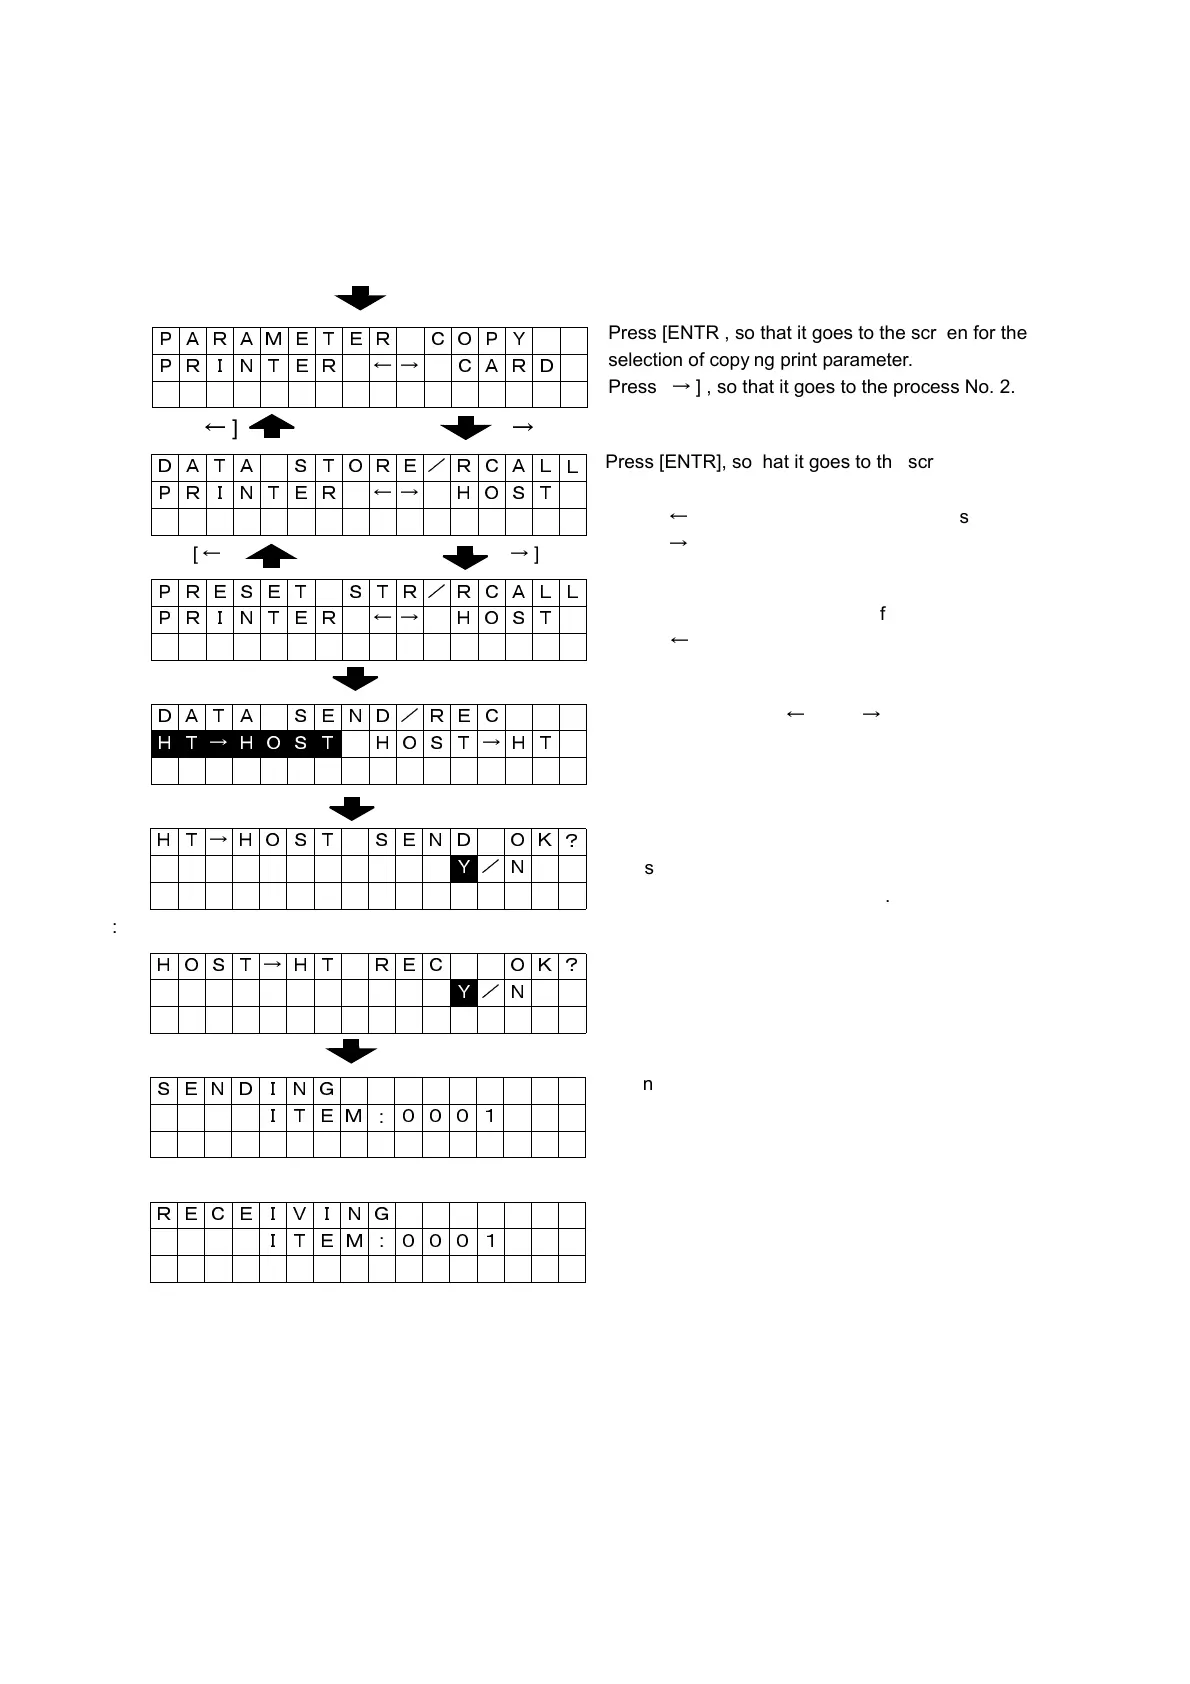
PROCESS ON THE SCREEN FOR TRANSFER OF PRESET DATA
6 + Power “ON”
[
←
][
→
]
[
←
][
→
]
Or:
Or:
Preset data that are transferred from a host computer will be registered in a printer. The data registered in the
printer can be transferred to the host.
Note: When preset data is transferred, on-line cable must be connected to the host before turning the power
“ON”.
PARAMETER COPY
1
PRINTER ←→ CARD
DATA STORE/RCAL
L
2
PRINTER ←→ HOST
PRESET STR/RCAL
L
3
PRINTER ←→ HOST
DATA SEND/REC
4
H T → H O S T HOST→HT
HT→HOST SEND OK
?
Y /N
HOST→HT REC OK?
Y /N
SENDING
ITEM
:
0001
RECEIVING
ITEM
:
0001
Press [ENTR], so that it goes to the screen for the
selection of copying print parameter.
Press [
→
] , so that it goes to the process No. 2.
Press [ENTR], so that it goes to the screen for the
selection of transferring print parameter.
Press [
←
], so that it returns to the process No. 1.
Press [
→
], so that it goes to the process No. 3.
Press [ENTR], so that it goes to the screen for the
selection of the direction to transfer preset data.
Press [
←
], so that it returns to the process No. 2.
For direction, select [
←
]and [
→
], and press
[ENTR] to go to the screen for the confirmation of
the receiving-and-sending.
Press [ENTR]:
“Y” is to start sending and receiving.
“N” is to return to the process No. 3.
When sending one item is complete, the
number of items will be added.
After sending, it returns to the process No. 3.
When receiving one item is complete, the number
of items will be added.
After receiving, it returns to the process No. 3.