SECTION 2: INSTALLATION AND SETUP
Page 2-30 SATO HT200e
PROCESS ON THE SCREEN FOR SERVICE MAINTENANCE MODE
9 + Power “ON”
[
←
][
→
]
[
←
][
→
]
[
←
][
→
]
[
←
][
→
]
Press [ENTR], so that it can go to each screen for processing.
For Service Maintenance Mode, [PGUP] is invalid, whereas [FMT] is valid.
PROCESS ON THE SCREEN FOR TEST PRINT
9 + Power “ON”
[ENTR]
[ENTR]
[ENTR]
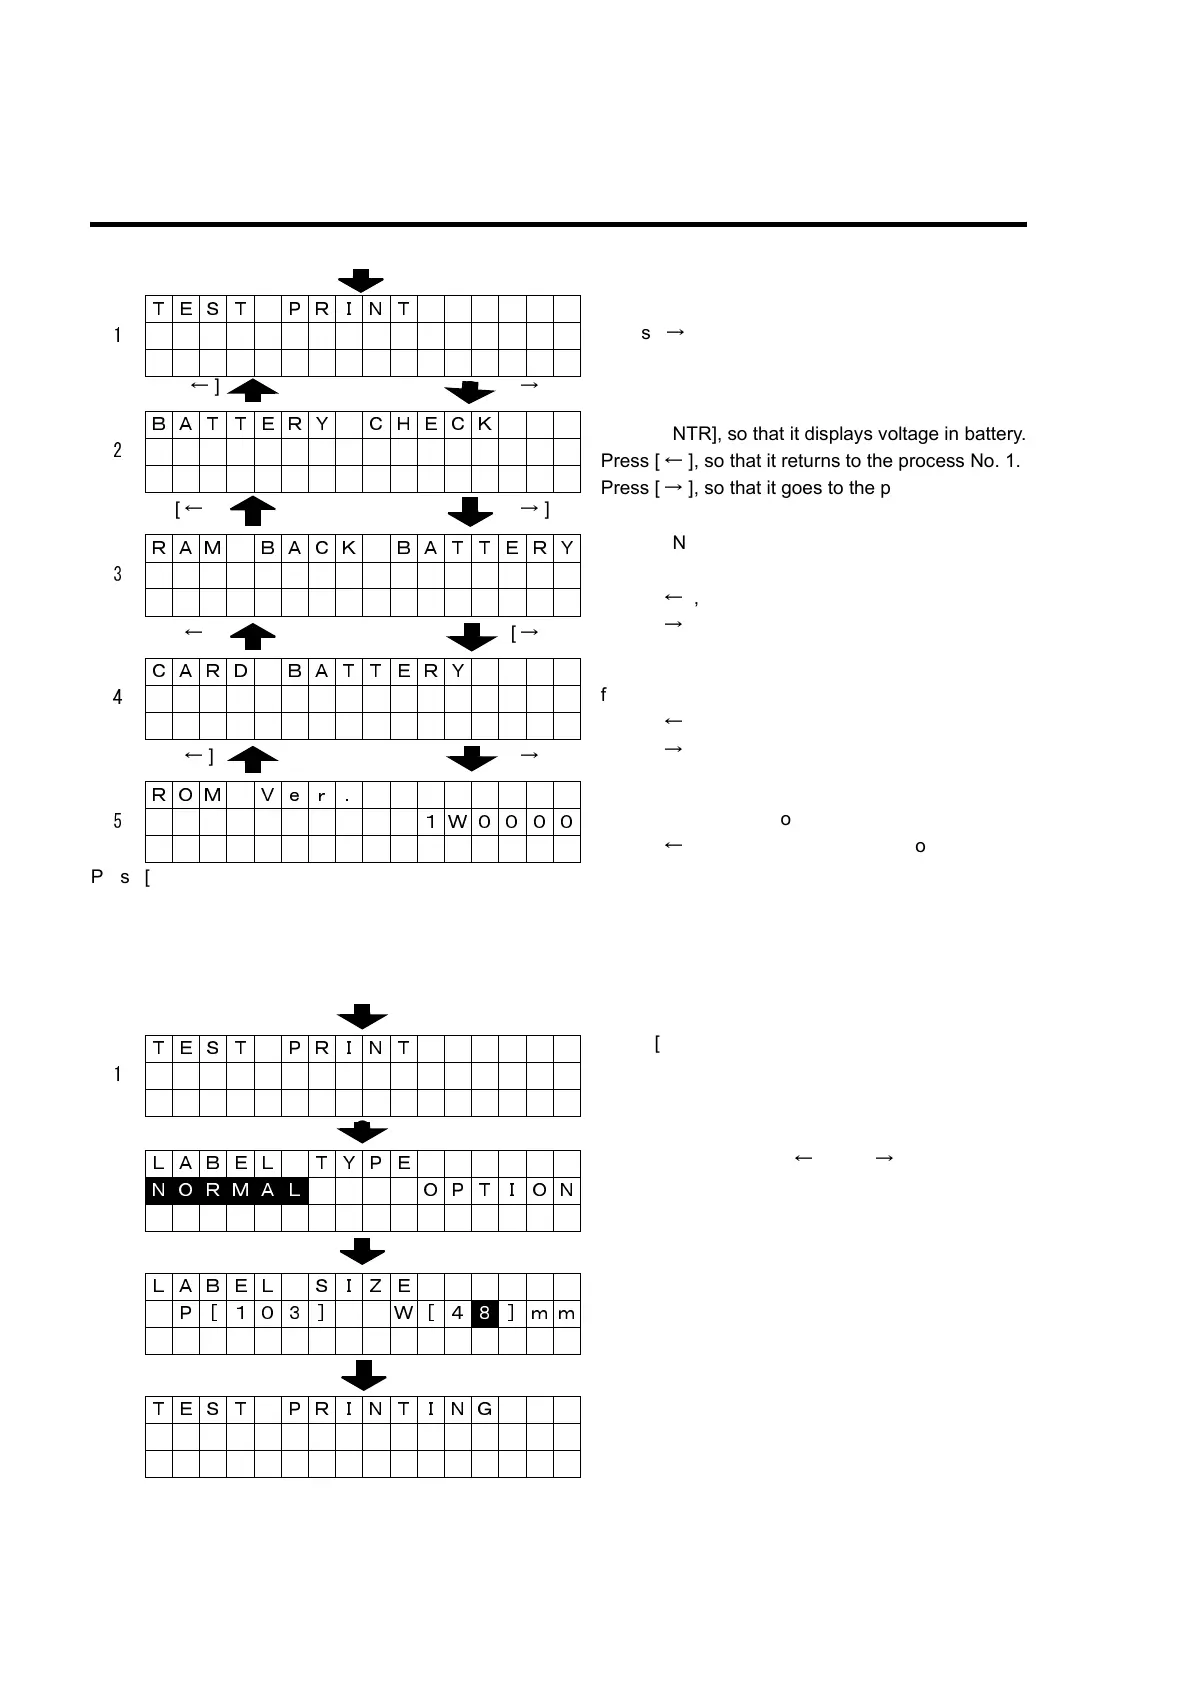
TEST PRINT
1
BATTERY CHECK
2
RAM BACK BATTERY
3
CARD BATTERY
4
ROM Ver .
5 1W0000
TEST PRINT
1
LABEL TYPE
N O R M A L OPTION
LABEL SIZE
P[ 103 ] W[ 4
8 ]m m
TEST PRINTING
Press [ENTR], so that it displays voltage in battery.
Press [
←
], so that it returns to the process No. 1.
Press [
→
], so that it goes to the process No. 3.
Press [ENTR], so that it starts test print.
Press [
→
], so that it goes to the process No. 2.
Press [ENTR], so that battery level (or remaining
fuel) can be indicated for RAM’s back-up.
Press [
←
], so that it returns to the process No. 2.
Press [
→
], so that it goes to the process No. 4.
Press [ENTR], so that battery level (or remaining
fuel) can be indicated for card’s back-up.
Press [
←
], so that it returns to the process No. 3.
Press [
→
], so that it goes to the process No. 5.
A ROM version can be displayed:
Note that [ENTR] is not available.
Press [
←
], so that it returns to the process No. 4.
Select label type with [
←
] and [
→
] and press
[ENTR],so that it goes to the screen for label size.
Press [ENTR], so that it goes to the screen for the
selection of the label type in the test print.
Label size can be entered with numeric keypad:
Press [ENTR], so that it starts printing.
es
pr
n
w
e
erm
na
e
w
en pr
n
ng one s
ee
of paper is complete: Press [S/S], so that test print
can be executed as is ordered.
Ensure that whether label has been properly set prior
to test print.