SECTION 2: INSTALLATION AND SETUP
Page 2-34 SATO HT200e
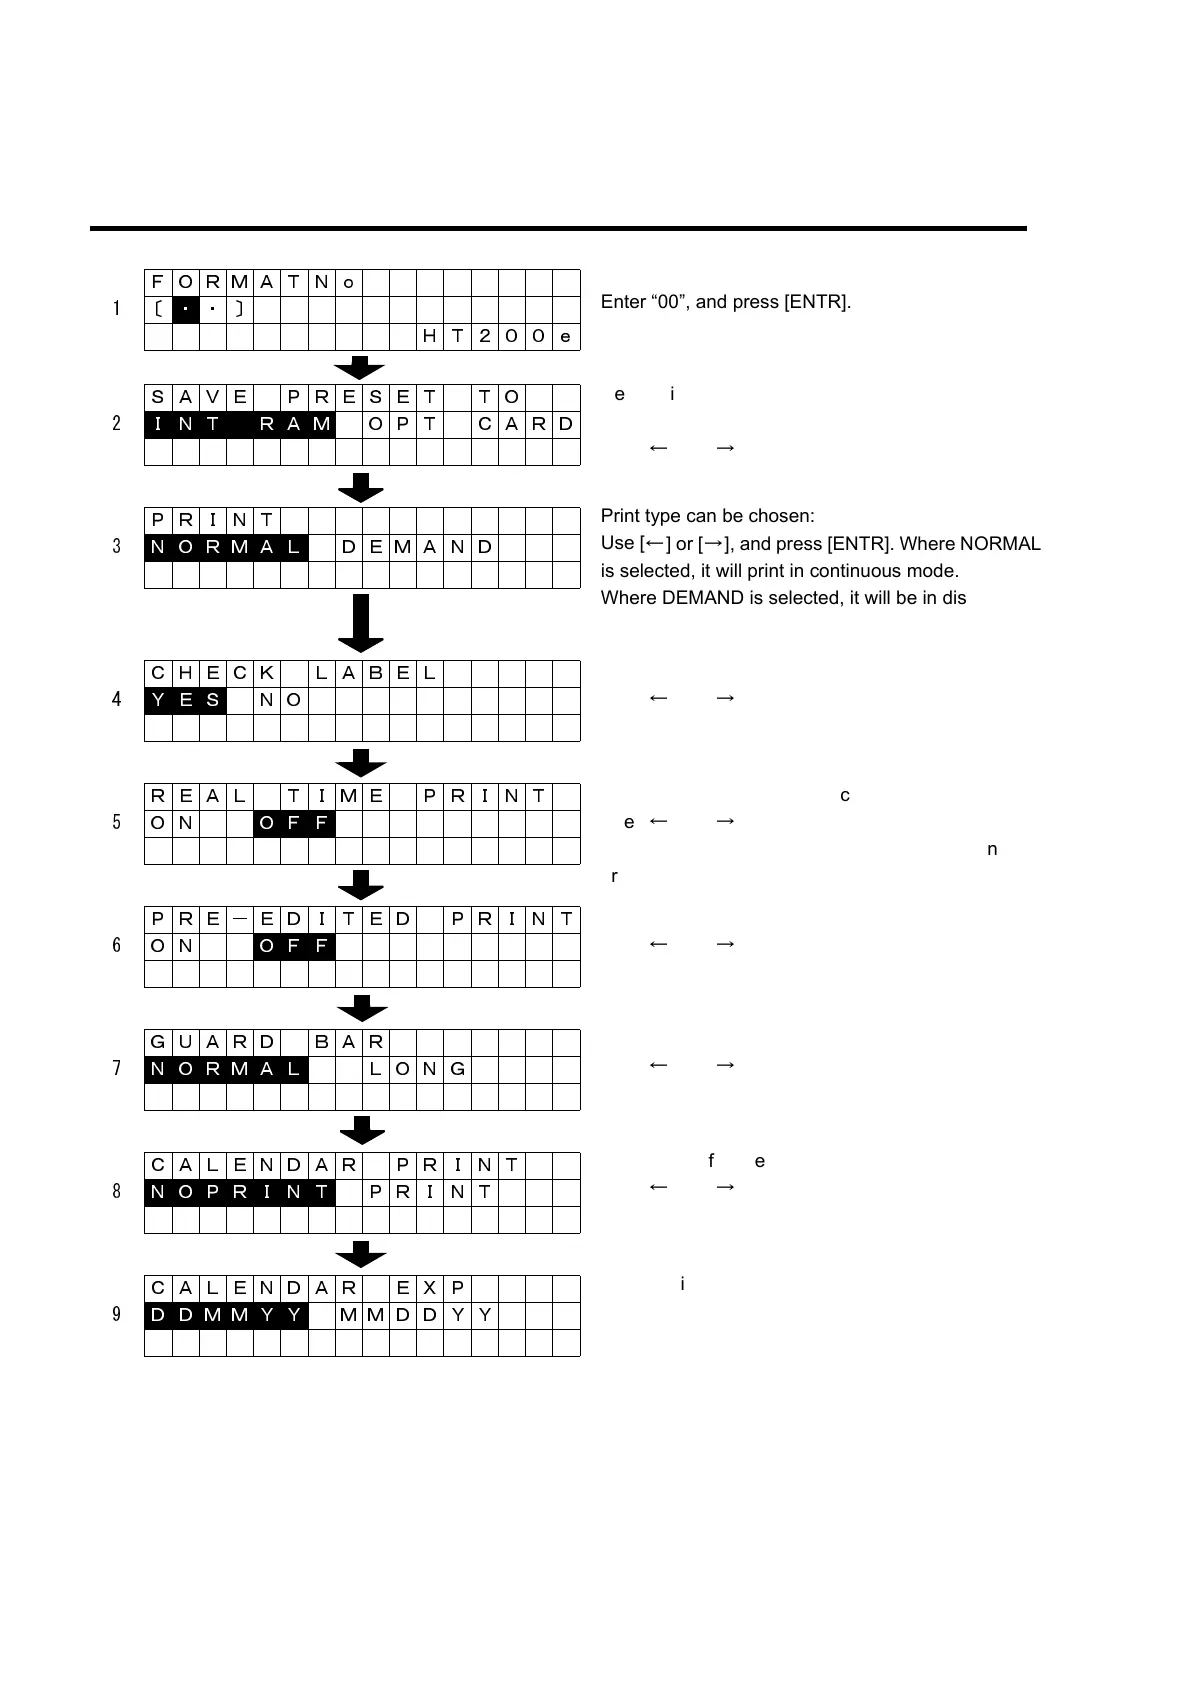
PROCESS ON THE SCREEN FOR INITIAL SETTING
FORMATNo
1〔
・ ・〕
HT200e
SAVE PRESET TO
2
I N T R A M OPT CARD
PRINT
3
N O R M A L DEMAND
CHECK LABEL
4
Y E S NO
REAL TIME PRINT
5ON
O F F
PRE-EDITED PRINT
6ON
O F F
GUARD BAR
7
N O R M A L LONG
CALENDAR PRINT
8
N O P R I N T PRINT
CALENDAR EXP
9
D D M M Y Y MMDDYY
Enter “00”, and press [ENTR].
Print type can be chosen:
Use [
←
] or [
→
], and press [ENTR]. Where NORMAL
is selected, it will print in continuous mode.
Where DEMAND is selected, it will be in dispense
mode. Note that available size of label ranges from
Destination (Internal memory or card) to preset can
be selected:
Use [
←
] or [
→
], and press [ENTR].
With or without check label can be selected:
Use [
←
] or [
→
], and press [ENTR].
IMPORTANT: This is the option for NORMAL in the
process 3.
Print in real time can be selected:
Use [
←
] or [
→
], and press [ENTR].
IMPORTANT: This is the option for DEMAND in the
process 3.
Print on a case-by-case basis can be selected:
Use [
←
] or [
→
], and press [ENTR].
IMPORTANT: This is the option for OFF in the
Guard Bar mode can be selected:
Use [
←
] or [
→
], and press [ENTR].
Format 1 to 9, 14, 15, 20, 22, 24, and 28 can be
Print of date for fixed format can be selected:
Use [
←
] or [
→
], and press [ENTR].
Format 1 to 9 can be made available.
Presentation for the date in print can be selected:
Select DDMMYY or MMDDYY.
IMPORTANT: This is the option for PRINT in the
process 8.