SECTION 5
:
PRESET, TABLE DATA
SATO HT200e Page 5-3
PRESET DATA REGISTRATION
[RCL]
[
→
]
[ENTR]
[ENTR]
[ENTR]
[ENTR]
[ENTR]
Note: Where asterisk mark or “*” can be seen in the upper right on the screen, entry by scanner
can be made possible.
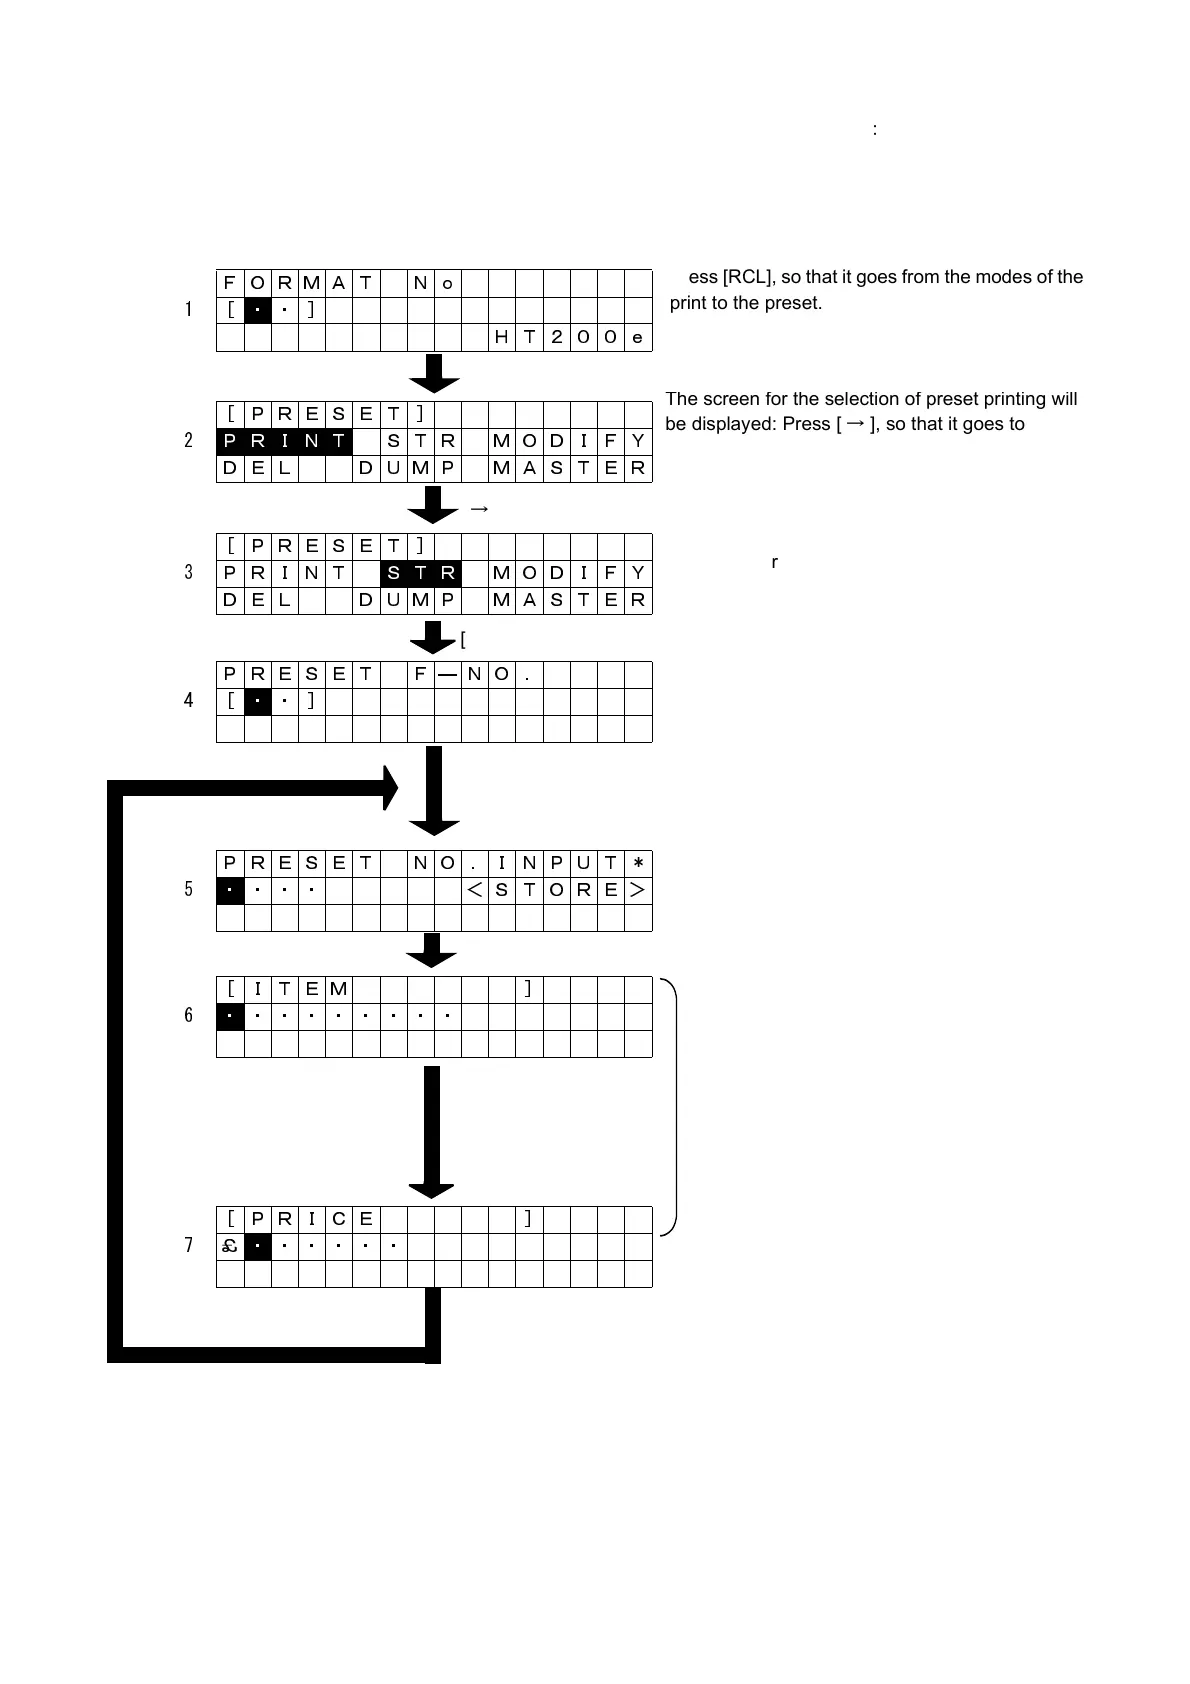
FORMAT No
1[
・ ・]
HT200e
[PRESET]
2
P R I N T STR MODIFY
DEL DUMP MASTER
[PRESET]
3 PRINT
S T R MODIFY
DEL DUMP MASTER
PRESET F―NO .
4[
・ ・]
PRESET NO .INPUT*
5
・ ・・・ <STORE>
[ITEM ]
6
・ ・・・・・・・・
[ PRICE ]
7£
・ ・・・・・
Press [RCL], so that it goes from the modes of the
print to the preset.
e screen
or
e se
ec
on o
prese
pr
n
ng w
be displayed: Press [
→
], so that it goes to the
process No. 3. Press [ENTR], so that it goes to the
entry of preset number.
The screen for the selection of preset storing will be
displayed: Press [ENTR], so that it goes to the
entry of format number.
The format number of preset storing can be entered:
Press [ENTR], so that it goes to the entry of preset
number.
The preset storing number can be entered:
Press [ENTR], so that it goes to the data entry for
the format specified.
Since the contents for entry will be changed,
based on the format No. to be registered,
enter data registered to each field, and press
[ENTR].
Note: Entry by scanner is available when ITEM
is input.
When data entry in all fields is finished, press
[ENTR], so that one preset data will be regis-
tered. Note that since the preset No. will auto-
matically be counted and returned to the entry
of preset number, be sure to repeatedly enter
when continuous input is required.