www.scheppach.com / service@scheppach.com / +(49)-08223-4002-99 / +(49)-08223-4002-58
GB
|
33
Note
Loosen spark plug can overheat and damage the en-
gine. And over tightening the spark plug can damage
the threads in the cylinder head.
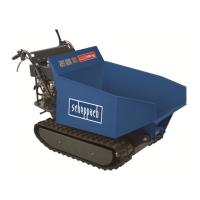
Lubrication drive chain (Fig.9-10)
Remove cover (Fig.9 Pos.A) concerning the screws
(19). Regrease drive chain (24) every 500 operating
hours. Recap the opening with the lid (Fig.9 Pos.A)
and the screws (19) after servicing.
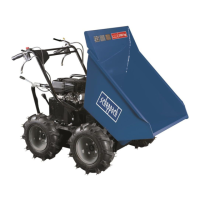
Disassembling wheels (Fig.6)
For maintenance disassemble the wheels as shown
in gure 6.
Please note that the following parts of this product are
subject to normal or natural wear and that the follow-
ing parts are therefore also required for use as con-
sumables.
Wear parts*: spark plug, belt
* Not necessarily included in the scope of delivery!
15. Disposal and recycling
The equipment is supplied in packaging to prevent it
from being damaged in transit. The raw materials in
this packaging can be reused or recycled. The equip-
ment and its accessories are made of various types
of material, such as metal and plastic.
Defective components must be disposed of as spe-
cial waste. Ask your dealer or your local council.
Recommended engine oil
SAE 10W-30 or SAE 10W-40 (depending on appli-
cation temperature).
Dispose of waste oil properly at the local used oil
collection point. It is forbidden to discharge waste oil
into the ground or mixed with other waste.
Important hint in case of sending the equipment
to a service station:
In case of delivery, please note that the unit must be
free of oil and fuel to ensure safe shipment.
Air lter
Frequently cleaning of the air lter prevents carbure-
tor malfunction.
Clean the air lter and change air lter inserts
(Fig. 19 and 20)
• The air lter (14) should be cleaned every 30 hours.
• Remove the air lter cover (Pos.A) by loosening the
thumbscrew (Pos.B1)
• Loosen the thumb screw (Pos.B2) and remove the
air lter (14)
• Clean the air lter by tapping , replace if necessary.
• Reassemble in reverse order.
m WARNING
NEVER use gasoline or cleaning solvents with a low
ash point to clean the air lter element. A re or
explosion could result.
Note
Never run the engine without or with a damaged air
lter. Dirt gets so into the engine, causing serious
engine damage can occur. In this case, seller, and
manufacturer disassociate from any warranty.
Check, clean and replace spark plug (13)
(Fig.11/15)
Check the spark plug (13) after 10 hours on dirt and
grime. If necessary, clean it with a copper wire brush.
Maintenance the spark plug after 50 hours of operation.
• Remove the spark plug ignition cable (25).
• Remove any dirt from the base of the spark plug
(13).
• Use a wrench to remove the spark plug (13).
• Check the spark plug (13) visually. Remove any de-
bris with a wire brush.
• Look for discolouration on the top of the spark plug.
By default, the colour should be bright.
• Check the spark plug gap. An acceptable gap width
is 0.6 to 0.7 mm (see Fig.11).
• Remove the spark plug (13)carefully by hand.
• If the spark plug (13) has been inserted, tighten
them with a spark plug wrench.
• Attach the spark plug connector (25) at the spark
plug (13).
 Loading...