SERVICE MANUAL
30.22
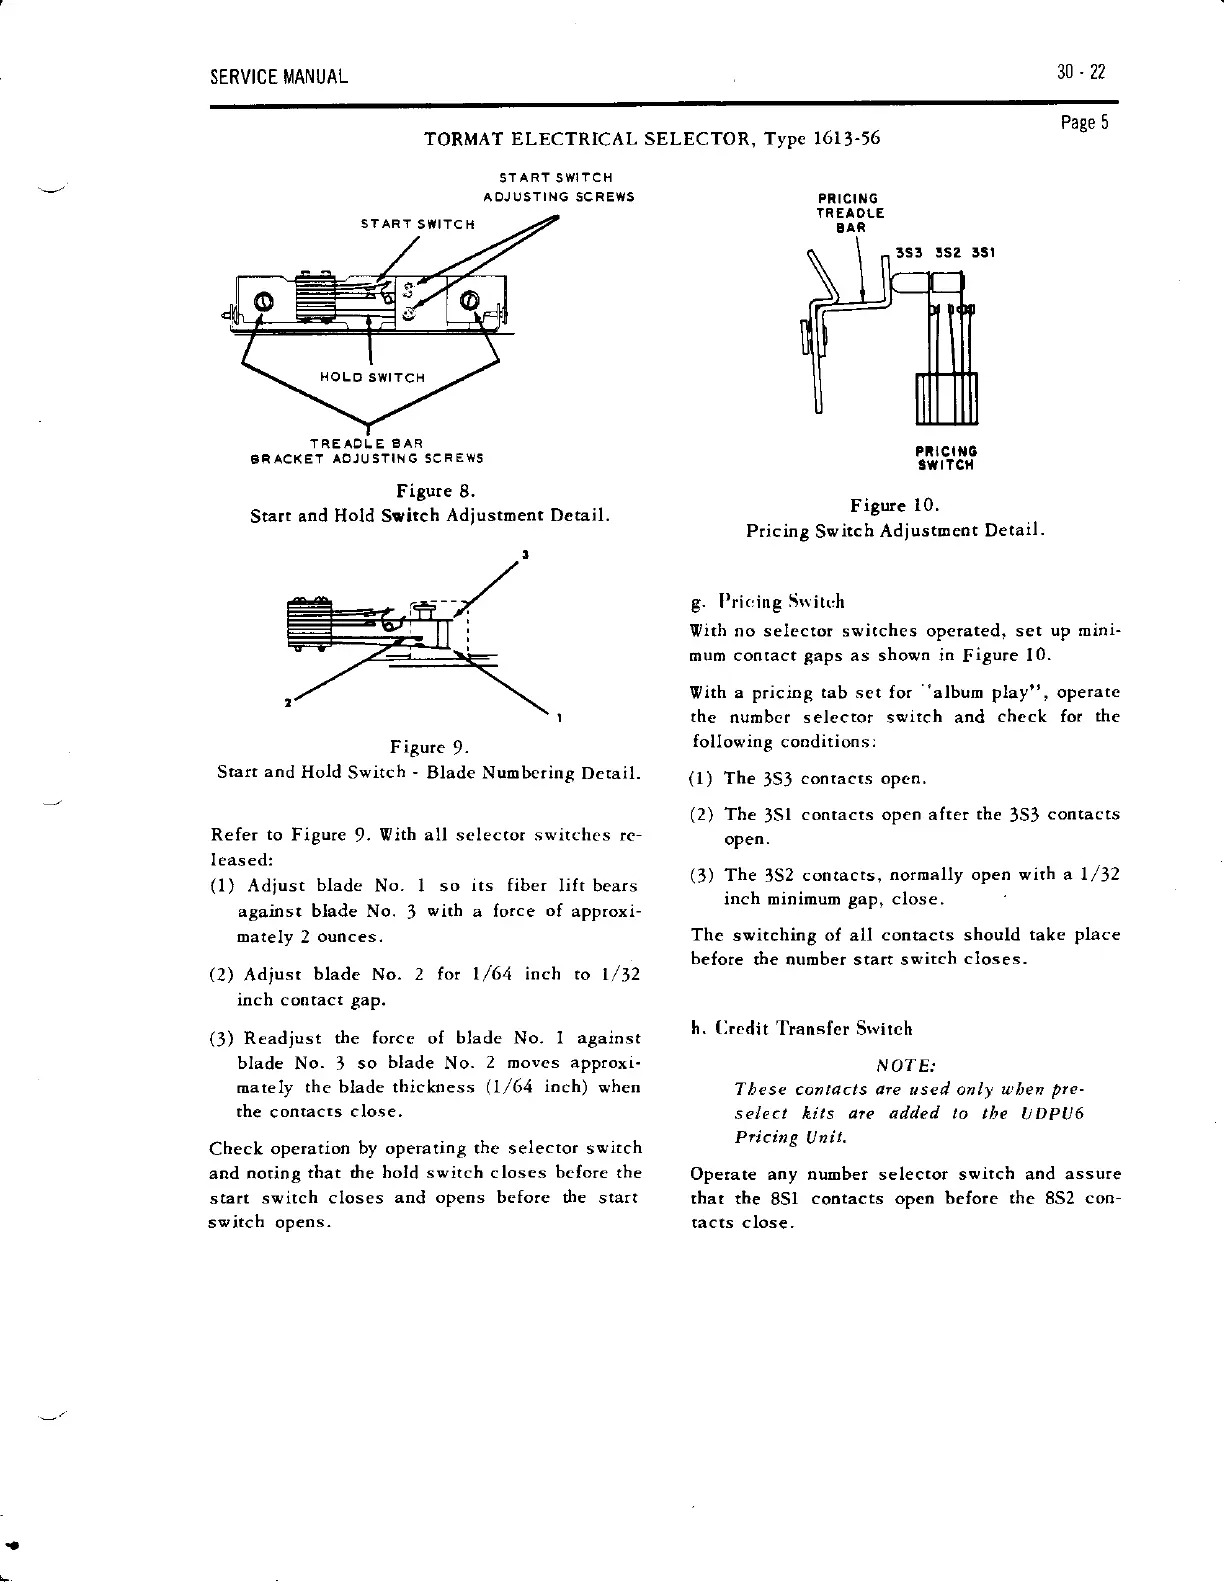
STAR'T
SWITC H
HO
L0
SWtTCti
TREAOLE
BAR
BR
ACK ET
AOJU
STIN
G SCFgWS
Figure 8.
Start
and Hold Ssitch
Adjustoent Detail.
Figure
9.
Start
and
Ho.ld
Switch
-
Blade Nuobering
Detail.
Refer
to
F.igure
9.
Vith all selectot switches rc-
leased:
TORMAT ELECTRICAL SELECTOR,
START S
WITCH
AO.JUSTING SCREWS
so
its fiber
lift bears
witb
a force
of
approxi-
lor
l/64
inch to
1/\2
Type 1613-56
PR ICITJG
TREAOLE
8AR
Page 5
PRt
C
I t{0
3Wr?CH
Figure
10.
Pricing
Switch
Adjustoenr
Detail.
g. I)rir:ing
Srritch
Vith no selector svirches operated, set
up mini-
mum coolact
gaps
as shown in
Figure
10.
Vith a
priciog tab set for
''album
play", operate
the
nurhbcr selector switch and
check for
the
following
cooditions:
(1)
The
lSl
contacts opeo,
(2)
The
lSl
contacts opeo after
the
JS3
contacts
oPen.
(3)
The
3S2
contacts,
normally open with a 1/)2
inch mtnimum gap. close.
The
switching of all
contacts should
take place
before
the aturEber start switch
closes.
h.
(lredit
Transfcr Srvitch
NOTEr
These contocts are ased only tLl)en
pre-
sekct Aits
dre ddded to
the
UDPU6
Pricing
U
tuil.
Opetate aoy number selector switch and assure
that the
8Sl
cootacts opelr before
the
8S2
con-
tacts close.
(1)
Adiust
blade
No. I
against blade No.
l
mately
2
ounces.
(2)
Adjust
blade No. 2
inch cootact
gap.
(3)
Readjust
the forcc
of
blade
No.
1 against
blade No.
J
so
blade
No.
2 movcs approxi-
mately
the blade thickness
(1,/64
ioch)
when
the
contacts
close.
Check
operation
by operating the selector sw.itch
aod noting
that the bold switch closes before the
start
switch closes
and opens before the
start
switch opens.