− 132 −
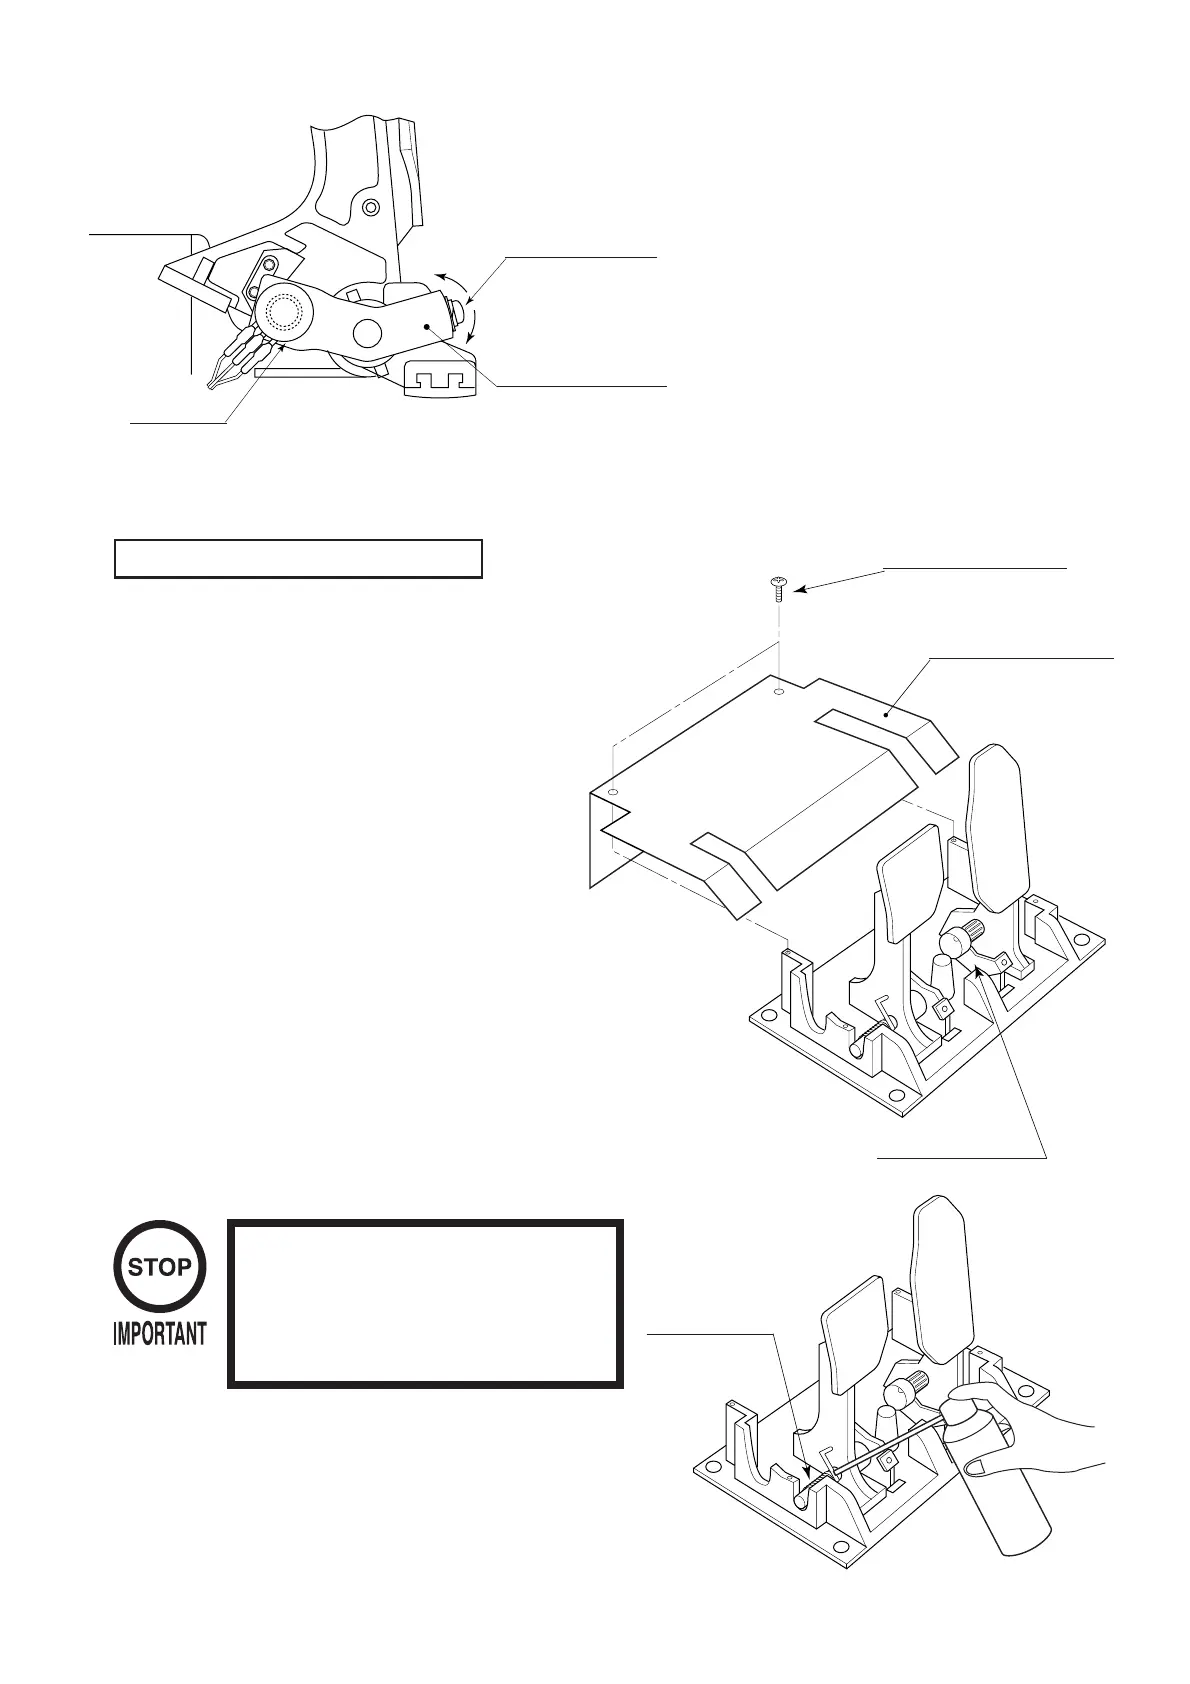
① Turnthepoweroff.
②Takeoutthe2screwsandremovethe
Potentiocover(FIG.13.1c).
③ Disconnecttheconnectorofthe
volumetobereplaced.
④ Removethescrewwhichsecuresthe
Potentiobase(FIG.13.1b).
⑤ RemovethePotentiobasetogether
withthevolumeasisattached.
(FIG.13.1c)
⑥ Removethebaseandthegearto
replacethevolume.
⑦ Adjustthevolumeaspertheprevious
pageafterreplacing.
TRUSSSCREW(2)
M4×8
POTENTIOCOVER
POTENTIOBASE
FIG.13.1c
13 − 2 GREASING
Besuretousethedesignated
grease.Usingundesignated
greasecancauseparts
damage.
Usespraygreaseonceeverythreemonthsto
greaseuptheSpringandgearmeshportion.
Forspraygreasing,useGREASEMATE
(PARTNo.090-0066).
GREASING
SCREW
M5×12,w/flat&
springwashers
POTENTIOBASE
FIG.13.1b
VR
220-5484
220-5753
② Loosenthescrewwhichsecure
thePotentiobase,andadjustthe
Volumevaluebymovingthe
Base.(FIG.13.1b)
③ SecurethePotentiobase.
④ Performvolumesettinginthe
volumesettingmode.
(See10-3G.)
FIG.13.2
REPLACEMENTPROCEDURE

 Loading...