Do you have a question about the Sega AV F-ZERO AX and is the answer not in the manual?
Explains the meaning of hazard pictographs like DANGER, WARNING, and CAUTION.
Explains pictographs for safe usage, such as 'HANDLE WITH CARE' and 'Protective Earth Terminal'.
Provides essential instructions for safe operation and maintenance.
Steps for installing the coin chute tower and POP components.
Instructions for attaching the POP and POP card to the card reader.
Tests RAM and Media Board components for proper function.
Instructions for loading and setting dedicated cards into the dispenser.
Procedure for cleaning the card reader/writer head using a cleaning card.
Steps to remove jammed cards from the card reader/writer.
Precautions for unplugging, retracting adjusters, and handling the cabinet.
Instructions and safety warnings for disassembling and moving through narrow spaces.
Checks initial settings, input/output devices, and IC board status.
Tests memory components on the Media Board for proper function.
Regular maintenance checks including memory, settings, input, and output.
Checks input devices, adjusts/replaces them, and verifies mechanism movements.
Checks and adjusts monitor settings for optimal display.
Performs memory tests on the IC board.
Adjusts difficulty level based on game play time and histogram data.
Tests the memory IC on the TRIFORCE Main Board.
Checks the status of input devices like steering, pedals, and buttons.
Checks the status of output devices such as lamps and motors.
Configures game settings like difficulty, handicap, and sound.
Enables or disables the memory card slot for GameCube compatibility.
Sets the game's difficulty level from VERY EASY to HARDEST.
Enables or disables handicap for COM and player battles.
Controls COM machine participation in Race Mode.
Controls the display of passwords for F-ZERO Internet Rankings.
Sets the number of laps for Race Mode.
Checks the card reader/writer for read, write, and print errors.
Cleans the card reader/writer head using a cleaning card.
Procedure for adjusting or replacing the Y-axis variable resistor.
Steps for replacing or adjusting microswitches for paddle levers.
Instructions for greasing the gear mesh portion of the steering unit.
Procedure for adjusting or replacing the X-axis steering VR.
Procedure for adjusting or replacing the Roll VR for seat tilt.
Instructions for greasing the gear mesh and spring portions.
Guidelines for maintaining and troubleshooting the seat motion mechanism.
Procedure for adjusting or replacing volume potentiometers for controls.
Instructions for greasing spring and gear mesh portions.
Safety warnings for monitors regarding voltage, static, and isolation.
Instructions for cleaning CRT surfaces while protecting anti-static coating.
Steps for adjusting monitor settings like brightness, contrast, and position.
Troubleshooting steps for errors related to card reader/writer and card data.
Lists TRIFORCE board error messages, causes, and countermeasures.
Explains messages on the drive board's 7-segment display for diagnostics.
Describes mechanical errors not related to the card reader/writer.
Addresses common problems like machine activation or lamp issues.
Steps for safely removing the GD-ROM drive from the base.
Procedure for safely removing the TRIFORCE game board.
Explains the components of the TRIFORCE game board.
Instructions for replacing the battery on the TRIFORCE main board.
Safety warnings for replacing DIMM board battery packs.
Precautions for shipping the TRIFORCE or GD-ROM drive for servicing.
Safety guidelines for setting up network play, including power and cables.
Step-by-step instructions for connecting network (LAN) cables between machines.
Configuration steps for network play settings like link number and group.
General precautions for operating machines linked via network play.
| Game Title | F-ZERO AX |
|---|---|
| Manufacturer | Sega |
| Developer | Amusement Vision |
| Publisher | Sega |
| Release Year | 2003 |
| Genre | Racing |
| Type | Arcade |
| Platform | Triforce |
| System | Sega Triforce |
| Display | CRT |
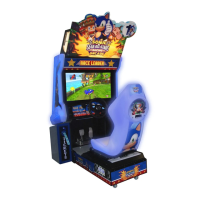
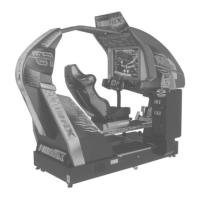
| Cabinet Type | Sit-down |
| Number of Players | 1-2 |
| Monitor | 29" CRT |
| Controls | Steering wheel, accelerator pedal |
| Game Modes | Time Attack |
| Special Features | Linkable with F-ZERO GX for GameCube |