86
TROUBLESHOOTING
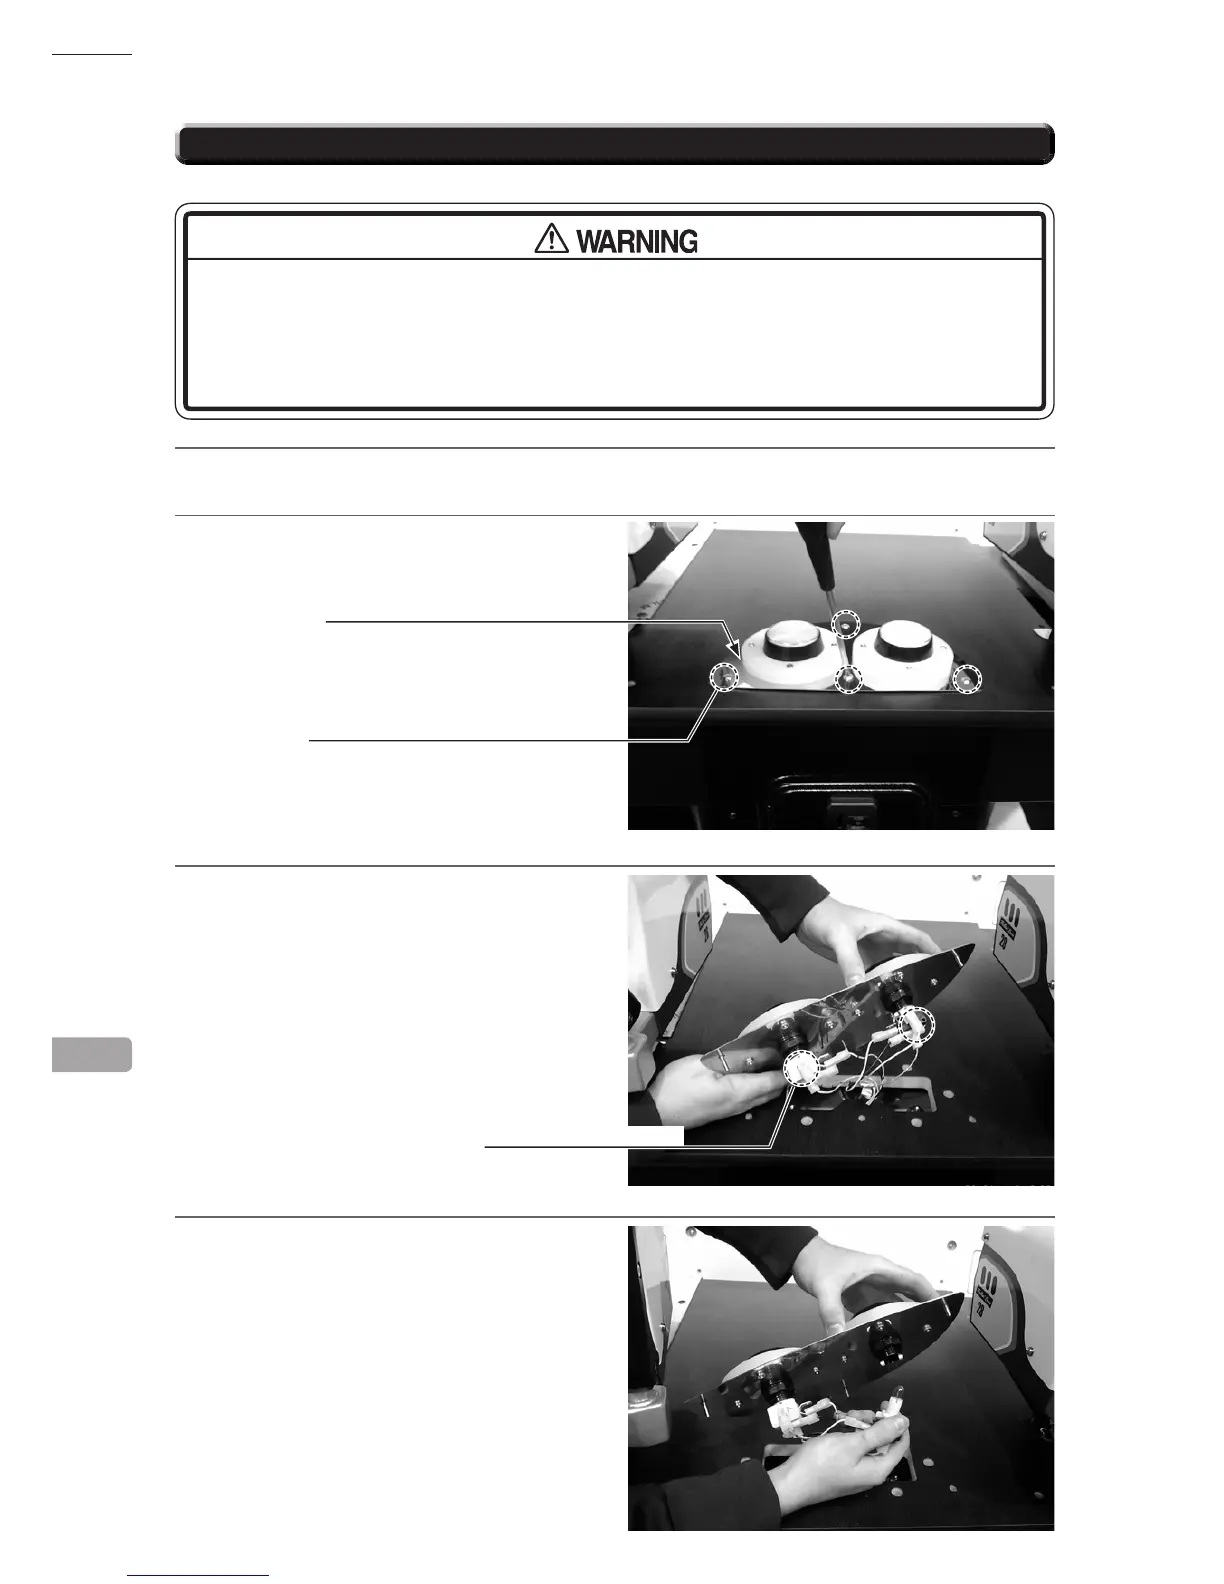
17-1 REPLACING SWITCH
● Whenworkingwiththeproduct,besuretoturnthepoweroff.Workingwiththe
power on may cause an electric shock or short circuit.
● Be
carefulnottodamagethewires.Damagedwiresmaycauseelectricshockor
shortcircuitorpresentarerisk.
1
Turn off the power switch.
2
Use an allen wrench with a WAF of 3 mm to
remove the 4 low-head hexagonal socket bolts
and take off the lower control panel plate.
3
Turn the lower plate over and rmly grasp the
lower parts of the Switch Housing between
you index nger and thumb. PULL to remove.
4
Once the Swich and Lamp housing has been
removed the bulb can then be replaced. The
Bulb is a 12v wedge type 1.2w - Push Fit.
17
CTRL PANEL PLATE LOWER
LOW-HEAD HEXAGONAL SOCKET BOLT(4)
M5 x 25, spring washers used
SWITCH & LAMP HOUSING

 Loading...