ADN Digital Conference System | 113
Using the “Conference Manager” software
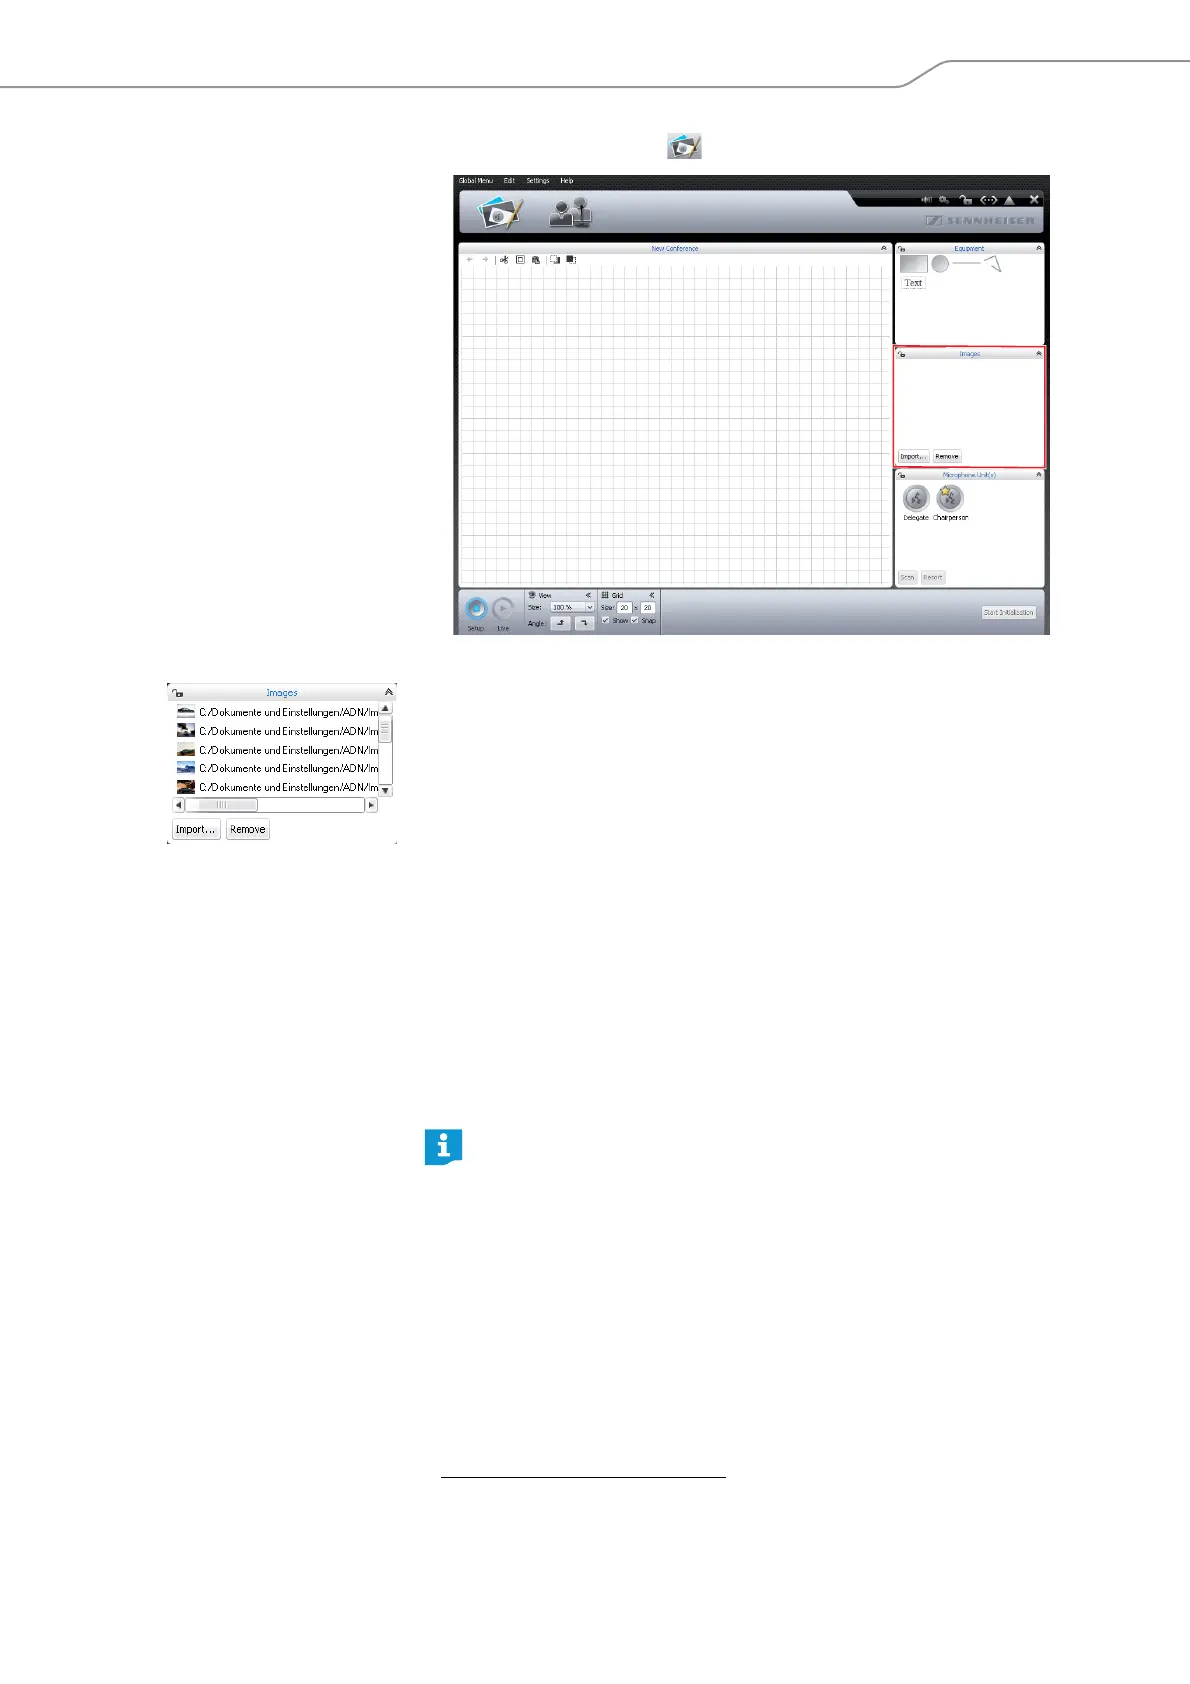
왘 Click the Room View button .
To add an image file
*
:
왘 In the “Images” library panel, click “Import...“.
The “Import...” window appears.
왘 Select an image file (file extension: “jpg”, “png” or “bmp”).
왘 Click “OK”.
The selected image file is added to the library. If you save the configuration on
the central unit (see page 103), all image files are copied and are then also
available on the central unit. Image files with a resolution of more than 2048
pixels in width are automatically reduced to 2048 pixels.
The picture of the conference room should meet the following requirements:
• Each seat should be clearly visible.
• Each seat should have enough space for a conference unit icon.
• Use the perspective on the conference room that the conference manager, e.g.
the chairperson, will have.
• If possible, use a bird’s-eye perspective, providing the conference manager
with a good view of the conference room.
• Avoid using dark pictures so that the conference unit icons are always clearly
visible on the screen.
To remove image files from the “Images” library panel
**
:
왘 Select an image file.
왘 Click “Remove”.
*
only if you are using the Windows version of the software
Please note that the memory space on the central unit is limited
(approx. 2 GB). To save memory space, delete image files that are no longer
needed.
By default, the image files are saved in the “My Documents/ADN/Images”
folder.
**
only if the library of the current configuration contains image files