TeamConnect | 23
Installing and connecting the TeamConnect components
Establishing a network connection
You can either connect the SL TeamConnect CU1 to an existing network or you can
set up a separate wireless network for directly accessing the SL TeamConnect CU1
in telephone or web conferences. After establishing a network connection the
mobile dialer iOS App “TeamConnect” or the browser-based dialer can be used to
operate the system during conferences. The device which is used for dialing must
be connected to the same network as the SL TeamConnect CU1.
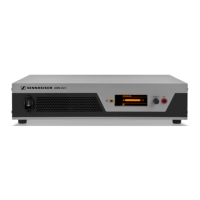
Connecting the SL TeamConnect CU1 to an existing network
To connect the SL TeamConnect CU1 to a network:
RJ-45
CU1
RJ-45
X Plug an RJ-45 cable into the LAN socket 7 of the SL TeamConnect CU1.
X Plug the other end of the RJ-45 cable into a network socket of your existing
network.
The IP address is obtained automatically via DHCP.
The SL TeamConnect CU1 has an integrated DHCP client for automatic IP
configuration, which is activated by default. In order to use the automatic
IP configuration the network must have a DHCP server. The DHCP client of
the SL TeamConnect CU1 can be deactivated in the Configuration Manager
software for manually configuring the IP address (see page 47). In case
of doubt, refer to your IT administrator for further information.