Servicing the iCon APX Meter Replacement – Basic Components
Removing the Register Cover
1. Remove the Meter Cover. Refer to “Removing the Meter Cover” above.
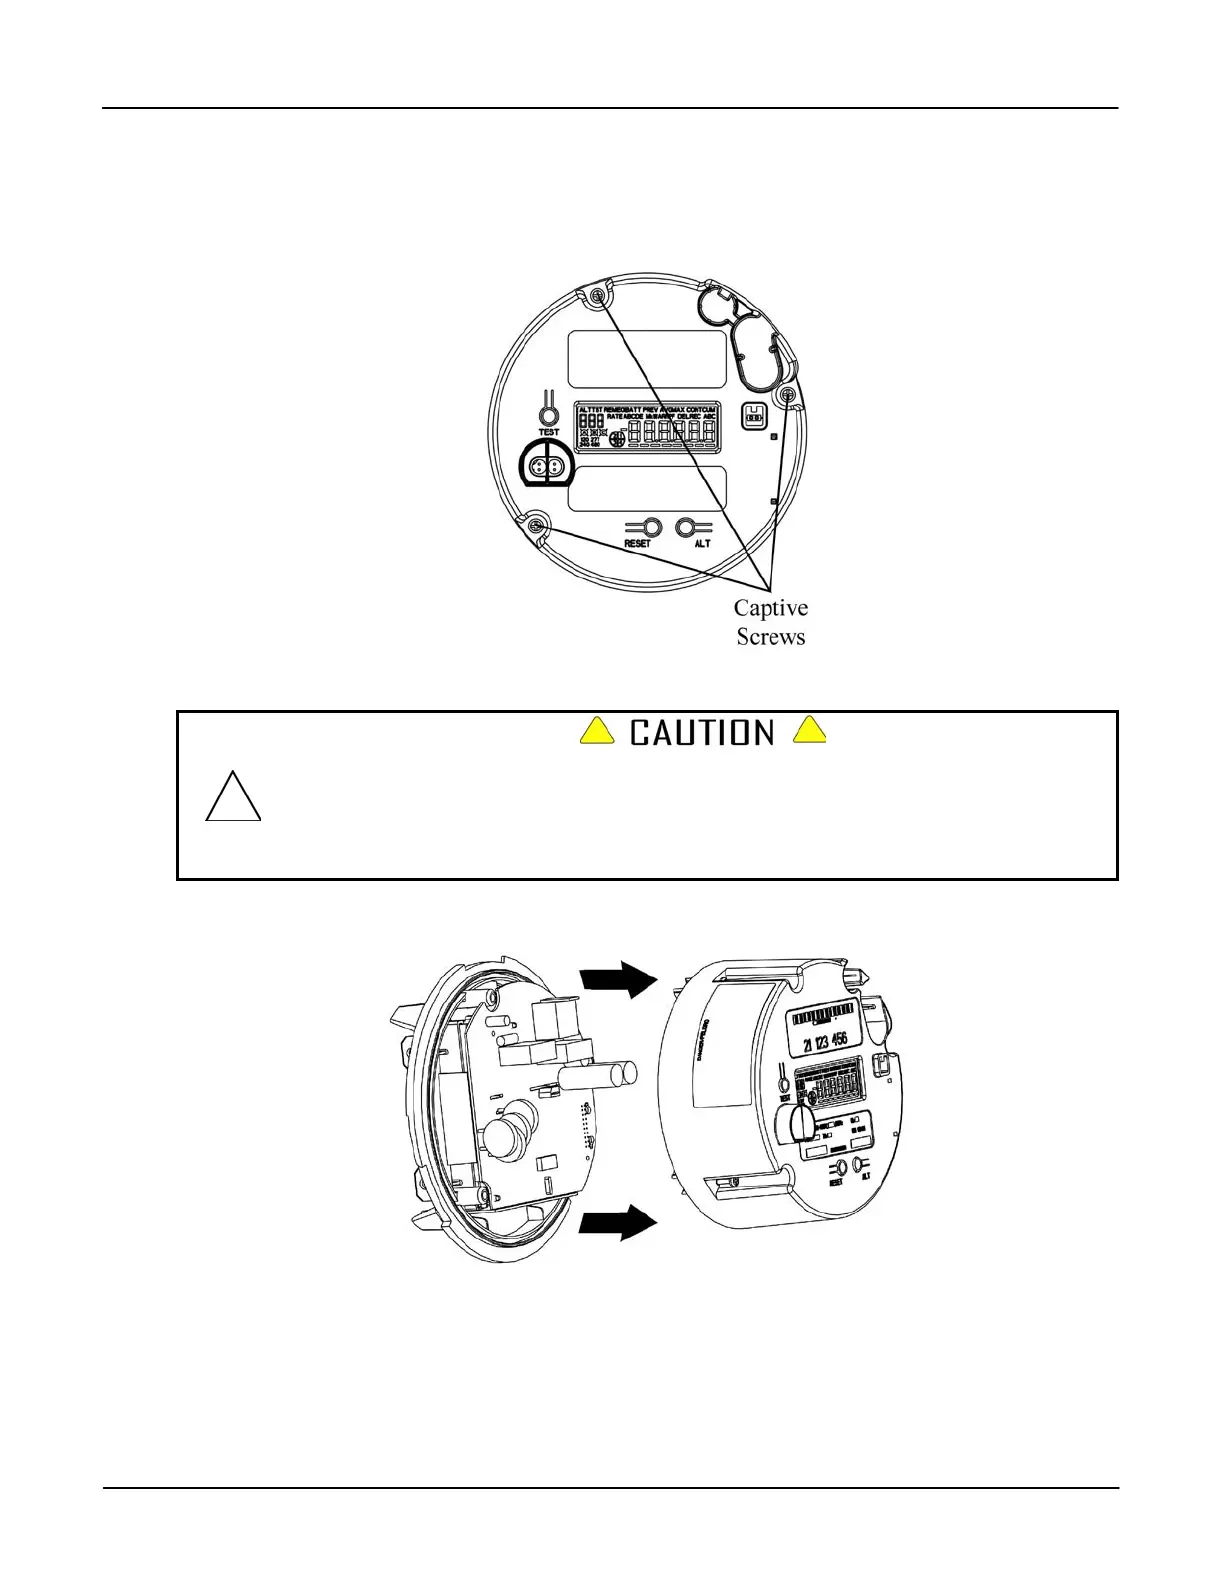
2. Loosen the three (3) captive screws that secure the Register Cover to the Meter Base
Assembly so they are no longer engaged in the Base Assembly.
Figure 4-3: Register Cover – Captive Screws
The APX meter design provides a secure fit of the Interconnect Board into the Sensor
Board connector port. When removing the Register Cover, it may be necessary to gently
rock the Register Cover from top to bottom to extract the Interconnect Board pins from the
Sensor Board connector port. Use care not to over-extend the pins. Failure to observe this
caution may result in damage to the meter.
3. Carefully remove the Register Cover from the Meter Base Assembly to expose the internal
components.
Figure 4-4: Register Cover – Removal
Version 1.0 Servicing the iCon APX Meter 4-7