Replacement – Basic Components Servicing the iCon APX Meter
4-10 Servicing the iCon APX Meter TM-iX0A-0805
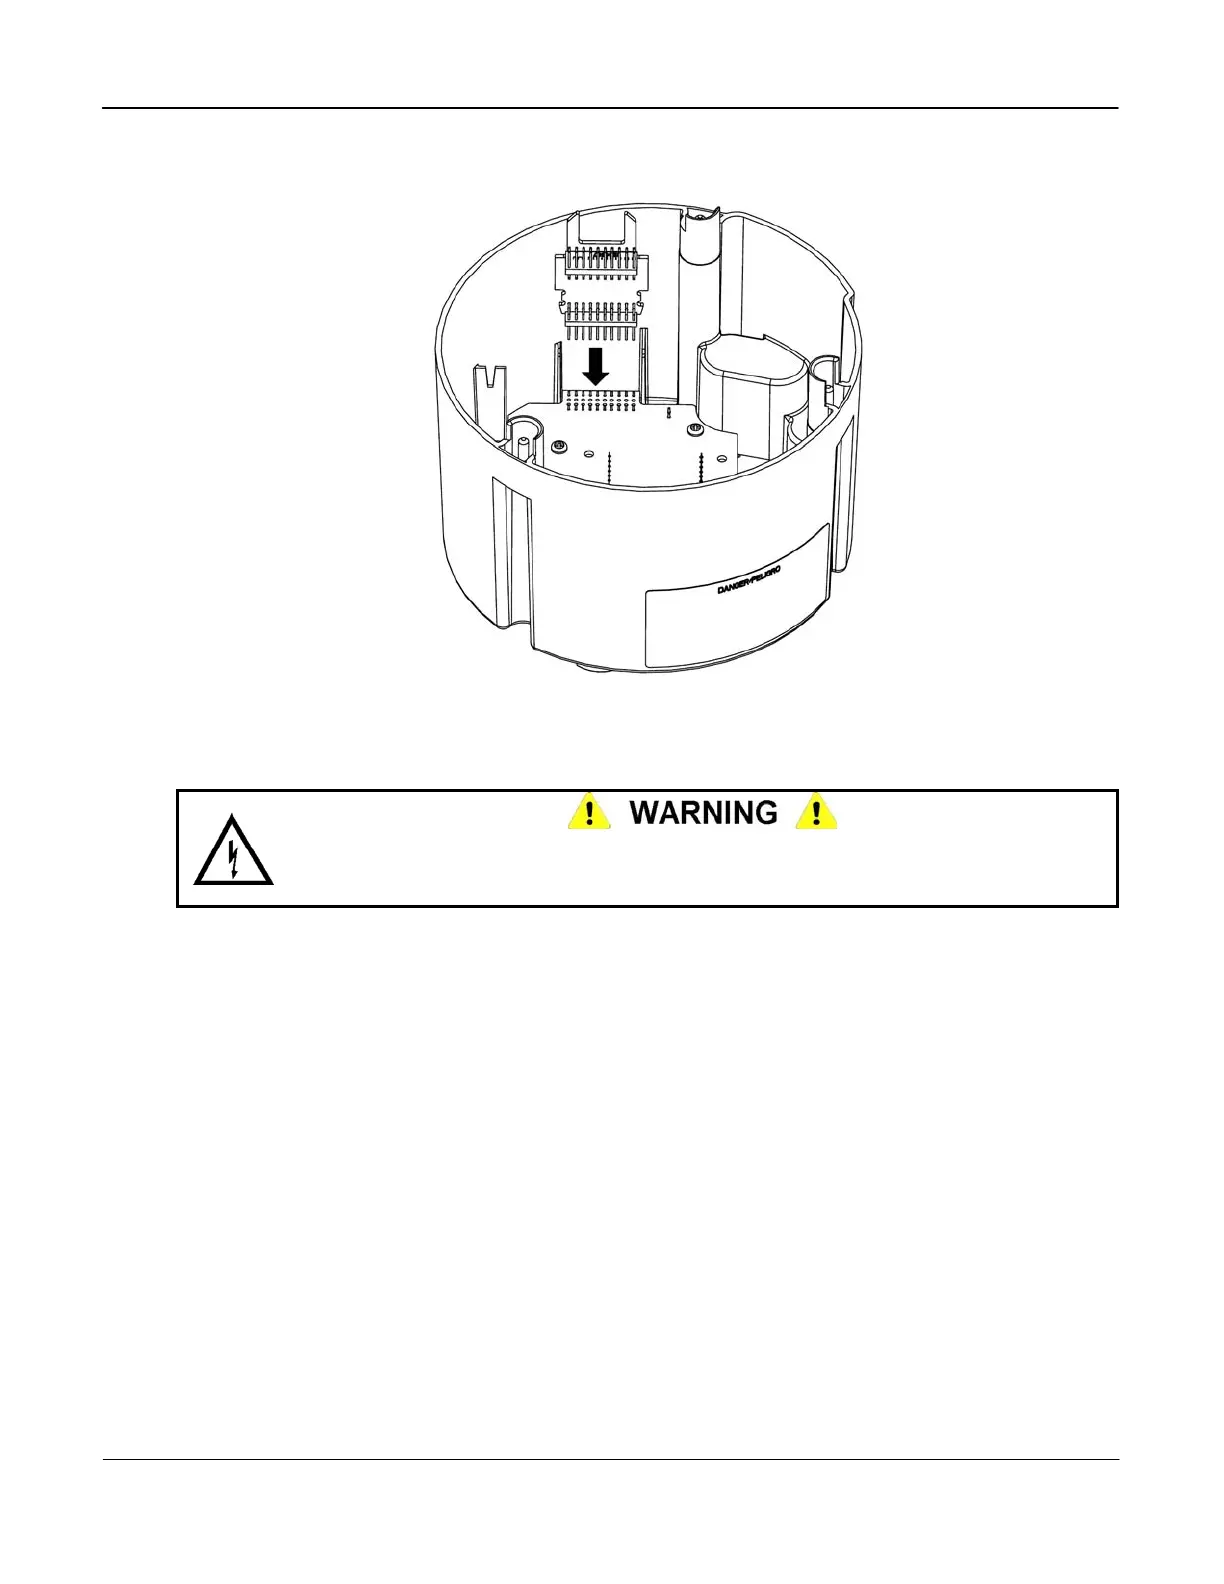
Installing the Interconnect Board
1. Slide the Interconnect Board into the Integrated Alignment Ribs.
Figure 4-7: Installing the Interconnect Board
2. Align the Header Pins on the Interconnect Board with the connector on the Register Display
Board.
The Register Display Board, Register Cover, and Interconnect Board may contain sharp
edges. Exercise care while installing the Interconnect Board. Failure to observe this
warning may result in minor injury to personnel.
3. Gently press the Interconnect Board into the connector on The Register Display Board until
the board clicks into place.
4. Install the Register Cover. Refer to “Installing the Register Cover” above.