Servicing the iCon APX Meter Replacement – Basic Components
Version 1.0 Servicing the iCon APX Meter 4-13
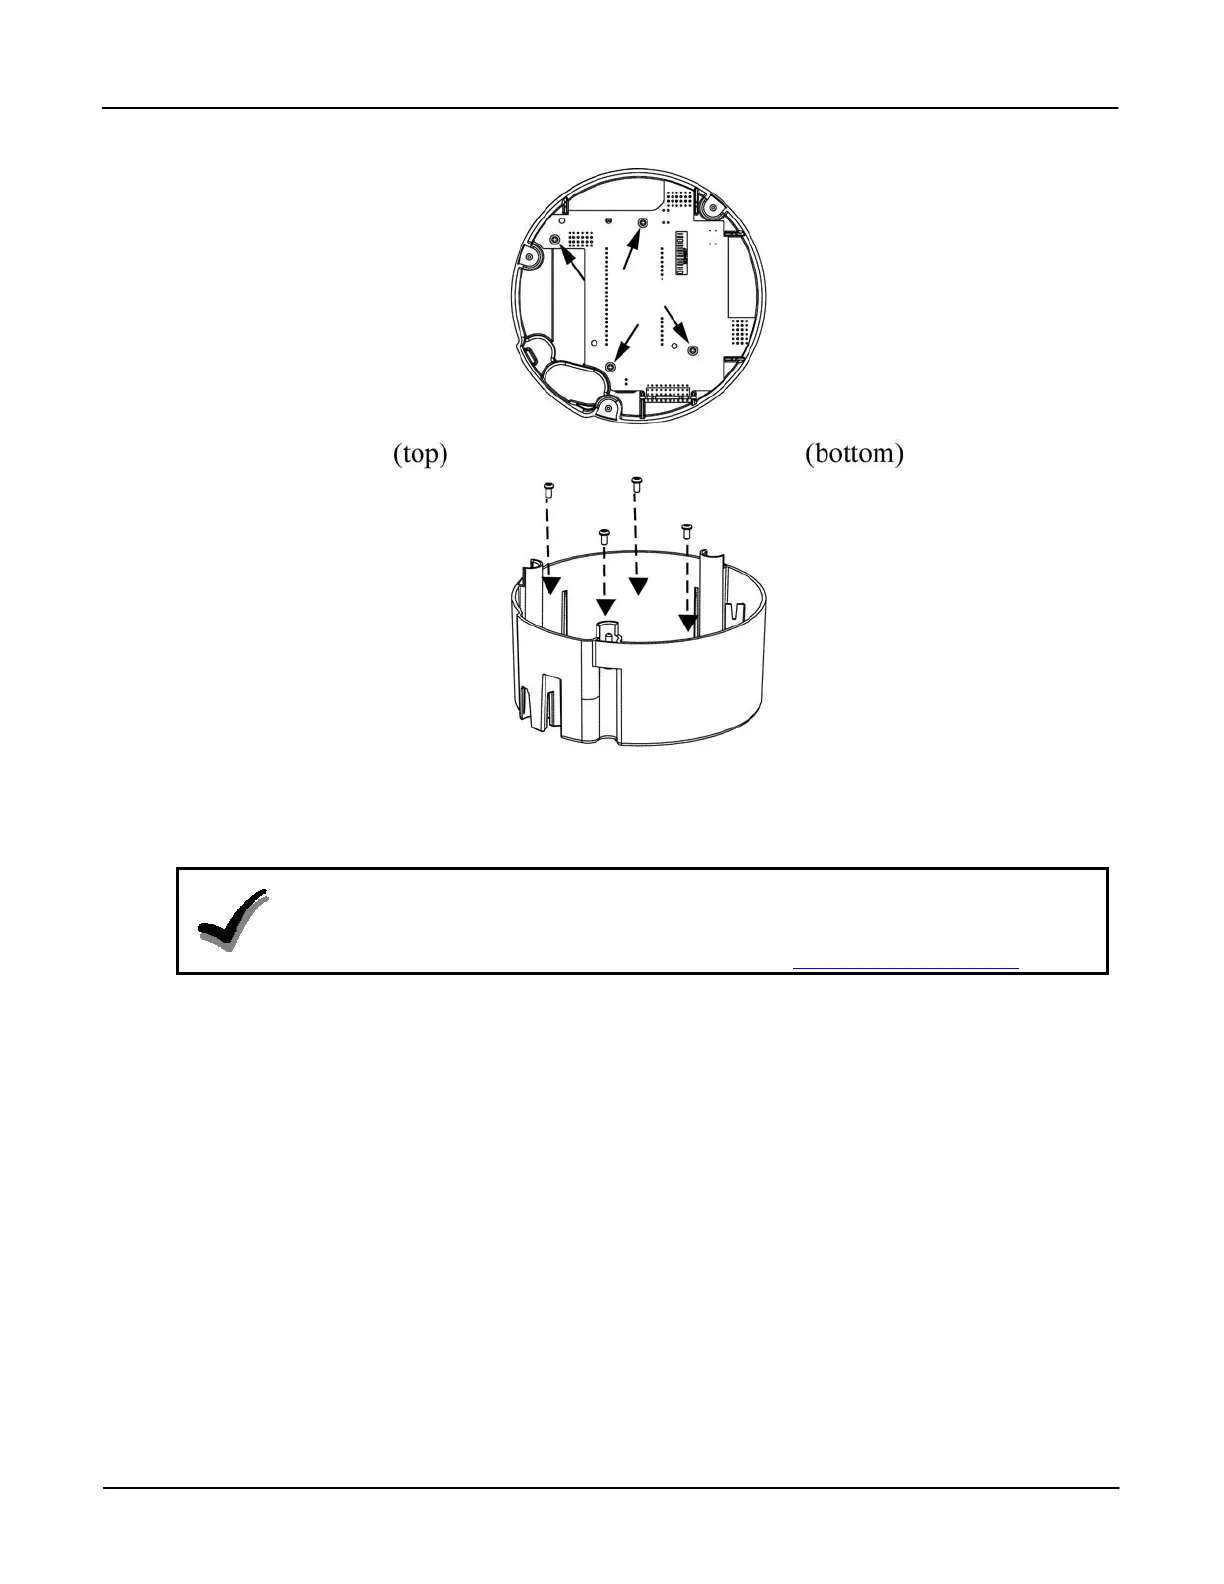
3. Locate the four (4) holes for the screws.
4. Secure the display board to the Register Cover using the four (4) screws.
Figure 4-10: Installing the Register Display Board Screws
5. Install the Interconnect Board. Refer to “Installing the Interconnect Board” above.
6. Install the Register Cover. Refer to “Installing the Register Cover” above.
NOTE
If the meter continues to malfunction, the error may be in the Sensor Board or other meter
component. Do not replace the Sensor Board. Contact your sales representative and
Customer Service at Sensus Metering Systems. Refer to Sensus Metering Systems
.