14
Product Version 1.0 | Revision D | Released 2022-06-20
BEFORE INSTALLATION
ALTHOUGH MOST FUNCTIONS ARE POSSIBLE TO BE SET VIA RDM ONCE MOUNTED IN POSITION, IT IS EASIER
TO DO CONFIGURATION AND ANY TROUBLESHOOTING BEFORE MOUNTING IS COMPLETE.
UNPACKING
Unpack the device and inspect it to ensure that it has not been damaged during transport.
The fixture is shipped with:
• 1 x Spanner with magnet (POI version).
• 6 x M-10 screws (POI version).
• Safety information leaflet
APPLICATION CONSIDERATIONS
The POI version is IP66-rated and designed for use in outdoor installations. It is protected from:
• Dust, to the degree that dust cannot enter the device in sufficient quantities as to interfere with its operation.
• High pressure water jets of water from any direction.
CONNECTING TEMPORARY POWER
Connect to AC power using the supplied 8mm cable (the larger of the two permanently wired cables). The fixture
must be grounded/earthed. The AC power supply must incorporate a fuse or circuit breaker for fault protection. For
temporary programming, a plug or terminals can be used.
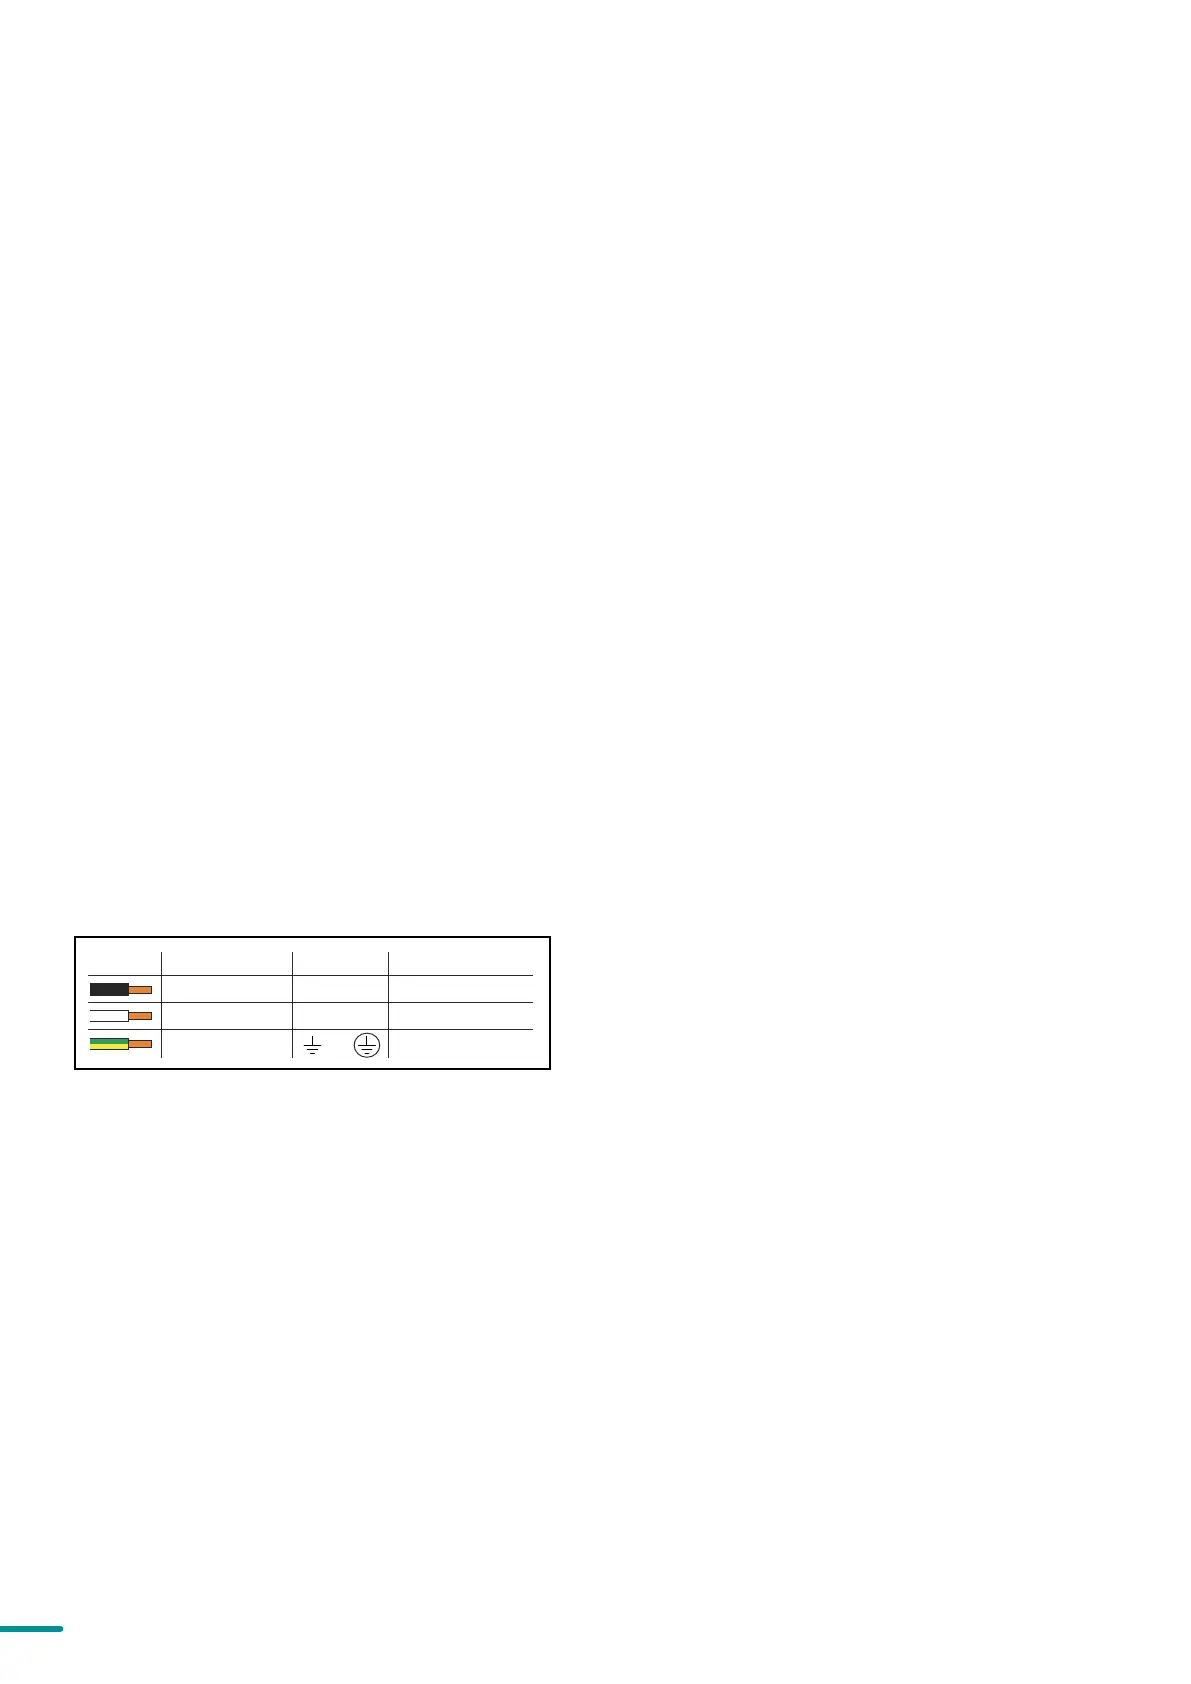
The power cable color coding is shown to the left:
• Connect the black wire to live
• Connect the white wire to neutral
• Connect the green/yellow wire to ground (earth)
Figure 7: Connecting AC Power
The fixture must be grounded/
earthed and be able to be isolated
from AC power. The AC power
supply must incorporate a fuse or
curcuit breaker for fault protection.
Color
Black
White
green/yellow
Conductor
live
neutral
ground (earth)
Symbol
or
L
N
Wire