6 ADJUSTMENT/REPLACEMENT OF EACH PART
MUX-100 SERVICE MANUAL 6 - 26
6-8
Setting of Date and Time
・・・・・・・・・・・・・・・・・・・・・・・・・・・・・・・・・・・・・・・・・・・・・・・・・・・・・・・・・・・・・・・・・・・・・・・・・・・・
Set the date (year, month and day) and the time.
Ⅰ
Setting of date/time setting mode
Set to ON the DIP switch SW3-8 on the NEXSC PCB, and turn on the power.
Next, press the hand scan key in the APR to enter the date/time setting mode.
(The LEDs on the hand scan key and the standard body key flicker.)
Ⅱ
Confirmation of date change
Press the remote control selection key to display the date (year, month and day). (The LED on the key is
extinguished.)
Change the year (the last two digits of the year) using the tube voltage setting keys “+” “-”.
Change the month using the tube current time product setting key “-”.
Change the day using the tube current time product setting key “+”.
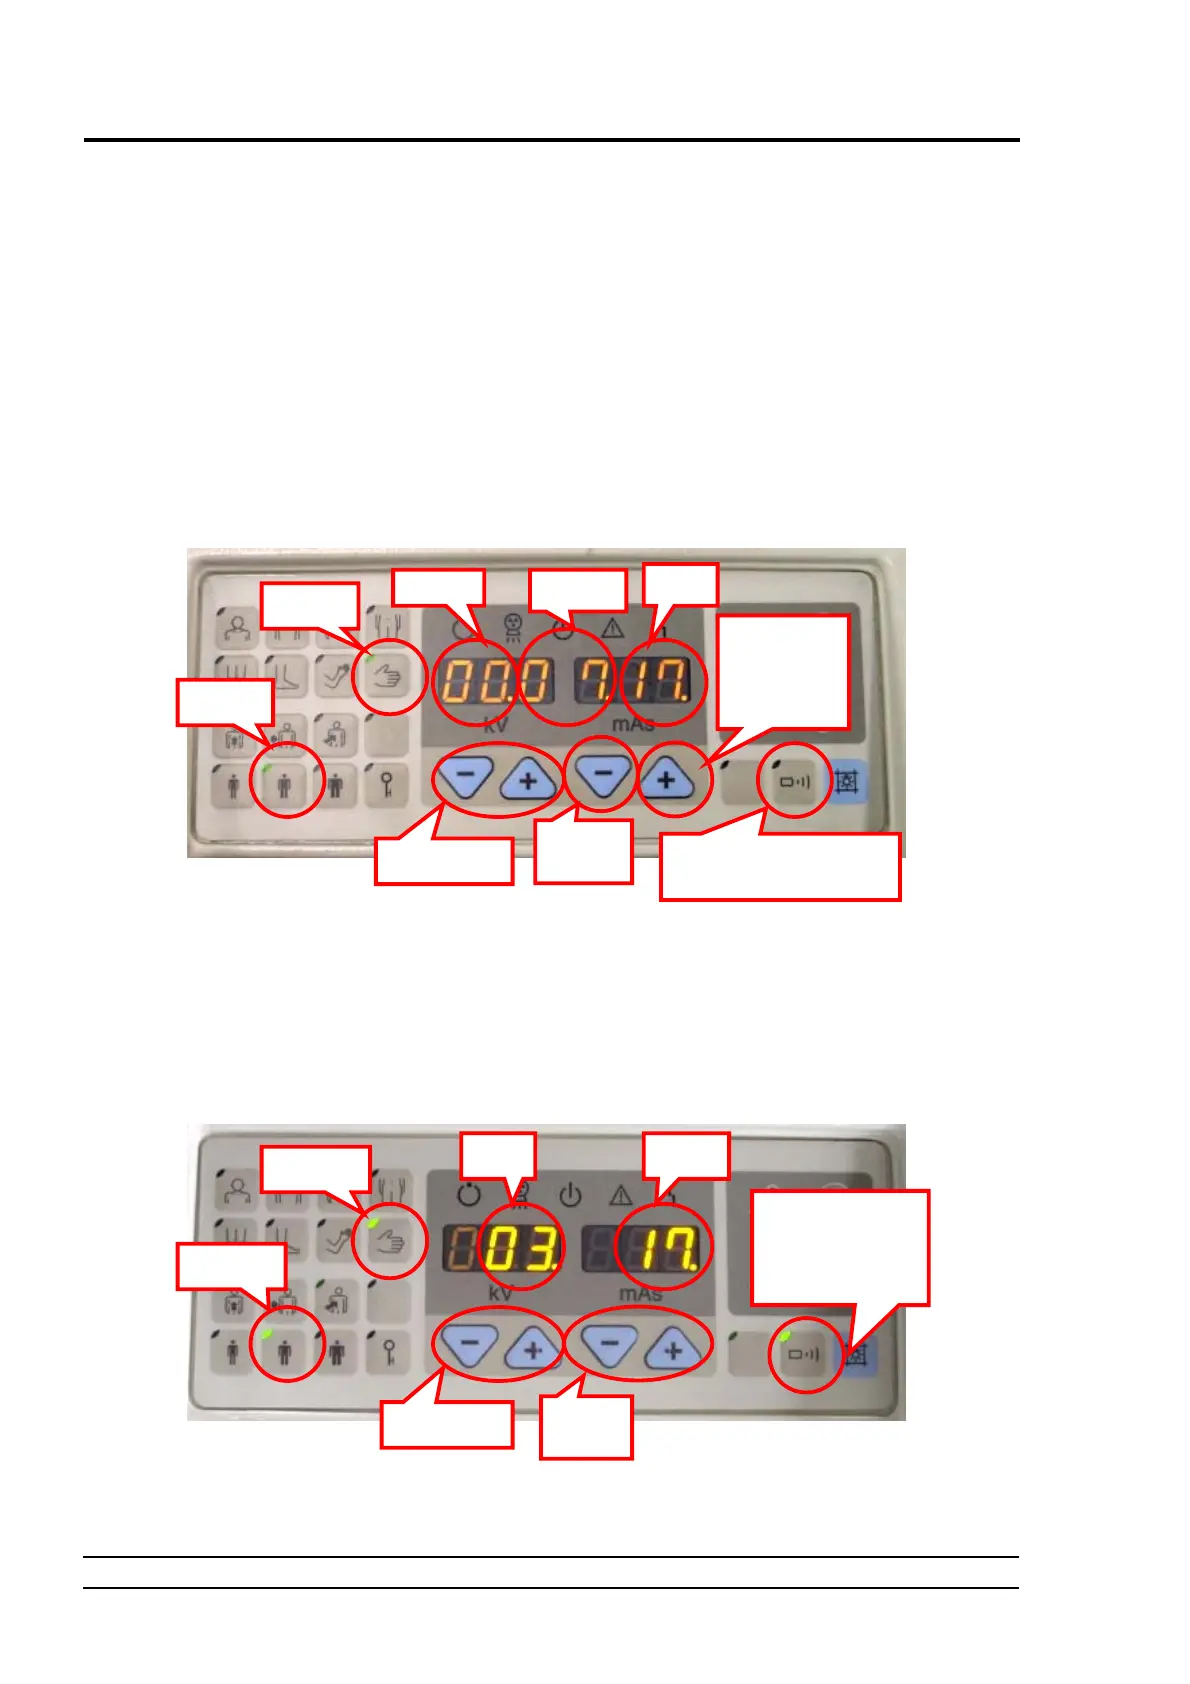
Fig. 6-42 Panel when the Date is Set
Ⅲ
Change of time
Press the remote control selection key to display the time. (The LED the key flickers.)
Change the time using the tube voltage setting keys “+” “-” (24-hour display).
Change the hour using the tube voltage setting key “+” “-”.
Change the minute using the tube current time product setting keys “+” “-”.
Fig. 6-43 Panel when the Time is Set
Flickers.
Sets the year.
MonthY
r
Changes over the date
display and the time display.
Sets the day.
Da
Sets the
month.
Flickers.
Flickers.
Sets the hour.
MinuteTime
Changes over the
date display and the
time display.
Sets th
minute.
Flickers.
 Loading...