79(107)
1) Install copper joint to the level valve.
2) Install level valve with copper joint to the welding water manifold.
3) Install water manifold to the machine.
4) Connect water manifold with manifold joint via screws.
5) Install Teflon to copper joint.
Note!
For the operating temperature not higher than 200℃, Teflon with
temperature resistance 200℃ is usable; for the operating temperature
from 200 to 300℃, must use Teflon with temperature resistance 300℃.
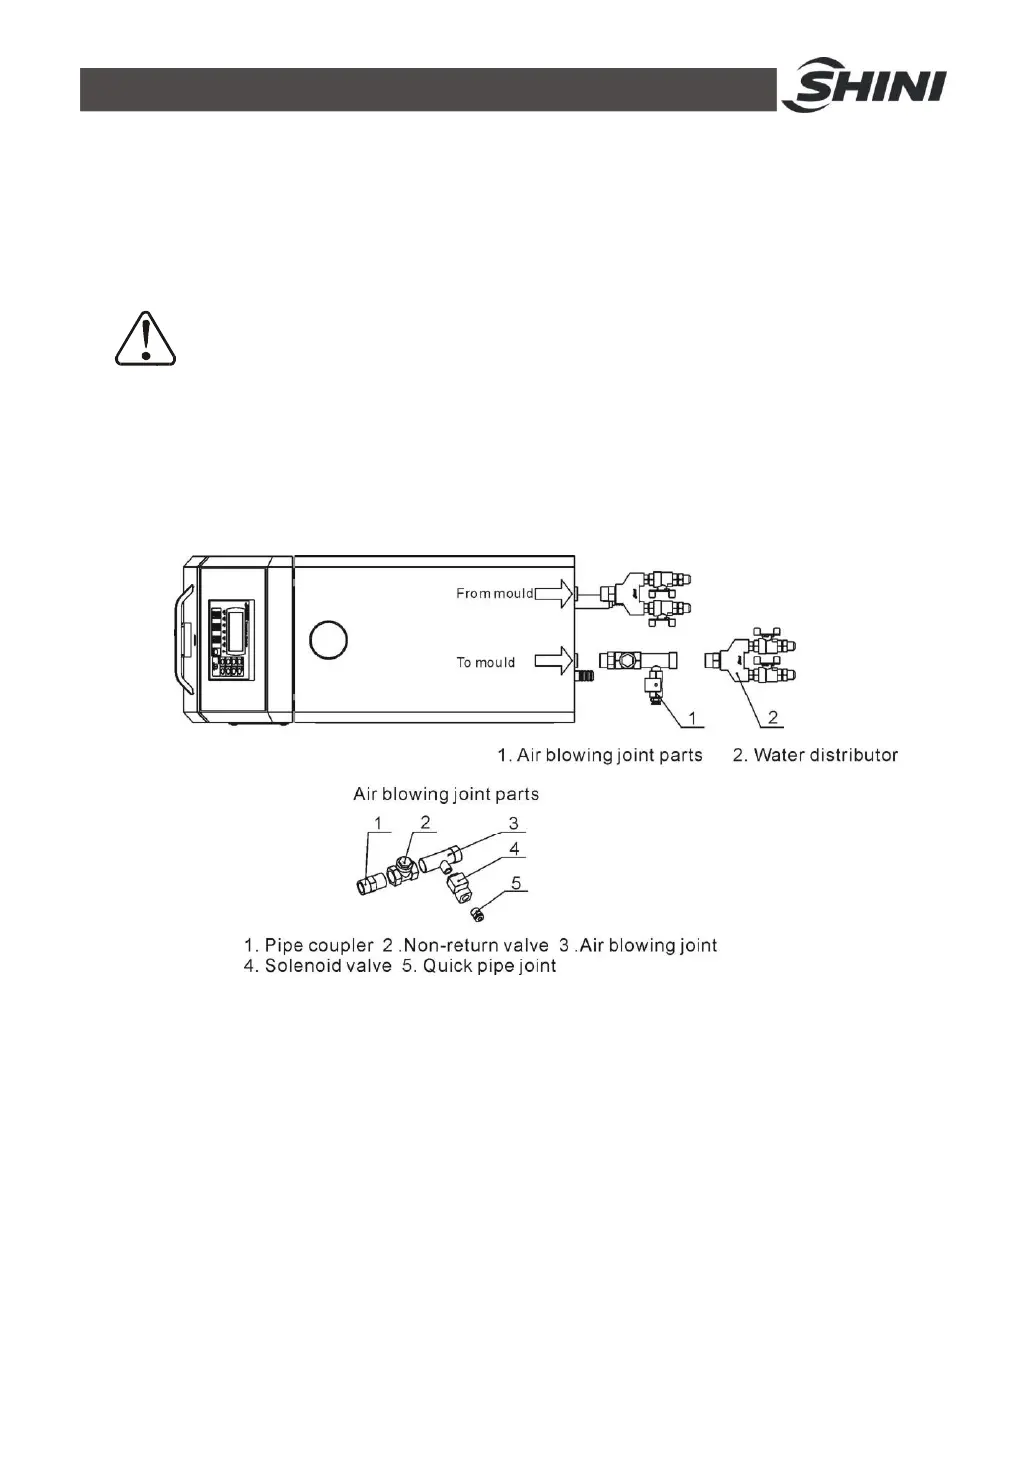
2.5.3 Installation Steps for Function of Water Drainage via. Air Blowing
1) Connect the air blowing joint parts to “Toward mold mouth” on mold
temperature controller and then istall the water distributor.
2) When it's in oFF state, press SUCTION. By then, the solenoid valve of air
suction and cooling solenoid valve will be opened to drain water by blowing
air.
3) After 1~2min of water drainage, press SUCTION again. By then, the water
drainage is finished; close the ball valve on water distributor and then take
out mold.
 Loading...