LED Behavior / ColorMicrophone Status
Green (solid)Active
Red (solid)Mute
Green (flashing)Hardware identification
Green (progresses along bar)Firmware update in progress
Network reset: Red (progresses
along bar)
Factory reset: Triggers device pow-
er-up
Reset
Red (split, alternate flashing)Error
Multi-color flash, Blue (moves quickly
back and forth across bar)
Device power-up
Note: When the LED is disabled, the LED still illuminates while the device
is powering up and when an error state occurs.
Customizing Lighting Settings
Custom LED brightness, colors, and behaviors are assignable in the control
software. They can also be controlled through an external control system:
1. Open the Configuration tab
2. Select Light Bar
Mute LED Behavior
The lighting for mute and active microphone states is configurable to match
the behavior of other devices in conference rooms. In the LIGHT BAR
PROPERTIES menu, use the drop-down menus to select LED settings.
Dimming and Disabling
To dim or turn off the LED, use the drop-down menu in the Light Bar config-
uration screen.
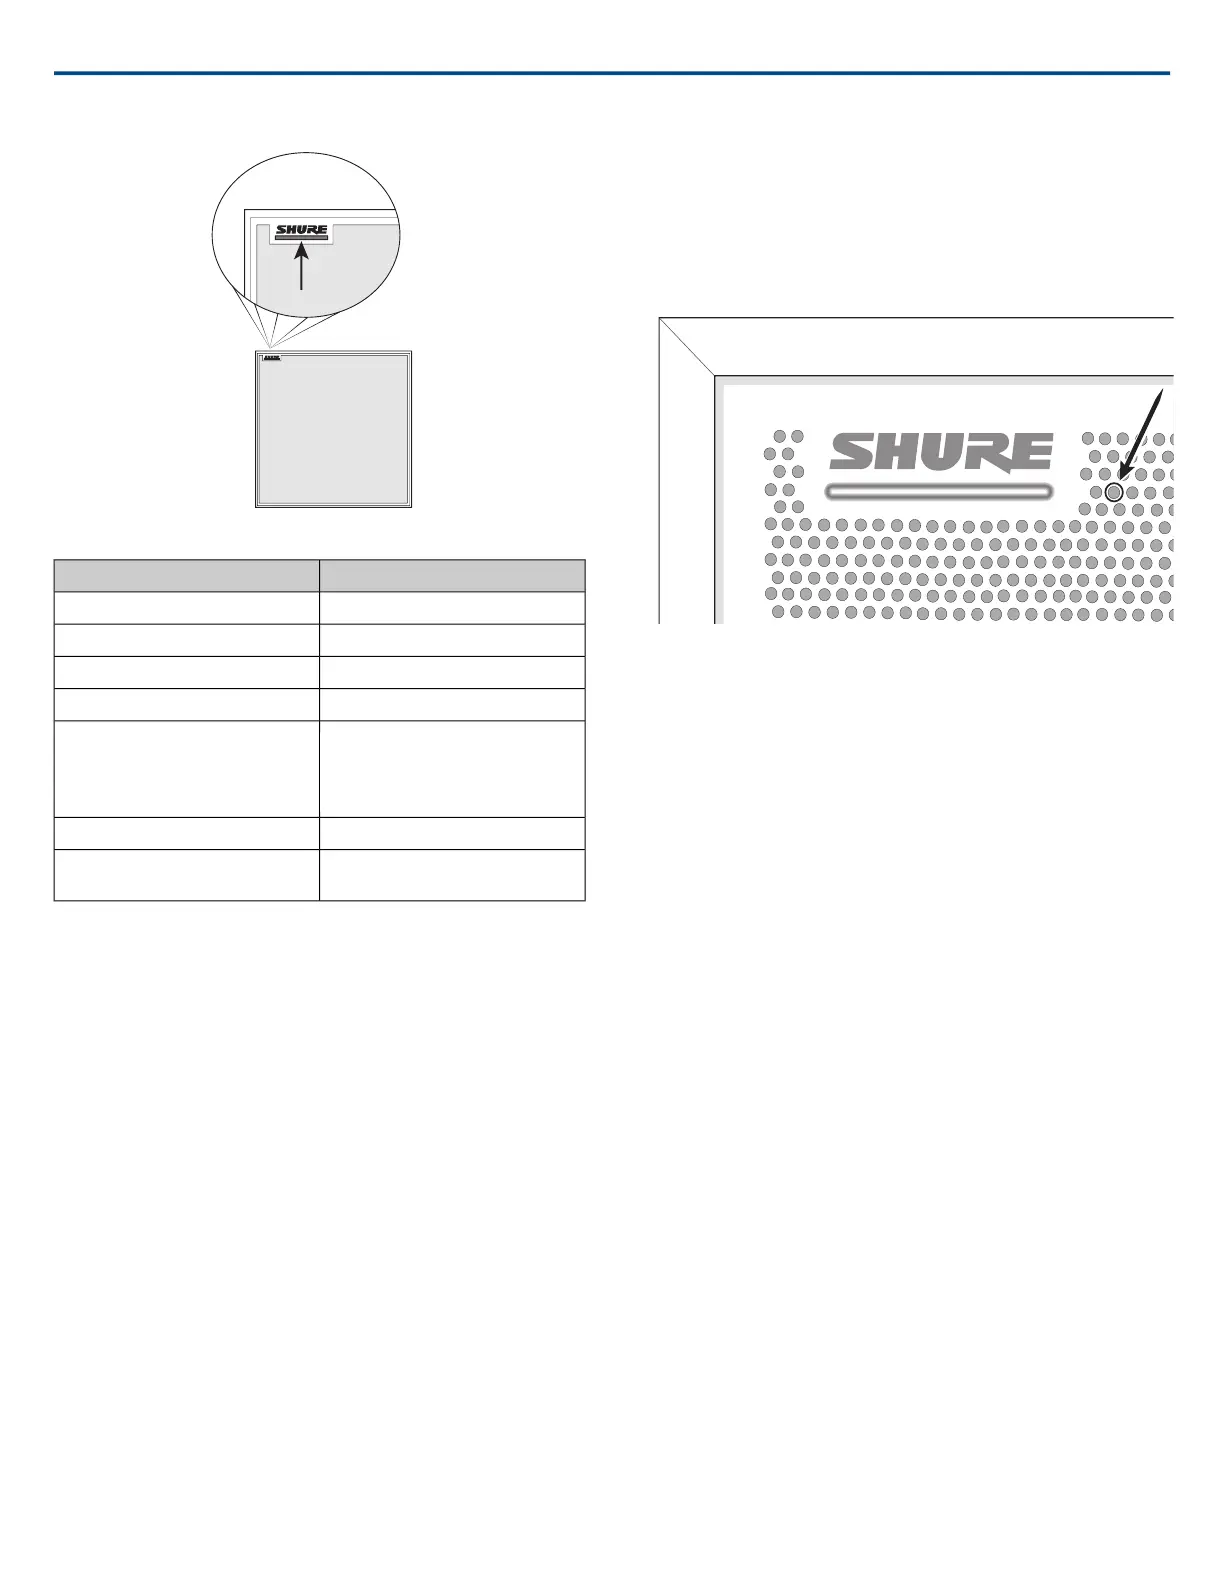
Reset Button
Reset Button
The hardware reset button is located inside a grille hole and can be pushed
with a paperclip or other small tool. The hole is identified with a gray circle.
When looking at the Shure logo, it is the second hole in the fourth row from
the top.
Reset Modes
Network reset (press button for 4-8 seconds)
Resets all Shure control and audio network IP settings to factory defaults
Full factory reset (press button for longer than 8 seconds)
Restores all network and web application settings to the factory defaults.
Software Reset Options
To simply revert settings without a complete hardware reset, use one of the
following options:
Reboot Device:In the web application (settings > factory reset), there is a
Reboot Device button, which simply power-cycles the device as if it were
unplugged from the network. All settings are retained when the device is re-
booted.
Default Settings: To revert audio settings back to the factory configuration
(excluding Device Name, IP Settings, and Passwords), select Load Preset
and choose the default settings preset.
Power Over Ethernet (PoE)
Power Over Ethernet
This device requires PoE to operate. It is compatible with both Class 0 and
Class 3 PoE sources.
Power over Ethernet is delivered in one of the following ways:
• A network switch that provides PoE
• A PoE injector device
Shure IncorporatedMXA910 Ceiling Array Microphone
2017/10/1826/57