Link Microphones to Group Channels
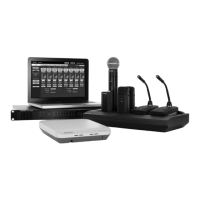
Use the Networked Charging Station (NCS) to Link microphones to Access Point channels. Slots in the charger are mapped to the APT according to the Group
setup from the Configuration tab. Once the Link procedure is complete, audio will route to the corresponding channel in the Group.
Linking will map any microphone placed in the charging station to the APT channels. This replaces any prior microphone Link for that channel. If a slot is empty
during the Link procedure, there will be no impact on that channel.
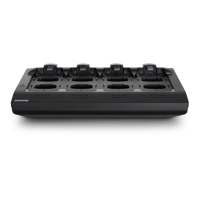
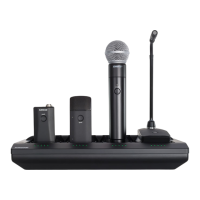
1. Arrange microphones in the charger.
Microphones are Linked to access point channels according to the arrangement in the charger.
Note: 2-channel chargers do not support gooseneck microphones.
Connecting the Microphone to the Charger Slot
2. Link the microphones to channels.
Use the control software or the charging station to Link the microphones to APT channels. If desired, this feature can be disabled on the charging station so that
Linking can only be performed from the control software:
• Control Software: From the Configuration page, press the Link button for each charger in the Group.
• Charging Station: Press and hold the Link button for 6 seconds. The LEDs flash during the process and turn solid green once the Link is successful.
3. Remove Mics and Test the Audio
Test the audio for each microphone and adjust mic gain if necessary from the Monitor tab of the control software. The gain should be set at a level where the
audio is registering (green/yellow) on the signal indicator but not clipping (red).
Monitor Tab
Preparing a Backup Microphone
Prepare an alternate microphone for each channel for more reliable and flexible events. Two MXW microphone transmitters can be linked to the same channel,
providing the option of either microphone for use.
The administrator can designate the secondary mic to anticipate needs that may arise during events:
Microphone Preference
Give presenters a choice between two different microphone types, such as handheld or bodypack microphones.
Charged Backup Microphones
Prepare for long events by linking fully-charged microphones as backups
Shared Resources
Easily add a temporary microphone without unlinking the most commonly used microphones.
One Active Mic per Channel
Only one microphone will operate on the channel at a time, blocking the second microphone from interfering with the RF and audio performance. The backup
microphone briefly flashes the LED to indicate the channel is occupied, and automatically turns off to conserve the battery. To use the second microphone,
simply turn off the first microphone.
Two Microphones Ready for the Audio Channel
The system allows one live microphone per channel.
Procedure
Link a single microphone:
1. Place the secondary microphone into the same charging slot that was used for the primary microphone.
2. Open the MXW control software and go to the Monitor tab.
3. Select Secondary in that channel's link slot.
4. Select the Link button on the channel strip to link that microphone. The charger LEDs will flash when the procedure is complete.
Link multiple microphones:
1. Place the secondary microphones into the same charging slots that were used for the primary microphones.
Shure IncorporatedMXW
2017/05/1734/72