3. Choose the user group in the User pas
sword dialog box.
4. Enter the new password twice and use Accept to confirm.
5. If you are requested to log in, log in as an Authorized customer.
✓
The new password is valid for the user group immediately.
Resetting a password
If you have forgotten a password, you can reset it.
1. Request the form for resetting your password from SICK support.
2. Connect to the device in Safety Designer.
3. In the device window, under Service, choose the entry User password.
4. Choose the Reset password option in the User password dialog box.
5. Transmit the serial number shown and the device counter together with the prod‐
uct number and the type code on the form to SICK support.
✓
You will then receive a reset code.
6. Enter the reset code under Password reset and use Accept to confirm.
✓
The passwords are reset to factory settings (SICKSAFE for an authorized client, no
password for machine operators. It is not possible for maintenance technicians to log
in). The configuration is not changed.
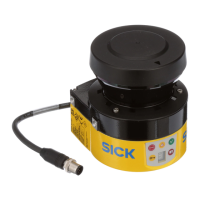
7.19.5 Optics cover calibration
Overview
Af
ter replacing an optics cover, the safety laser scanner’s measurement system must
be calibrated to the new optics cover. During optics cover calibration, the reference for
the contamination measurement of the optics cover is defined (status = not contami‐
nated).
Important information
WARNING
Incor
rect reference value of optical properties
If optics cover calibration is not done correctly, persons and parts of the body to be pro‐
tected may not be detected.
b
Carry out an optics cover calibration with the Safety Designer every time the optics
cover is replaced.
b
Carry out the optics cover calibration at room temperature (10 °C to 30 °C).
b
Only carry out the optics cover calibration using a new optics cover.
b
Make sure that the entire system is clear of contamination when the adjustment is
carried out.
Approach
1.
Click on Yes in the Replacement column.
2. Check that the front screen is clean.
3. Click on Confirm in the Cleanliness check column.
4. Click on Optics cover calibration in the Execute optics cover calibration column.
✓
The calibration process starts. Typically, this process can take up to a minute. A
progress bar shows the progress.
5. Do not switch off the safety laser scanner and do not break the connection
between the computer and the safety laser scanner during the adjustment.
✓
The end of the calibration is shown.
7 C
ONFIGURATION
122
O P E R A T I N G I N S T R U C T I O N S | microScan3 – EtherNet/IP™ 8020200/15ZT/2019-11-14 | SICK
Subject to change without notice