Brief instructions on commissioning
2.1 Commissioning on PROFIBUS DP
ET 200M
Operating Instructions, 12/2008, EWA-4NEB780600602-08
25
Front Connectors of the DI and DO
1. Open the front doors of the DI and DO.
2. Move the front connector to the wiring position:
To do so, push a front connector into each DI and DO until it engages. The front
connector still protrudes from the module in this position. In the wiring position a wired
front connector has no contact with the module.
3. Strip 6 mm of insulation off the ends of the wires you want to insert into the front
connector and then attach appropriate wire end ferrules to the wire ends.
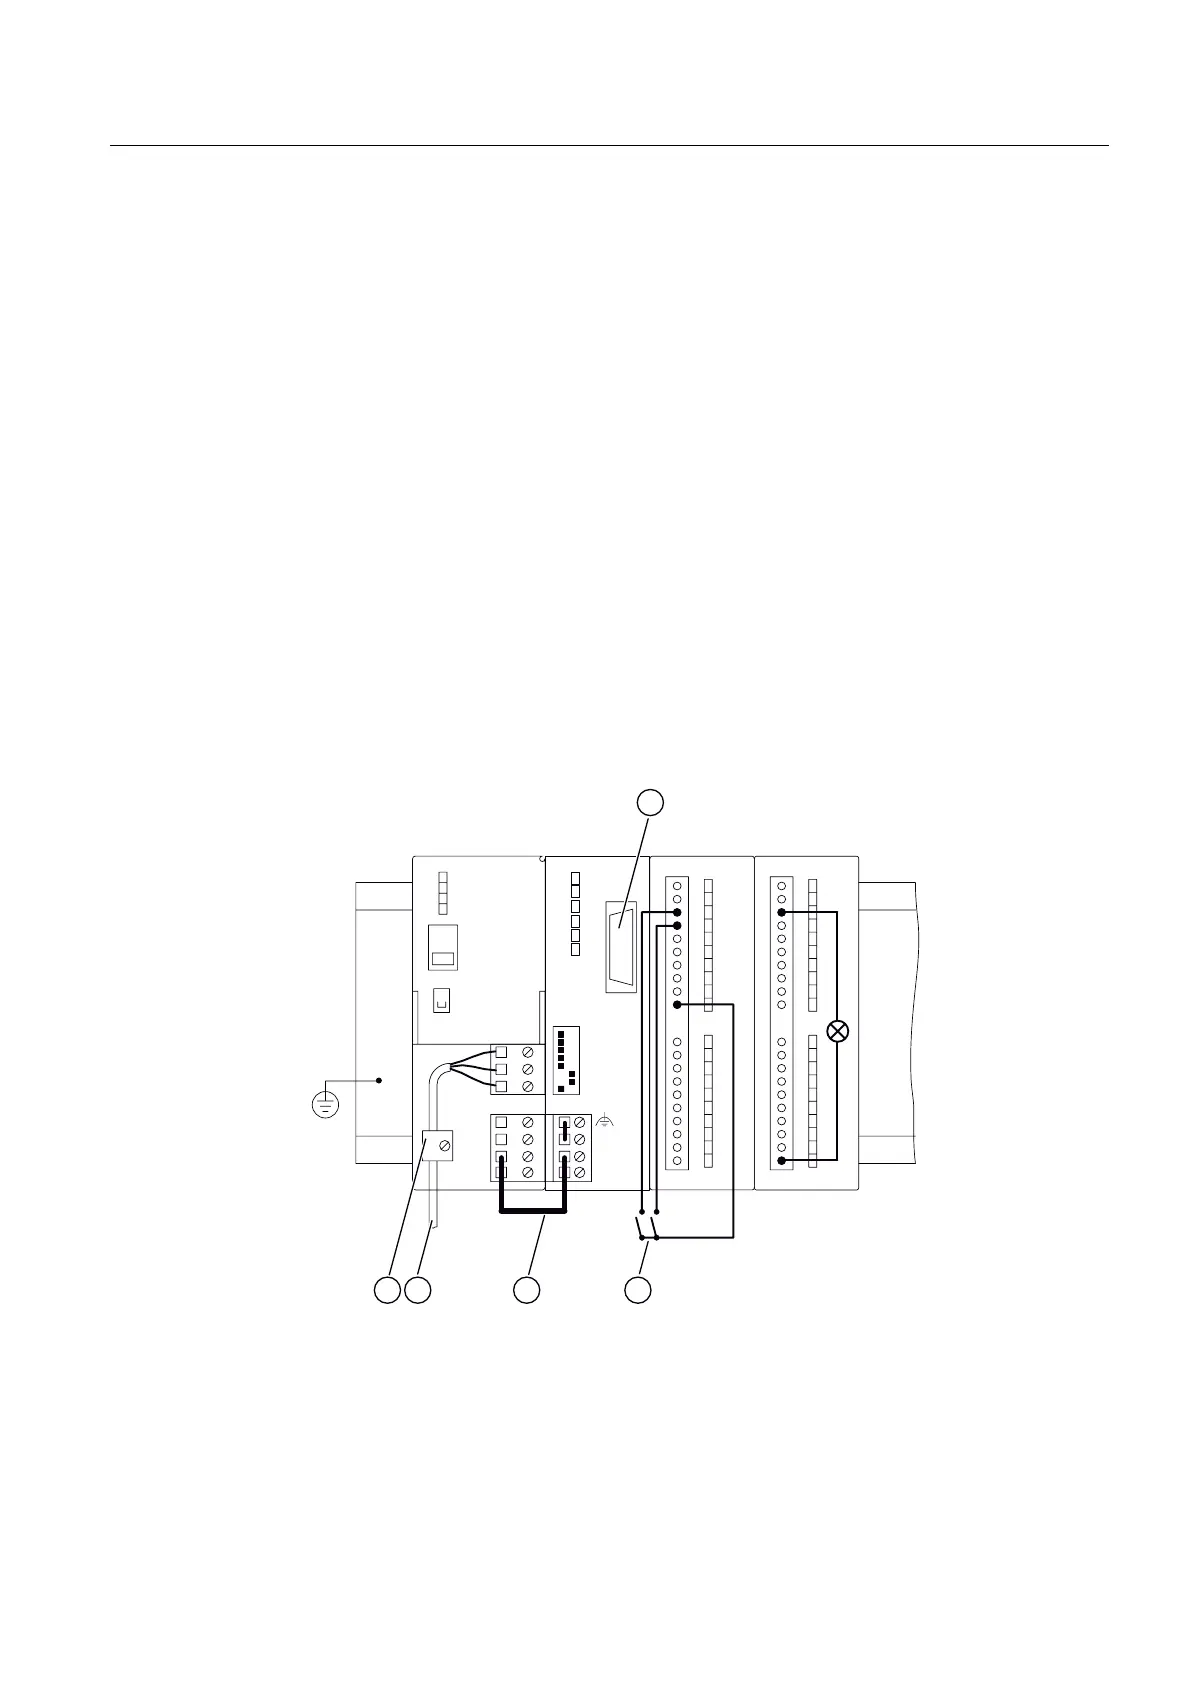
4. Wire the front connector of the DI in the following way:
Terminal 1: L+ of PS;
Terminal 20: M of PS;
Terminal 3: Button 1;
Terminal 4: Button 2;
Terminal 10: Free cable ends of button (see the following figure)
5. Wire the front connector of the DO in the following way:
Terminal 1: L+ of PS;
Terminal 20: M of PS;
Terminals 3 and 20: Indicator lamp (see the figure below)
6. Guide the wires down and out of the front connectors.
7. Press the release button of the front connector on the top of the module and
simultaneously push the front connector into the module until the release button returns
to its original position.
8. Close the front doors of PS, DI and DO.
1
2345
36 ,0 ', '2
0
/
0
0
/
0
/
Figure 2-3 Wiring of the ET 200M
① Connector for PROFIBUS cable
② Button
③ Jumper
④ Power cable
⑤ Strain-relief assembly