Brief instructions on commissioning
2.1 Commissioning on PROFIBUS DP
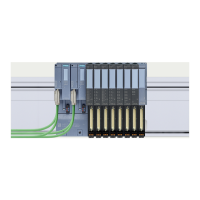
ET 200M
26 Operating Instructions, 12/2008, EWA-4NEB780600602-08
2.1.4 Putting Hardware into Service
Procedure
1. Use the PD cable to connect the PD to the DP master (MPI interface). Make sure that the
terminating resistors in the connectors are switched on. Set the mode switch to STOP.
2. Connect the supply cable to the power supply and then switch on the power supply
module for the DP master.
The 24 V DC LED lights up on the PS.
With the CPU, all the LEDs light up briefly; the SF LED, the BAT LED and the DC5V LED
remain switched on. The STOP LED flashes for 3 seconds and then remains on.
3. Insert the backup battery:
– Plug the backup battery connector into the appropriate socket in the battery
compartment of the CPU. The notch on the connector must point to the left.
– Insert the backup battery into the battery compartment of the CPU.
– Close the front door of the CPU.
The BATF-LED goes out and then shortly afterwards the SF LED follows.
4. Boot the programming device.
5. Reset the CPU 315-2 DP:
– Turn the mode switch to MRES. Hold the mode selector at this position until the STOP
LED lights up for the second time and then remains lit (approx. 3 seconds)
– You must turn the mode switch back to MRES within 3 s.
The STOP LED begins to flash rapidly and the CPU performs a reset. The CPU has
completed the memory reset when the STOP LED remains permanently lit again.