Figures
Figure 3-1 ESD Protective Measures ......................................................................................................... 18
Figure 4-1 Input Protection Interface for Trip Contacts.............................................................................. 22
Figure 4-2 K41 Input Protection Interface for Trip Contacts....................................................................... 22
Figure 4-3 Standard Contacts K3 / CIMV (Close Input MV) and K4 / TIMV (Trip Input MV) .......................... 24
Figure 4-4 SIMATICS Touchpad ................................................................................................................ 25
Figure 6-1 Proper Anchoring in Concrete Technique ................................................................................. 34
Figure 6-2 Combining Several Shipping Splits (Transport Units)................................................................ 36
Figure 7-1 SINAMICS Perfect Harmony GH180™ Drive System .................................................................. 42
Figure 7-2 Earthing (Grounding) cable screens (shields) when multiple sections are used......................... 44
Figure 7-3 Recommended Cable Segregation........................................................................................... 45
Figure 10-1 DC Bus Voltage Indicator......................................................................................................... 60
Figure 10-2 DC Bus Voltage Indicator (340-430A) ...................................................................................... 61
Figure 10-3 DC Bus Voltage Indicator (550-780A) ...................................................................................... 61
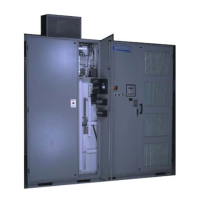
Figure 10-4 VFD Cabinet (front view)......................................................................................................... 62
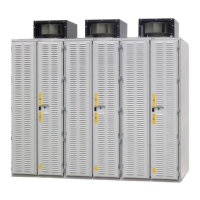
Figure 10-5 VFD Cabinet - (Front View) from left to right: (100-140A, 600-1000Hp) and (200-260A,
1100-2000Hp)........................................................................................................................ 63
Figure 10-6 VFD Cabinet - (Front View): (340-430A, 1250-3500Hp) ........................................................... 64
Figure 10-7 Make-proof grounding switch ................................................................................................. 66
Figure 10-8 Type 6SR5 40A, 70A ONLY (Blower Cage Louver Installation) ................................................... 73
Figure 10-9 Installed Filter ........................................................................................................................ 74
Figure 10-10 Screwdriver Insertion Points.................................................................................................... 75
Figure 10-11 Filter Cover Removal ............................................................................................................... 76
Figure 10-12 Filter with Cover Removed ...................................................................................................... 77
Figure 10-13 Filter Media Removal .............................................................................................................. 78
Figure 10-14 HEX Cleaning Using Water....................................................................................................... 79
Figure 10-15 Fiber Optic to Remove............................................................................................................. 82
Figure 10-16 Fiber Optic Removed............................................................................................................... 83
Figure 10-17 NXGpro Digital Control Rack - Compact Flash .......................................................................... 85
Figure 10-18 40 A - 140 A - proper alignment of power cell mounting with receiving holes .......................... 87
Figure 10-19 200 A - 260 A, 4Q 120 A-160 A - proper alignment of power cell mounting with receiving
holes ...................................................................................................................................... 87
Figure 10-20 340 - 430 A, 4Q 325 A - proper alignment of power cell mounting with receiving holes ........... 88
Figure 10-21 Fiber Optic Location................................................................................................................ 89
Figure 10-22 Fiber Optic Location................................................................................................................ 90
Figure 10-23 40-140 Fiber Optic and DC Bus Indicator ................................................................................. 92
Figure 10-24 Torque Connections for 40 A, 70 A, 100 A, 140 A Power Cells.................................................. 92
Figure 10-25 200 - 260 A, 4Q 120 A-160 A Fiber Optic and DC Bus Indicator ................................................ 93
Table of contents
Type 6SR5 Air-Cooled
6 Operating Instructions, AK, A5E39390112

 Loading...