A
B
C
D
A
B
C
D
2:7
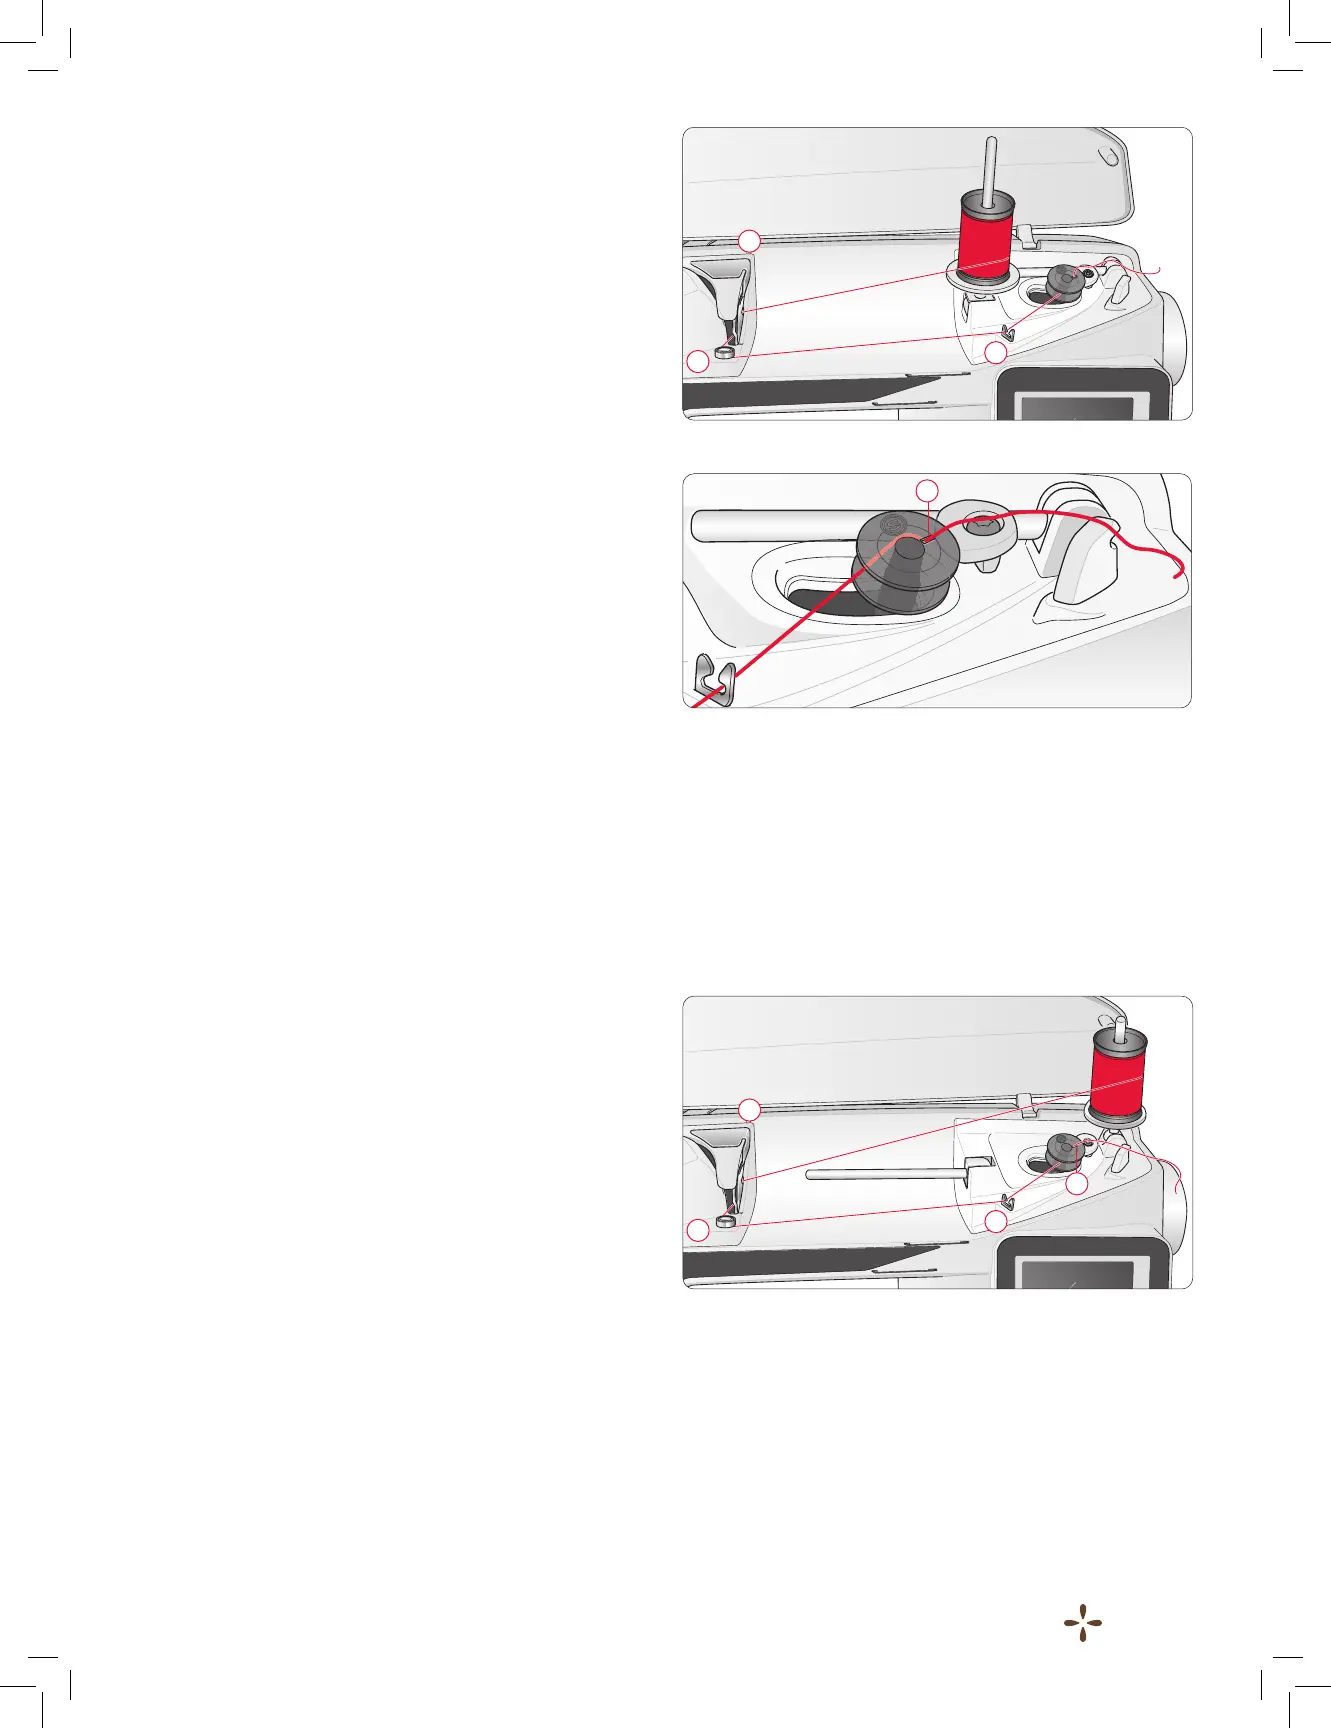
WINDING THE BOBBIN USING
THE VERTICAL SPOOL PIN
1. Placeanemptybobbinonthebobbinspindleonthetop
ofthemachine.Thebobbinonlytsononeway,withthe
logofacingup.UseonlyoriginalSINGER
®
bobbins,group
EF.
2. Placethelargespoolcapandafeltpadunderthespoolon
themainspoolpinsetintheverticalposition.
3. Bringthethreadoverandbehindthepre-tensionthread
guide(A)anddownaroundthethreadtensiondisc(B),
thenthroughthreadguide(C)asillustrated.
4. Guidethethreadthroughtheholeinthebobbin(D)from
the inside to the outside.
5. Push the bobbinwinderspindletotherighttowind.
Apop-upappearsonthescreentoinformyouthatbobbin
windingisactive.Toadjustwindingspeed,usethesliderin
thepop-up.Startbobbinwindingbytouchingthestart/stop
button.
Whenthebobbinisfull,itwillstopwinding.Touchthe
start/stopbuttontostopthebobbinwindermotorfrom
running.Movethebobbinwinderspindletotheleftandthe
pop-upwillclose.Removethebobbinandcutthethread
usingthebobbinthreadcutter.
Note: It is important that you cut the thread end close to the
bobbin.
Note: Moving the bobbin spindle to the left will engage the
embroidery mechanism. Always stop winding by pushing the
Start/Stop button before moving the bobbin spindle.
WINDING THE BOBBIN USING
THE AUXILIARY SPOOL PIN
1. Placeanemptybobbinonthebobbinspindleonthetop
ofthemachine.Thebobbinonlytsononeway,withthe
logofacingup.UseonlyoriginalSINGER
®
bobbins,group
EF.
2. Foldouttheauxiliaryspoolpin.Placeaspoolcapandafelt
pad under the spool.
3. Bringthethreadoverandbehindthepre-tensionthread
guide(A)anddownaroundthethreadtensiondisc(B),
thenthroughthreadguide(C)asillustrated.
4. See“WindingtheBobbinUsing
theVerticalSpoolPin”onpage2:7,step4–5.