6:7
Corner icons
CORNER ICONS
Use the corner icons to set the locking point for Basic Design
Positioning in a corner of the design or at the center. This is the
easiest and most precise way since the connecting point will be
automatically placed exactly in the corner.
The corner icons may also be used when locking point is
selected. When touching one of the icons, the selected point
will automatically be set to the corresponding position, i.e. at a
corner or at the center of the embroidery.
E.g. when choosing the upper left corner icon, the connecting
point will be set at the upper left corner in the outer line of the
design(s). After this, you can continue and make your own
adjustments on the connecting point.
Trace the design eld
The corner icons can also be used to trace the design eld by
touching each of the four corner icons in turn. You can nd the
center of the design again by touching the centering icon.
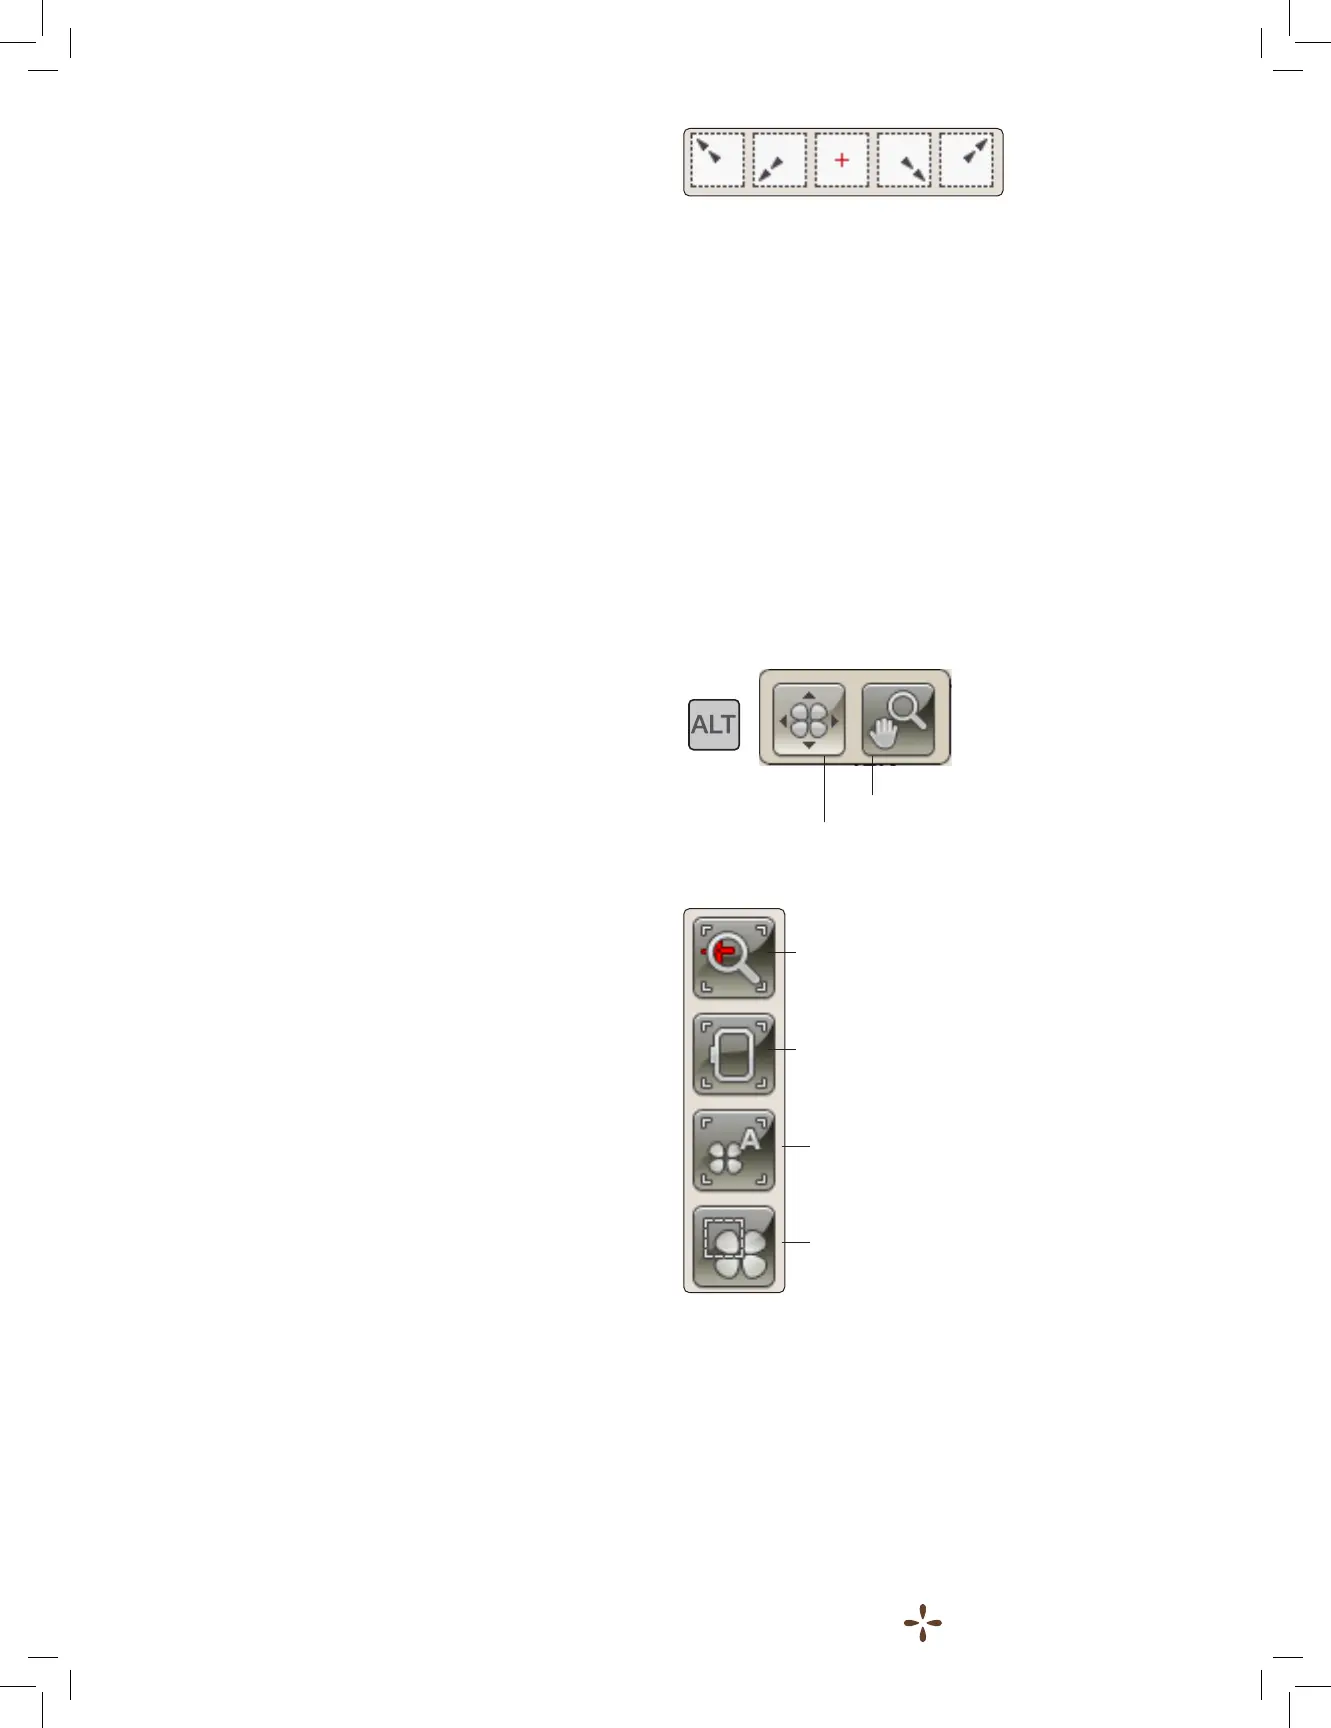
ZOOM OPTIONS/PAN
You can use the Zoom Options/Pan icons to place the design
exactly where you want it. Fine tune the placement with the
arrows on the screen.
To access the Zoom Options/Pan icons from Basic Design
Positioning view, touch ALT and select Zoom Options/Pan.
You can now choose between four different zoom options.
• Zoom to Cursor – Touch to zoom in to the cursor position
as much as possible. You can position the locking and
matching point exactly where you want them.
• Zoom to Hoop – Touch to adjust the embroidery eld to t
the selected hoop.
• Zoom to All – Touch to show all the design(s) in the
embroidery.
• Zoom to Box – Used to zoom in to a specic area. Touch
and drag your stylus in the embroidery eld on the screen
to create a box. The screen zooms to show that specic
area.
To return to the Basic Design Positioning view, touch ALT and
select Design Placement Options.
Note: When you use the Zoom to Box function, the pan function
is not active.
Zoom to Cursor
Zoom to Hoop
Zoom to All
Zoom to Box
Design placement options
Zoom Options/Pan