© Mar. 2023 42 AB16EJ Plus Maintenance Manual
CHASSIS AND TURNTABLE ASSEMBLY
the marking line on the chassis.
3. Check the clearance between the slewing bearing
mounting surface and the chassis mounting surface
with a feeler gauge, ensuring the clearance ≤
0.2mm (0.008in).
4. Using the special high-strength washers for high-
strength bolts, fit the washer face with the mounting
surface, and apply Loctite 272 threadlocking adhe-
sive, and then install the bolts one by one by pass-
ing it through the chassis and the outer ring of the
slewing bearing.
NOTICE
• Do not reuse removed bolts and washers, and
replace with new fasteners.
• The slewing bearing is the only structural con-
nection between the chassis and the turntable,
and its replacement should meet the specifica-
tion requirements. It is highly recommended
that you use genuine accessories.
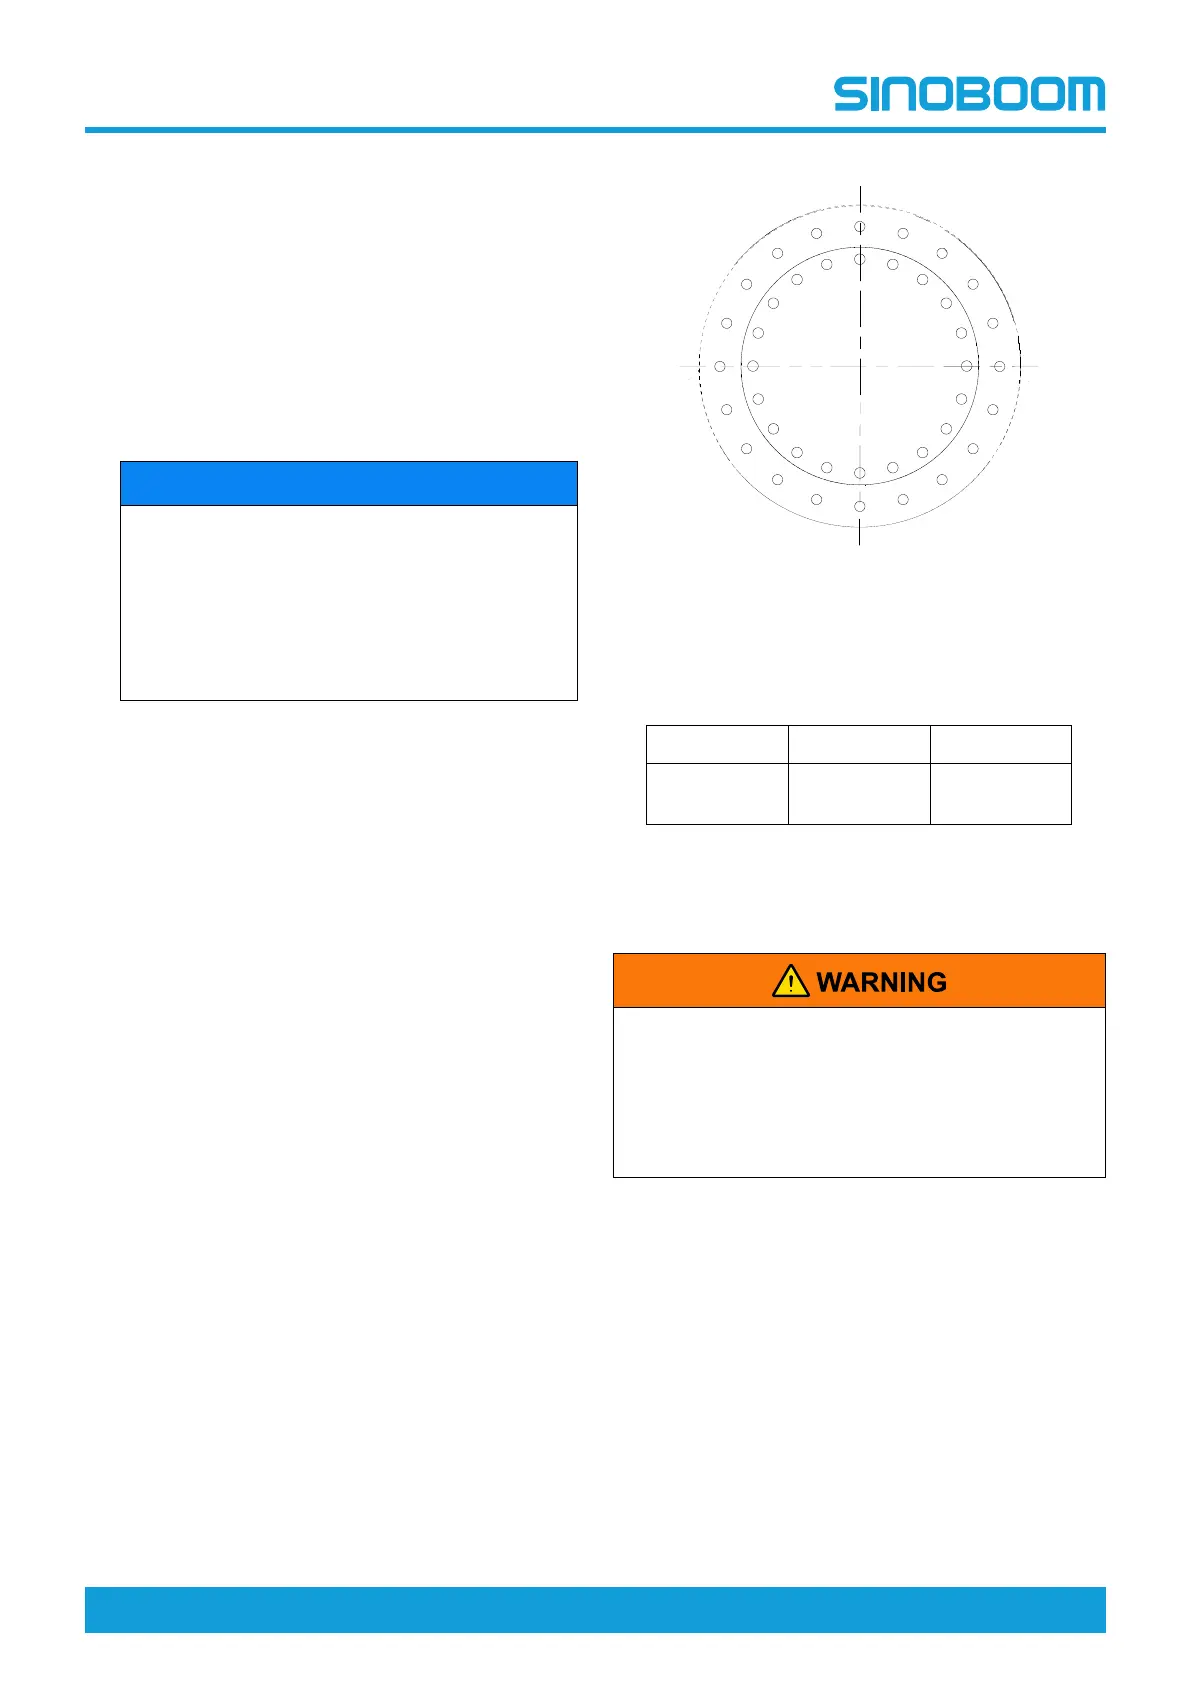
5. Then tighten the bolts in the sequence shown in the
following diagram and follow the steps in the table
below.
6. After the bolts are tightened, mark the bolt head and
its connection with an appropriate tool to facilitate
later inspection of the bolts for looseness.
7. Rotate the inner ring of the slewing bearing by hand
to ensure smooth movement.
8. Remove the lifting equipment from the slewing
bearing.
9. Lift the turntable assembly to the top of the chassis
using suitable lifting equipment, carefully lower the
turntable onto the slewing bearing, and align the in-
ner ring of the slewing bearing with the marking line
on the turntable. If replacing the slewing bearing
with a new one, make sure that the filling cup joint is
at 90° to the left-right symmetrical line of the
turntable.
10. Using the special high-strength washers for high-
strength bolts, fit the washer face with the mounting
surface, and apply Loctite 272 threadlocking adhe-
sive, and then install the bolts one by one by pass-
ing it through the turntable and the inner ring of the
slewing bearing.
11. Then tighten the bolts in the sequence shown in the
following diagram and follow the steps in the table
below.
12. After the bolts are tightened, mark the bolt head and
its connection with an appropriate tool to facilitate
later inspection of the bolts for looseness.
13. Remove the lifting equipment and reconnect the hy-
draulic hoses according to the marks before
disassembly.
Fig 11 Tightening sequence of slewing bearing
bolts
Table 5-4 Table of slewing bearing bolt tightening
torques
First step
Second step
Third step
160Nm
(118ft-lb)
270 Nm
(199ft-lb)
300Nm
(221ft-lb)
5.5 COUNTERWEIGHT
Counterweights are essential to maintain the
stability of the machine. Do not modify or remove
counterweights without the manufacturer's
written authorization. Improperly assembled
counterweights may cause the machine to tip
over, causing serious injury, death, or machine
damage.
Disassembly
1. Adjust the machine to the stowed position and make
sure the turntable is locked (if equipped with a rotary
pin, make sure the rotary pin is locked).
2. Use suitable lifting equipment to provide reliable
support for the boom and prevent the machine from
tipping after the counterweight is removed.
3. Use suitable lifting equipment to support the
counterweight.
4. Remove the bolts securing the counterweight to the
turntable.
5. Slowly remove the counterweight with the aid of the
lifting equipment.
1
2
3
4
5
6
7
8
9
10
11
12
13
14
15
16
17
18
19
20