© March 2023
70
AB16EJ Plus Operation Manual
OPTIONS
Wiring Diagram, Platform Controller
The diagram below only shows the wiring related to the
secondary guarding device. For detailed wiring instruc-
tions, please refer to the complete wiring diagram of the
platform controller.
Fig 5
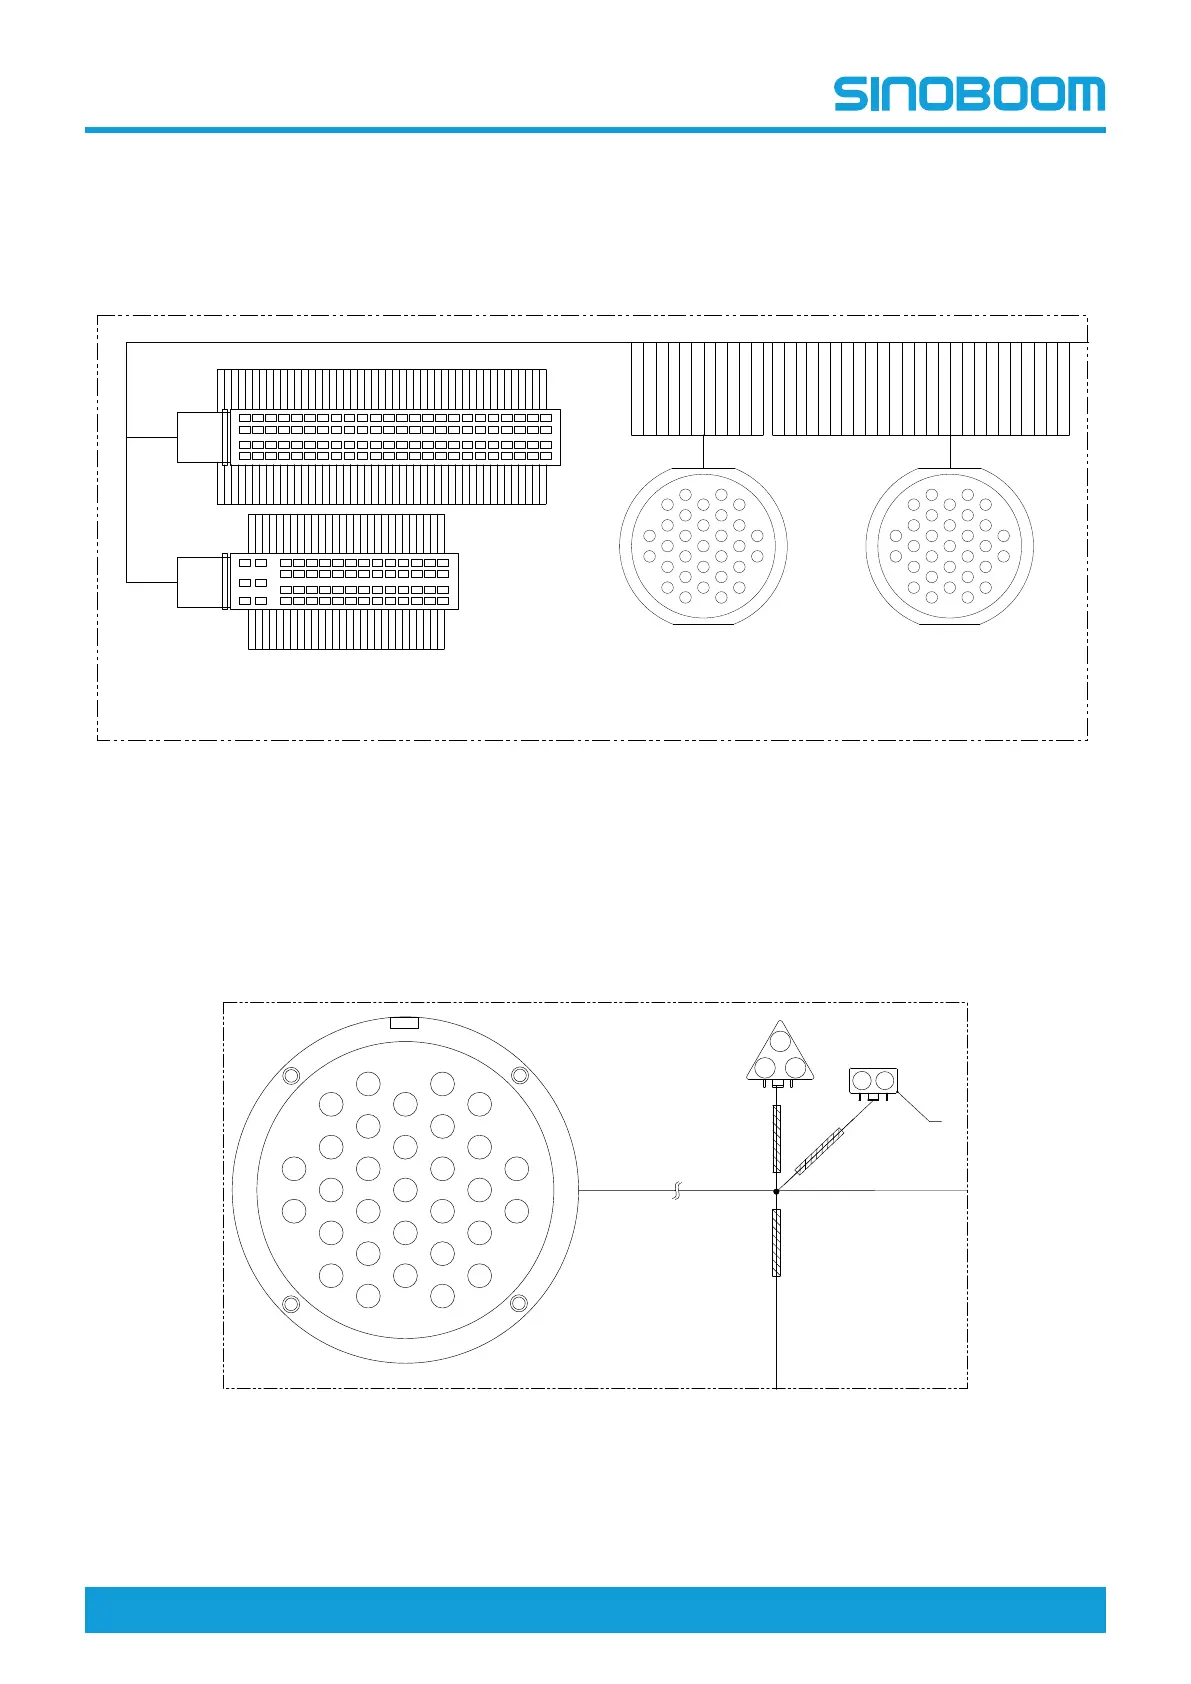
Platform Harness
The figure below only shows the platform harness re-
lated to the secondary guarding device. The complete
harness layout can be found in the complete platform
harness diagram.
Fig 6
C12
1
2
3
4
13
25
9
20
21
10
11
12
24
22
23
8
5
14
31
19
7
6
15
26
30
18
17
16
27
29
28
1
2
3
4
5
6
7
8
9
10
11
12
13
14
15
16
17
18
19
20
21
C11
1
2
3
4
5
6
7
8
9
10
11
1
2
3
4
13
25
9
20
21
10
11
12
24
22
23
8
5
14
31
19
7
6
15
26
30
18
17
16
27
29
28
1
) ————————————— (
24
) ————————————— (
) ————————————— (
) ————————————— (
25
49
73
48
72
96
XC1
1
) ————————— (
19
) ————————— (
) ————————— (
5
32
45
58
XC2
2 7
20
33
466
1234567891011121314151617181920212223242526272829
3031323334353637383940414243444546474849505152535455565758
1234567891011121314151617181920212223242526272829
30313233343536373839404142434445464748
4950515253545556575859606162636465666768697071727374757677
787980818283
84858687888990919293949596
RC28-14
12
22
23
174-2
130
C12:26
26
31
130
174-2
XJ11:18
XC1:39
174-2
130
C12:31
174-2
130
Crush Protect Inspect
Crush Protect Warning Light
Sensor
1
2
3
4
13
25
9
20
21
10
11
12
24
22
23
8
5
14
31
19
7
6
15
26
30
18
17
16
27
29
28
F3
174-1
GND
174-2
130
174-2
130
100
1
A
B
C
1
2